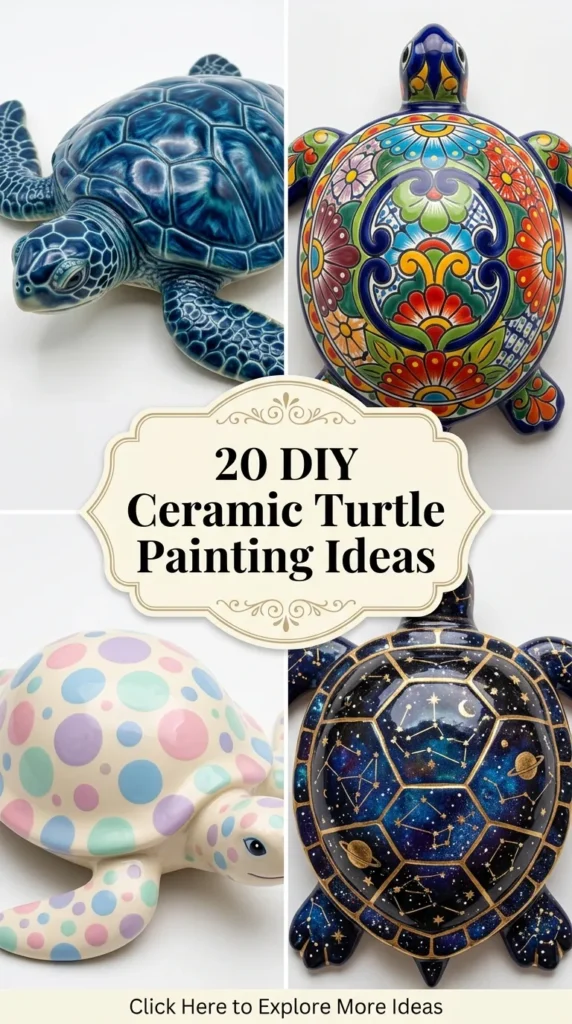
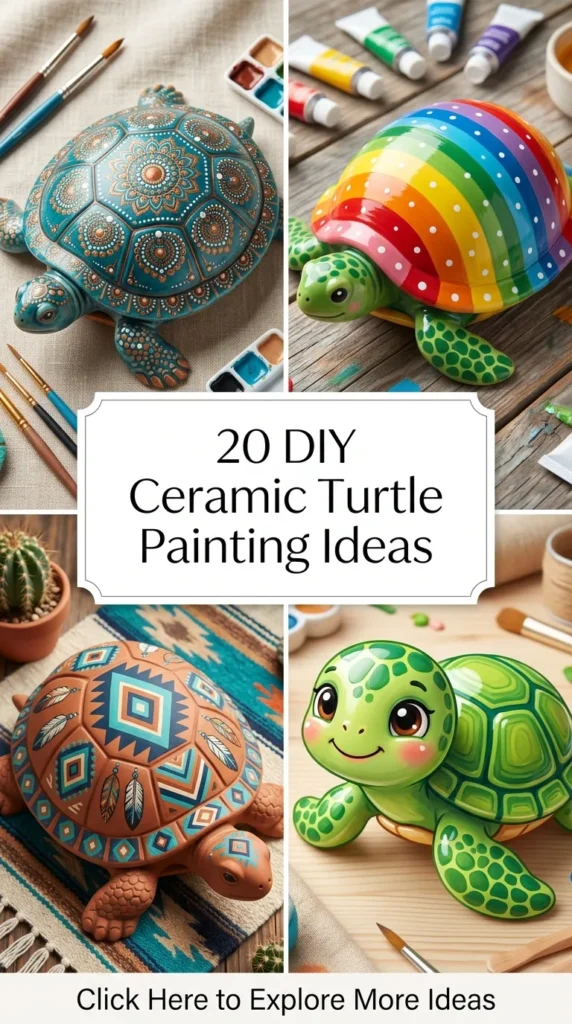
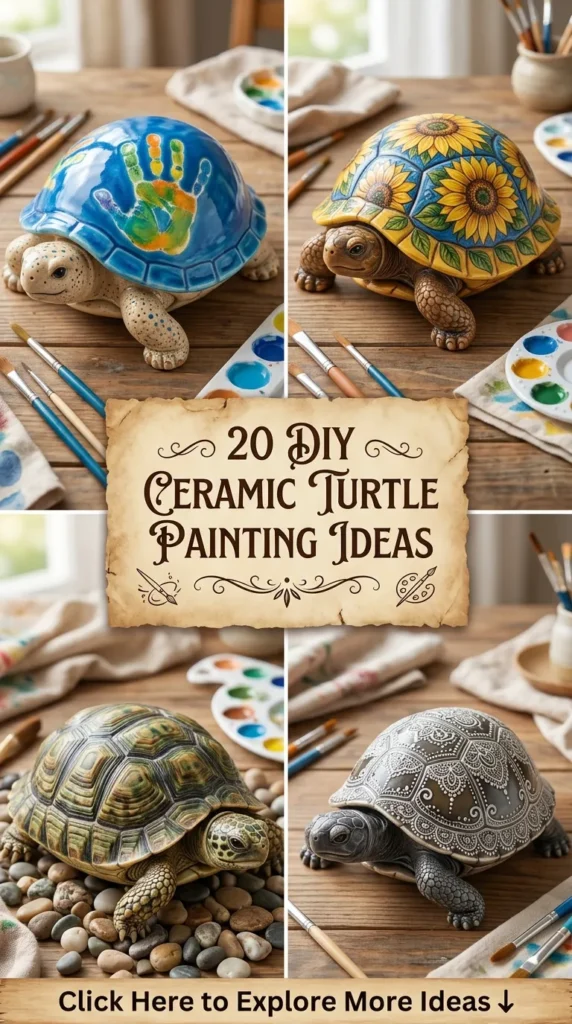
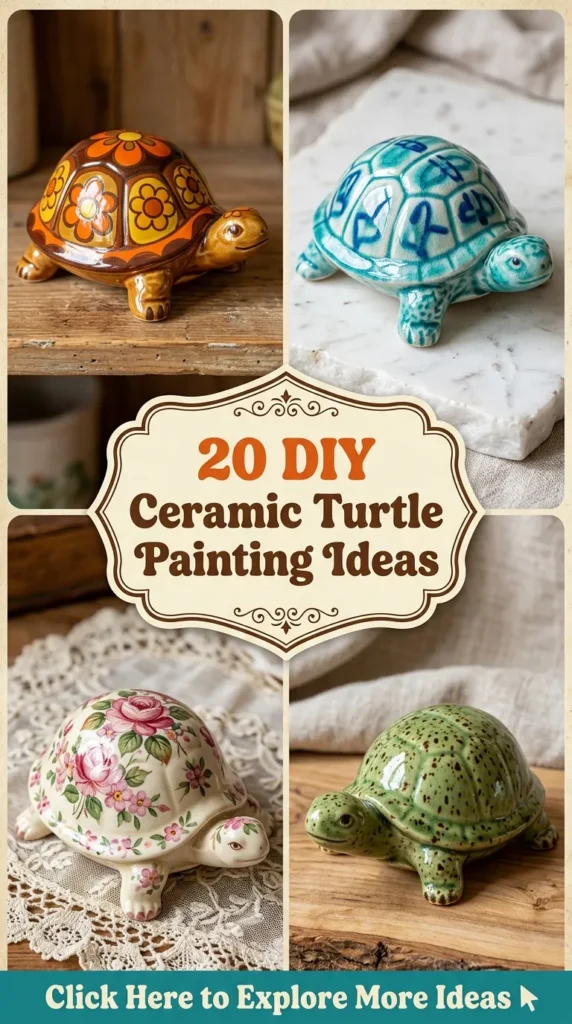
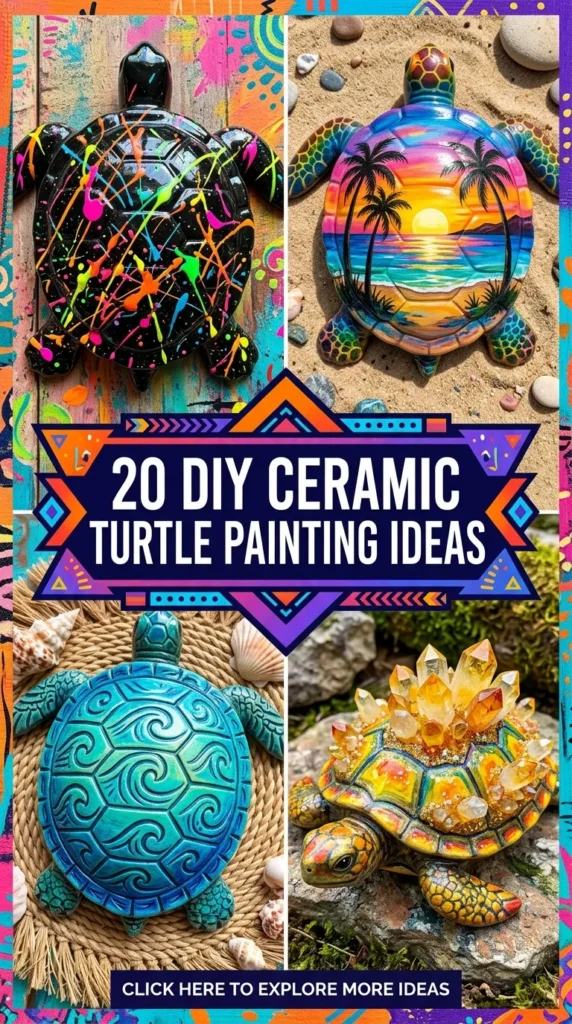
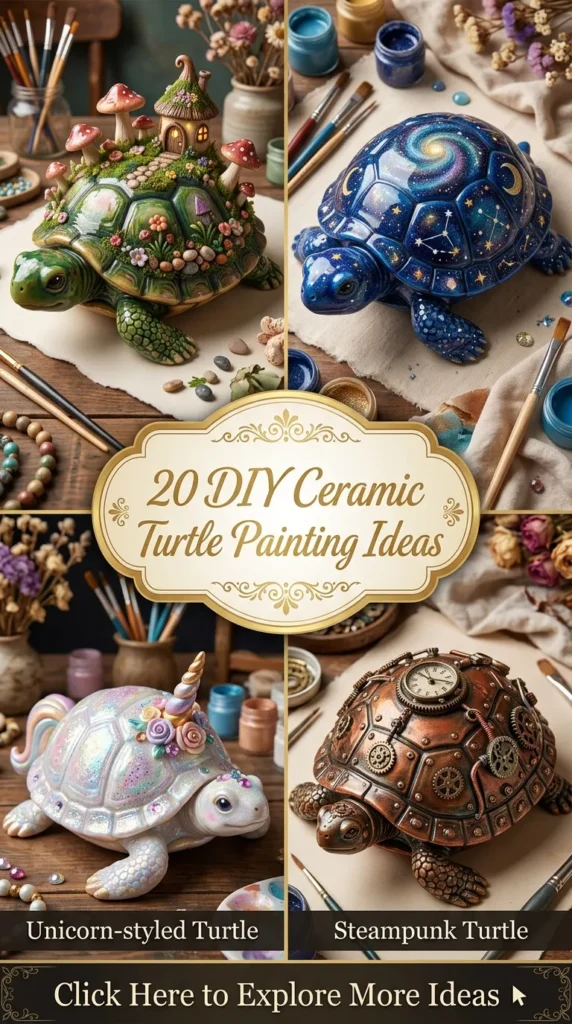
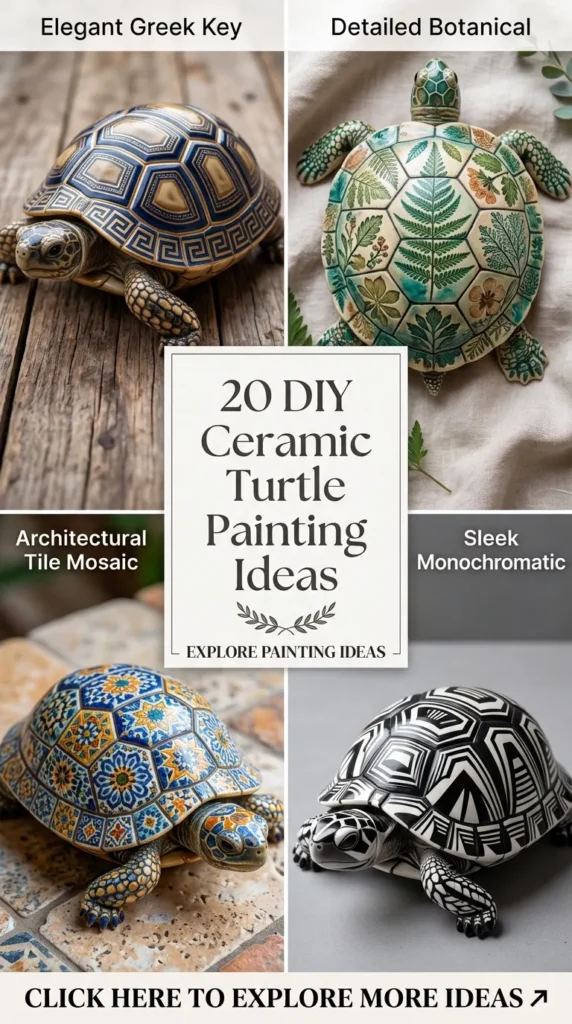
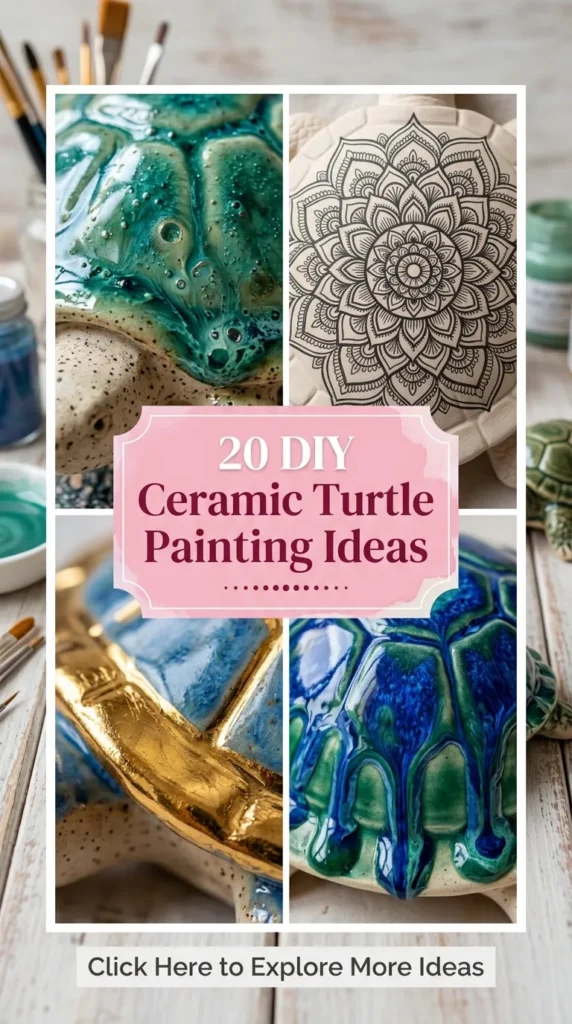
Ceramic painting is one of the most relaxing, deeply rewarding, and versatile art forms available to DIY enthusiasts today. Among the vast array of ceramic bisque shapes available, ceramic turtles hold a special place in home decor, garden accents, and gift-giving traditions. Symbolizing longevity, peace, grounded wisdom, and steady progress, the turtle serves as a perfect three-dimensional canvas. The unique geometric arrangement of a turtle’s shell (carapace), paired with the organic textures of its skin and flippers, offers endless opportunities for creative exploration.
On visual platforms like Pinterest, hand-painted ceramic turtles are taking center stage in aesthetics ranging from cozy cottagecore and coastal bohemian to sleek mid-century modern and magical celestial styles. Whether you are painting a bisque sea turtle planter for your succulents, transforming a small clay trinket dish, or sprucing up a set of concrete garden stepping turtles, this comprehensive guide will walk you through 20 inspiring, aesthetic painting ideas. Each concept is broken down with its symbolic meaning, step-by-step instructions, practical tips and variations, and the specific supplies needed to craft your masterpiece.
1. Moroccan Mosaic Jewel Shell Turtle
What This Idea Means
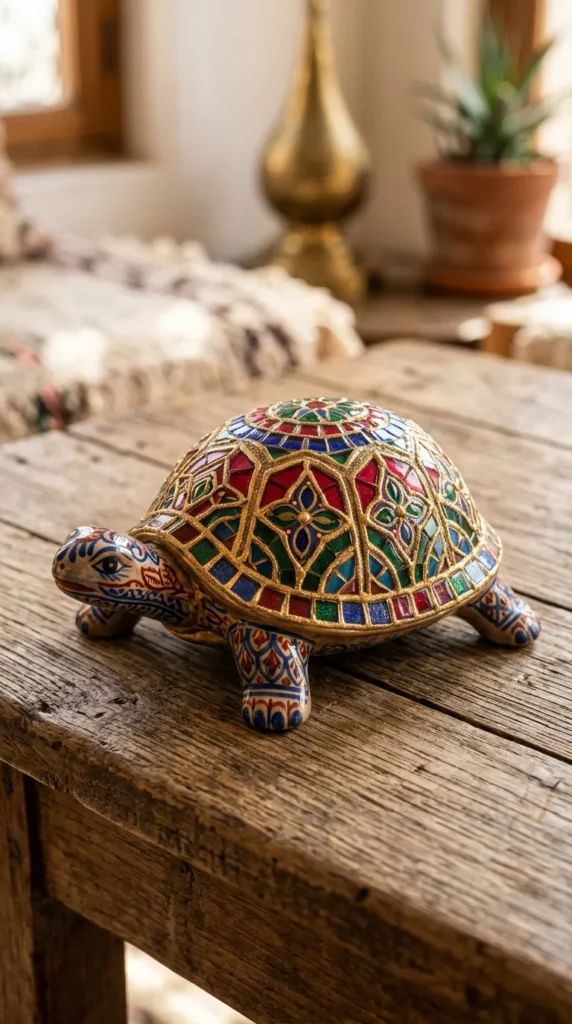
Moroccan tile art, renowned for its intricate geometric precision and vibrant jewel-toned glazes, brings exotic elegance into home decor. Painting a ceramic turtle with rich ruby, sapphire, emerald, and amber mosaic segments turns a humble clay figure into a dazzling, handcrafted treasure reminiscent of Mediterranean courtyards.
How to Make It
- Clean your ceramic turtle bisque with a slightly damp sponge to remove any dust.
- Paint the entire shell with a rich, metallic gold or antique brass acrylic base coat to serve as the mosaic “grout” lines.
- Once dry, use liquid dimensional relief outliner or fine painter’s tape to define geometric star and diamond tile shapes across each scute (shell segment).
- Fill in each geometric tile shape with high-gloss glaze or jewel-toned glass paints using a fine round brush.
- Finish with a crystal-clear, high-gloss topcoat to give the tile segments an authentic glossy ceramic look.
Tips & Variations
- Tip: Apply two coats of high-gloss sealant over the painted tiles to mimic the deep, reflective sheen of glazed ceramic pool tiles.
- Variation: Keep the skin and flippers a muted matte dark brown or charcoal to let the bright gold and jewel-toned shell dominate the composition.
What You Need
- Ceramic turtle bisque
- Metallic gold acrylic paint
- Dimensional liquid outliner
- High-gloss glass/acrylic paints (Ruby, Sapphire, Emerald)
- High-gloss clear sealant
- Fine detail brushes (#0 and #2)
2. Enchanted Pressed Wildflower Cottagecore Turtle
What This Idea Means
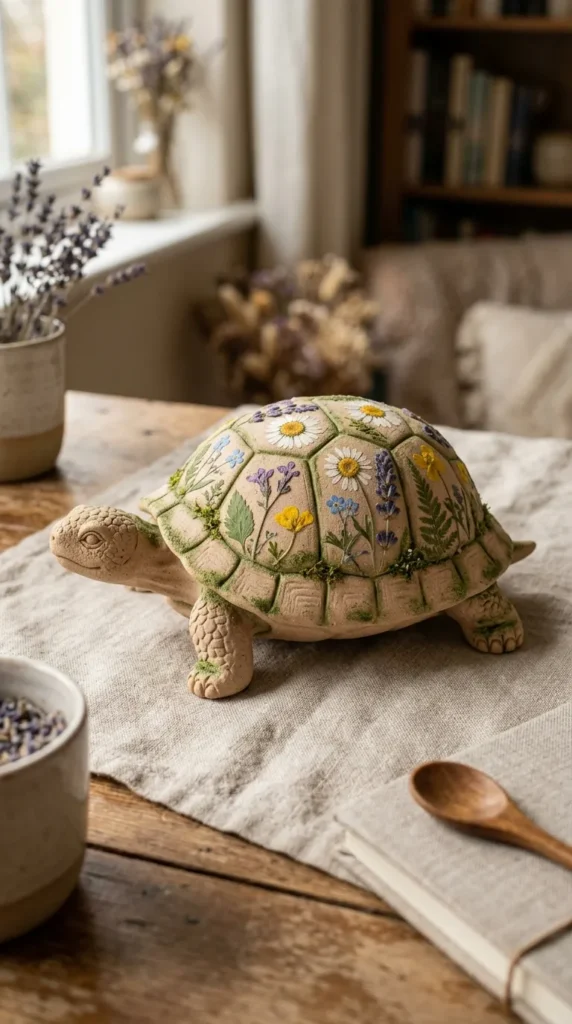
Capturing the quiet beauty of a sunlit English garden, this cottagecore aesthetic treats the turtle’s shell as a tiny blooming meadow. It combines earthy moss tones with soft pastel wildflowers, symbolizing a peaceful harmony between slow living and nature’s fleeting beauty.
How to Make It
- Paint the turtle’s body and shell with a soft, matte cream or warm linen acrylic background.
- Using a small sea sponge, lightly stipple sage green and olive paint around the edges of the shell scutes to create soft mossy shading.
- Draw delicate, trailing green stems curving across the shell using a fine liner brush.
- Paint tiny wildflower blossoms—such as daisies, forget-me-nots, and lavender sprigs—along the stems using pastel pink, lilac, butter yellow, and sky blue paints.
- Add tiny yellow dots to flower centers using the end of a paintbrush handle for a raised, realistic finish.
Tips & Variations
- Tip: Seal with a matte or satin finish spray instead of gloss to preserve the delicate, soft vintage paper feel of cottagecore art.
- Variation: Mix real dried pressed flowers onto the shell using decoupage glue before applying the final clear protective coat.
What You Need
- Ceramic turtle
- Matte acrylic paints (Cream, Sage Green, Pastel Pink, Lilac, Soft Yellow)
- Micro liner brush (#00)
- Natural sea sponge
- Matte varnish spray
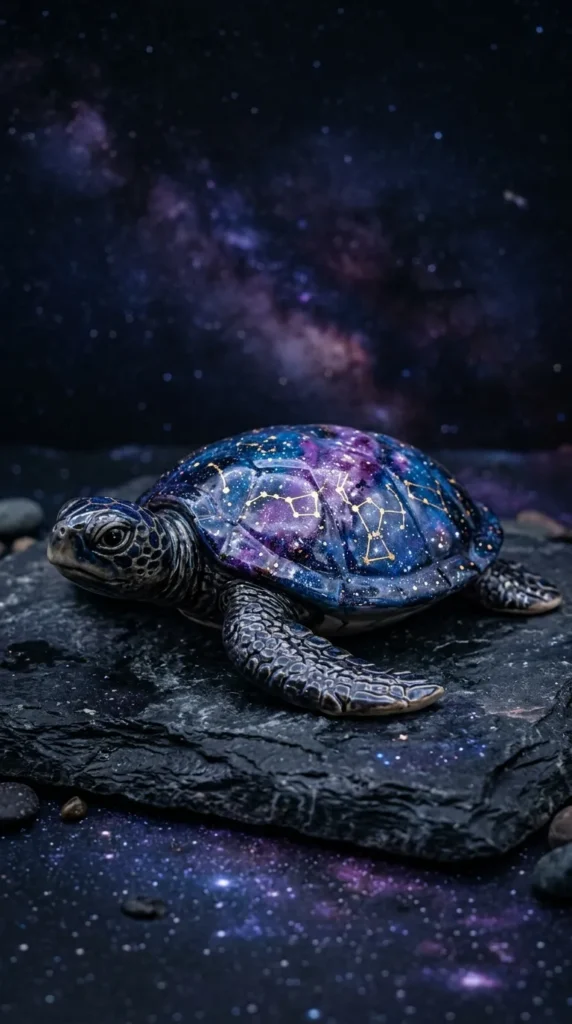
3. Celestial Galaxy & Star Constellation Turtle
What This Idea Means
Turtles have long been associated with cosmic myths, such as the ancient concept of the “World Turtle” carrying the universe on its back. Painting a galaxy onto the shell blends deep midnight tones with shimmering nebulas and constellations, turning your ceramic piece into a piece of cosmic art.
How to Make It
- Prime the entire turtle in an ultra-opaque midnight black coat.
- Using a makeup sponge or stippling brush, blend layers of deep navy blue, royal purple, and magenta over the central areas of the shell scutes.
- Stipple a light touch of bright teal and metallic silver in the core of each color cloud to create depth in the galactic nebulas.
- Dip an old toothbrush or stiff bristle brush into watered-down white acrylic paint and flick fine paint droplets across the shell to form star fields.
- Use a micro detail brush and gold paint to connect select star dots into classic constellations (like Ursa Major or Orion).
Tips & Variations
- Tip: Keep the galactic color blending restricted to the top of the shell, keeping the belly and underside of the turtle solid midnight black.
- Variation: Add a iridescent or color-shifting topcoat over the galaxy sections so the colors shift as you move around the room.
What You Need
- Unglazed ceramic turtle
- Acrylic paints (Black, Navy, Violet, Magenta, Teal, Metallic Silver, Gold)
- Cosmetic sponges and old toothbrush
- Micro detail brush
- High-gloss or iridescent sealant
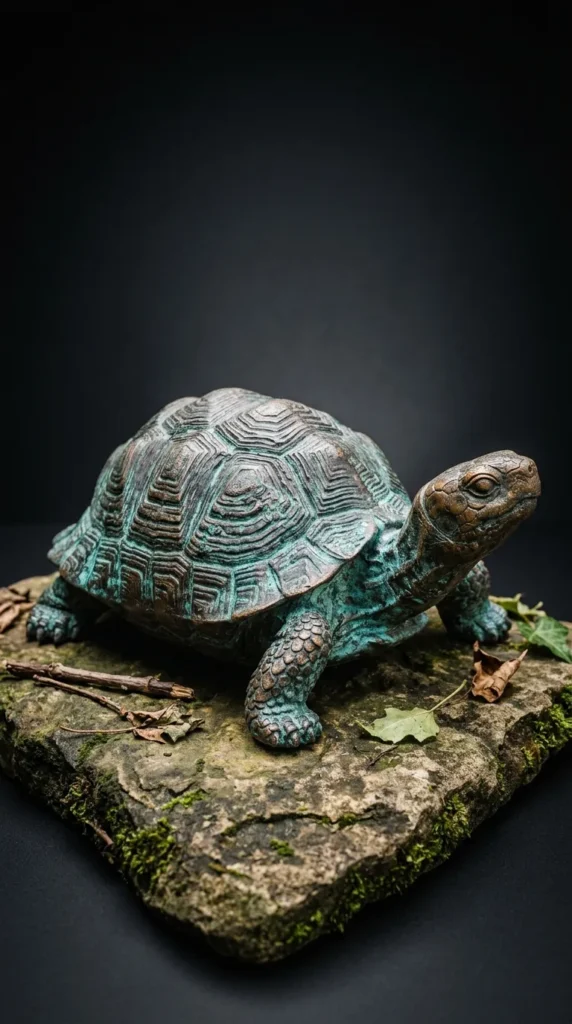
4. Vintage Weathered Copper Bronze Rust Turtle
What This Idea Means
Verdigris—the natural green-blue patina that forms on aged copper and bronze over decades—evokes history, strength, and timeless charm. This technique turns lightweight ceramic into what appears to be a heavy, antique bronze artifact retrieved from a sunken shipwreck or old estate garden.
How to Make It
- Base coat the entire ceramic turtle with dark metallic bronze or deep copper acrylic paint.
- Once dry, mix turquoise, seafoam green, and a touch of light gray chalk paint to create a matte patina shade.
- Dilute the patina paint with water and brush it generously into all the carved crevices, scute grooves, and textured skin of the turtle.
- Immediately wipe away excess paint from the raised surfaces using a damp paper towel, leaving the teal patina trapped inside the deeper carved details.
- Lightly dry-brush metallic gold over the highest points of the shell to restore metallic contrast.
Tips & Variations
- Tip: Use chalk paint or matte acrylics for the verdigris patina layer; the dull finish contrasts realistically against the metallic bronze base.
- Variation: Apply real copper reactive metallic paint paired with an acid patina activator solution for genuine chemical oxidation.
What You Need
- Ceramic turtle figure
- Metallic bronze and gold acrylic paint
- Turquoise and seafoam green chalk paint
- Soft brushes and paper towels
- Satin clear coat
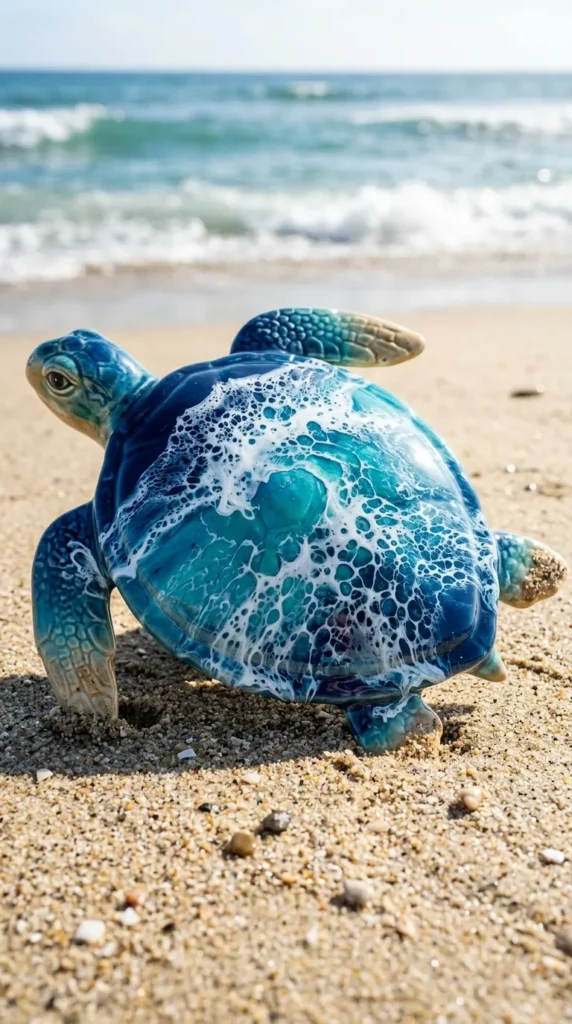
5. Coastal Ocean Wave & White Sea Foam Turtle
What This Idea Means
Celebrating sea turtles in their natural marine environment, this design captures the fluid energy of crashing ocean waves and coastal tides. The deep blues and swirling white sea foam on the shell invoke the refreshing atmosphere of ocean breezes and coastal living.
How to Make It
- Paint a smooth gradient across the shell, transitioning from dark navy blue at the bottom edges to vibrant turquoise and soft ocean blue at the center top.
- While the blue base is slightly tacky, pour small drops of fluid white acrylic pouring paint along the color boundaries.
- Use a hairdryer on a cool, low setting or blow through a plastic straw to spread the white paint out into lacy, cellular ocean foam patterns.
- Allow the fluid foam layer to dry completely overnight without touching it.
- Paint the turtle’s head and flippers in a clean, sandy beige or soft seafoam shade to balance the dramatic wave shell.
Tips & Variations
- Tip: Add a few drops of silicone oil into your white acrylic pouring paint to create realistic, open “cells” that resemble bubbling ocean foam.
- Variation: Embed real fine beach sand around the base or fins using mod podge before painting for authentic beachy texture.
What You Need
- Ceramic sea turtle
- Acrylic pouring paints (Navy, Turquoise, Cyan, White)
- Acrylic pouring medium & silicone oil (optional)
- Hairdryer or straw
- High-gloss resin or gloss finish
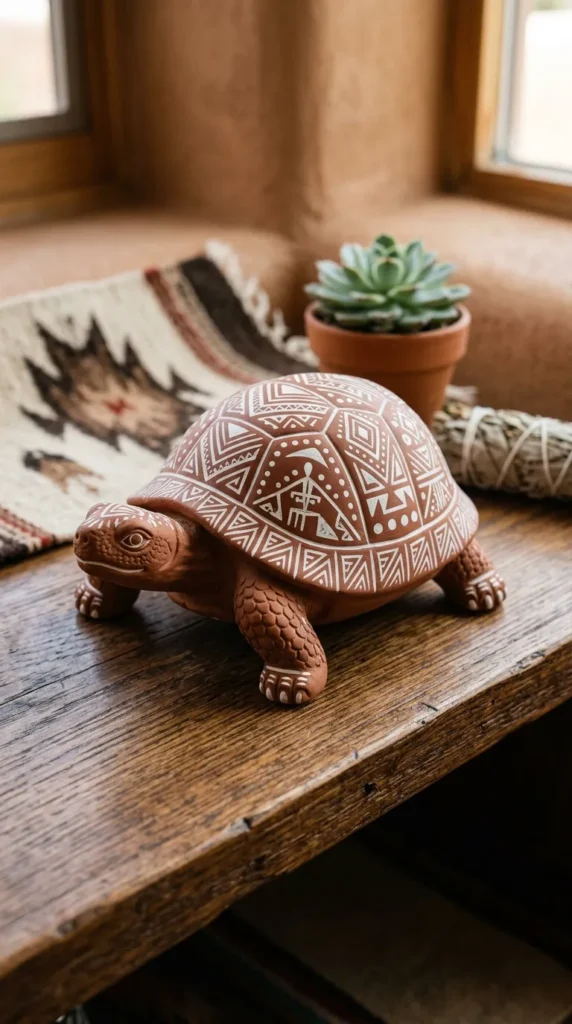
6. Terracotta Clay & White Aztec Tribal Patterns
What This Idea Means
Grounded in ancient Southwestern, Aztec, and indigenous art traditions, this style uses earthy terracotta tones paired with crisp geometric linework. It symbolizes protection, ancient heritage, and a deep, respectful connection to the earth.
How to Make It
- Paint the entire turtle with a rich matte terracotta or burnt sienna chalk paint to simulate unglazed red clay pottery.
- Lightly pencil geometric Aztec guidelines—such as chevrons, step-pyramids, diamonds, and zigzag lines—across each scute section.
- Using an opaque white acrylic paint marker or fine liner brush, trace over the guidelines with steady, crisp strokes.
- Add small white dots and hatch marks inside the geometric shapes to enhance the tribal aesthetic.
- Leave the background matte and unvarnished (or seal with an ultra-matte spray) to maintain a genuine unglazed ceramic look.
Tips & Variations
- Tip: Acrylic paint markers offer far greater control than traditional brushes when drawing long, straight geometric line work on curved ceramic surfaces.
- Variation: Alternate white line work with deep charcoal black accents for extra visual punch.
What You Need
- Ceramic turtle
- Terracotta/Burnt Sienna matte chalk paint
- Fine-tip white acrylic paint markers
- HB pencil and soft eraser
- Ultra-matte finish spray
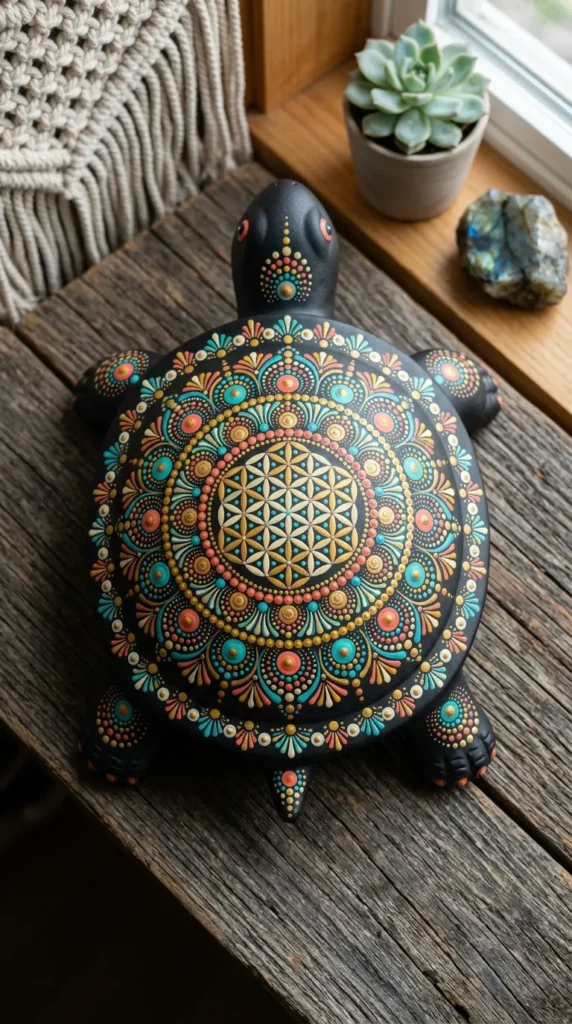
7. Bohemian Dot Mandala Sacred Geometry Turtle
What This Idea Means
Mandala dot art is a meditative painting practice rooted in sacred geometry, focus, and spiritual balance. Applying concentric dot patterns to the symmetrical scutes of a turtle shell creates a striking piece of boho-chic decor that radiates calm, centered energy.
How to Make It
- Paint the entire turtle in a solid matte black or dark indigo shade to serve as a high-contrast background.
- Find the exact center of the main middle shell scute and place one large central dot using a large dotting tool and teal paint.
- Using smaller dotting tools, place a ring of tiny white dots around the central dot in a perfect circle.
- Continue building outward in concentric rings, alternating dot sizes and complementary colors (coral, mustard yellow, turquoise, mint green).
- Repeat smaller mandala patterns inside each surrounding outer shell scute to cover the carapace evenly.
Tips & Variations
- Tip: Dip your dotting tool into fresh paint before making every single dot to ensure every circle remains uniform in size and volume.
- Variation: Use a gradient palette—start with deep purple in the center and lighten step-by-step to soft lavender on the shell edges.
What You Need
- Ceramic turtle
- Acrylic paints (Black base, Teal, Coral, Mustard, Mint, White)
- Double-ended acrylic dotting tools (various sizes)
- Satin or gloss sealer
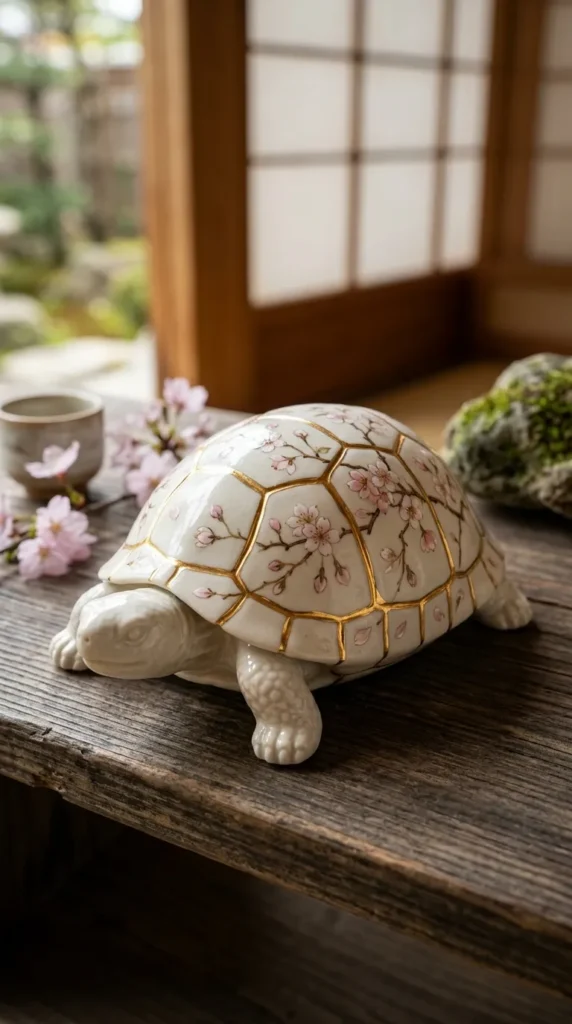
8. Japanese Cherry Blossom (Sakura) & Gold Kintsugi
What This Idea Means
Combining the delicate beauty of springtime Sakura blossoms with the Japanese philosophy of Kintsugi (finding beauty in flaw and repair), this style celebrates renewal, grace, and life’s delicate transitions. Gold line accents trace the natural seams of the shell like glowing veins.
How to Make It
- Base coat the entire turtle in a smooth, matte eggshell white or pale cream color.
- Using dark brown glass/acrylic paint and a micro fine liner brush, draw delicate, angular tree branches sweeping diagonally across the shell.
- Paint small five-petaled cherry blossoms along the branches using soft blush pink and white paints.
- Using a gold metallic paint pen or dimensional gold outliner, trace along every groove where the shell scutes meet, creating bright, raised metallic lines.
- Finish with a silky satin varnish to protect the gold details.
Tips & Variations
- Tip: Keep the branch linework thin and slightly jagged—natural cherry branches change direction sharply at every node.
- Variation: Paint falling pink petals drifting down off the shell and landing on the turtle’s flippers.
What You Need
- Ceramic turtle
- Acrylic/Glass paints (Cream base, Dark Brown, Blush Pink, White)
- Metallic gold liquid outliner or gold paint marker
- Fine liner brush (#00)
- Satin finish varnish
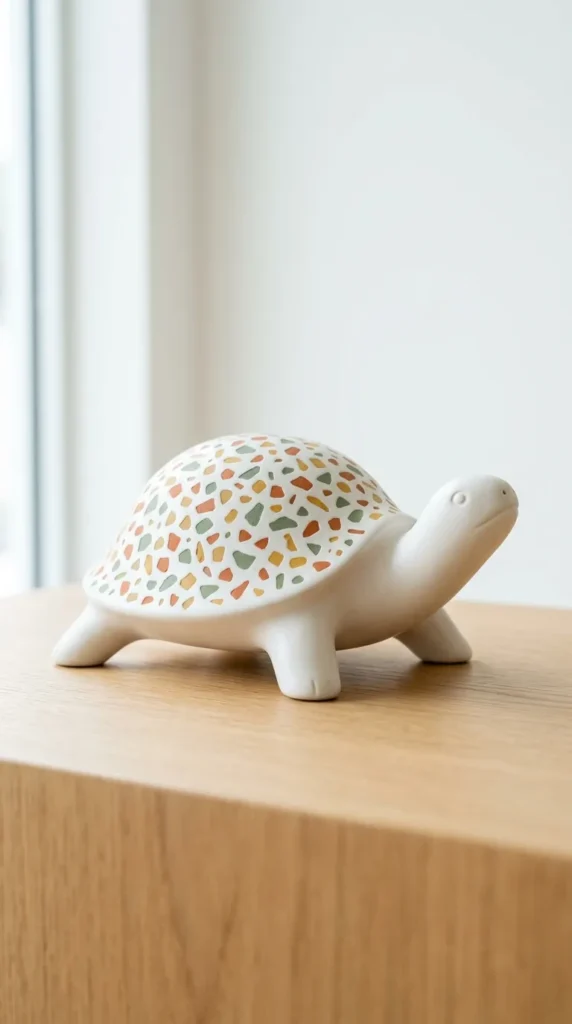
9. Modern Terrazzo Stone Speckle Turtle
What This Idea Means
Originating in Venice, Italy, terrazzo is a classic composite material celebrated for its playful, speckled stone appearance. Painting a terrazzo pattern onto a ceramic turtle transforms classic folk craft into a trendy, mid-century modern statement piece.
How to Make It
- Base coat the entire ceramic turtle in a flat, crisp white or pale dove gray acrylic shade.
- Mix four to five trendy accent paint colors on a palette (such as terracotta, mustard yellow, sage green, blush pink, and dark slate blue).
- Using a small flat synthetic brush, paint random, irregular geometric chip shapes across the shell and skin.
- Ensure the painted stone chips vary in size and angle, leaving even white gaps between them.
- Finish with a thick gloss varnish coat to mimic polished, smooth terrazzo stone.
Tips & Variations
- Tip: Avoid making rounded dots or perfect squares; authentic terrazzo chips have sharp, irregular, multi-sided edges.
- Variation: Add a few genuine gold leaf foil chips among the painted stone chips for an upscale, glamorous finish.
What You Need
- Ceramic turtle
- Acrylic paints (White base, Terracotta, Mustard, Sage, Pink, Slate Blue)
- Small flat synthetic brushes (#2 and #4)
- High-gloss varnish
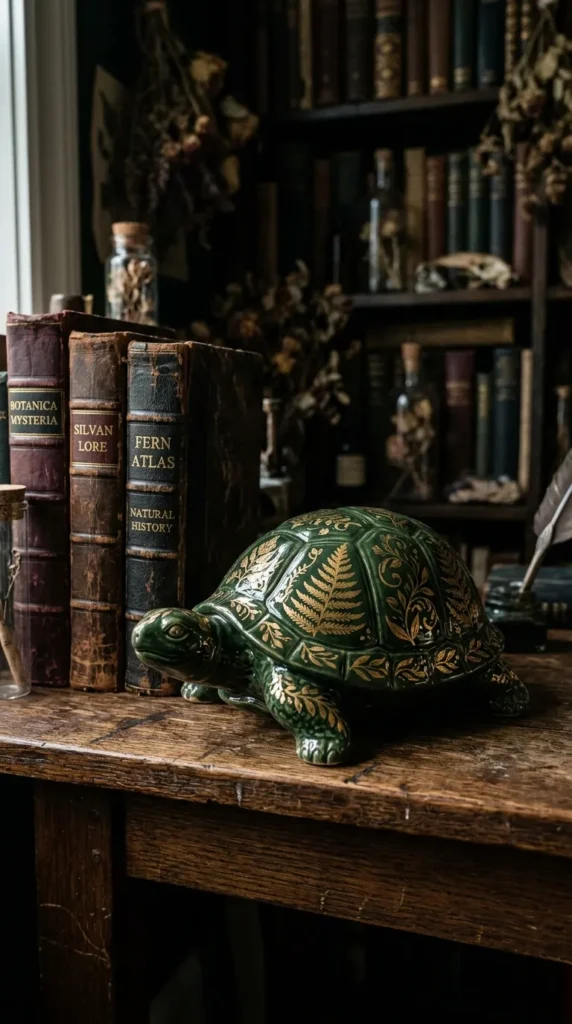
10. Moody Dark Academia Botanical Fern Turtle
What This Idea Means
Dark Academia aesthetics revolve around vintage study spaces, classic literature, botanical illustrations, and moody earth tones. Decorating a turtle with delicate golden fern fronds against a moody forest green backdrop evokes the charm of a 19th-century natural history museum.
How to Make It
- Paint the entire ceramic turtle in a rich, dark matte forest green or deep emerald shade.
- Sketch light botanical guidelines for fern fronds curving along the natural contours of the shell scutes.
- Using a fine detail brush and metallic gold acrylic paint, paint the central stems of each fern frond.
- Add small, pointed leaves branching off each stem in symmetrical pairs, tapering in size toward the tip of the frond.
- Accentuate the turtle’s skin texture with a very subtle dark olive wash to maintain the moody tone.
Tips & Variations
- Tip: Layer two coats of metallic gold paint over the fern fronds so they gleam against the dark green background.
- Variation: Substitute gold ferns for classic vintage mushroom illustrations or antique botanical ivy.
What You Need
- Ceramic turtle figure
- Matte acrylic paints (Deep Forest Green, Dark Olive)
- Metallic gold acrylic paint
- Fine detail brush (#0)
- Matte spray sealer
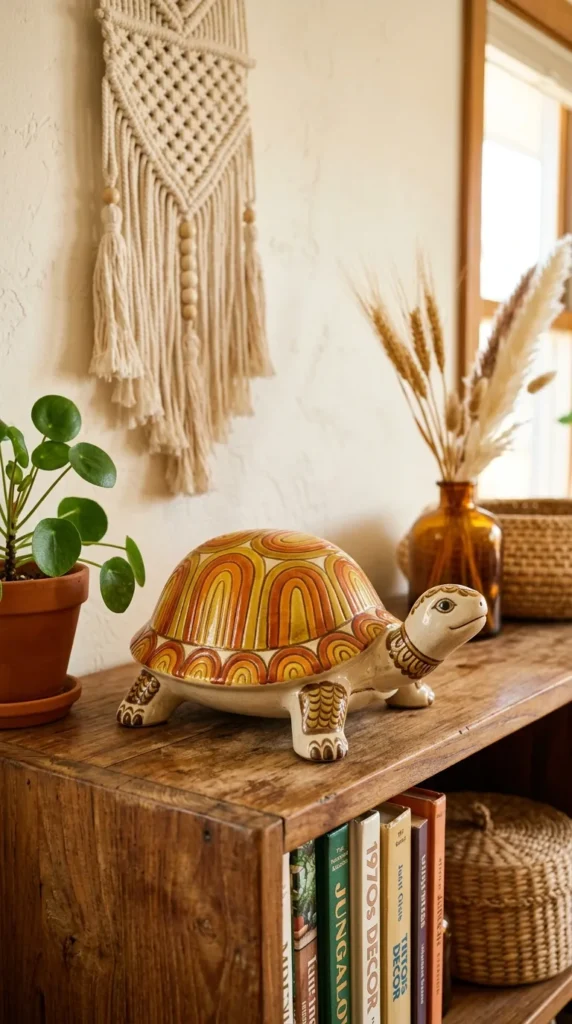
11. Retro 70s Sunshine & Arch Gradient Turtle
What This Idea Means
Embracing groovy retro vibes, this 1970s-inspired concept uses warm, sun-drenched color palettes and arched geometric shapes. It brings nostalgic energy, warmth, and playful cheer to shelves, desks, or patio setups.
How to Make It
- Prime the turtle in a soft, muted warm beige or biscuit ceramic base coat.
- Mark rainbow arch shapes across each major shell scute using pencil and a flexible edge guide.
- Paint concentric color arches inside each scute using iconic 70s shades: mustard yellow, burnt orange, rust red, and avocado green.
- Fill the turtle’s head and limbs with solid mustard or rust red to tie the retro theme together.
- Seal with a smooth satin coat for a clean, mid-century ceramic look.
Tips & Variations
- Tip: Keep your paint consistency creamy—too thin will cause runs on curved ceramic edges, while too thick will show heavy brushstrokes.
- Variation: Draw a retro rising sun with radiating color beams spanning across the central shell instead of individual arches.
What You Need
- Ceramic turtle
- Acrylic paints (Warm Beige, Mustard, Burnt Orange, Rust Red, Avocado)
- Medium round and detail brushes
- Satin clear spray
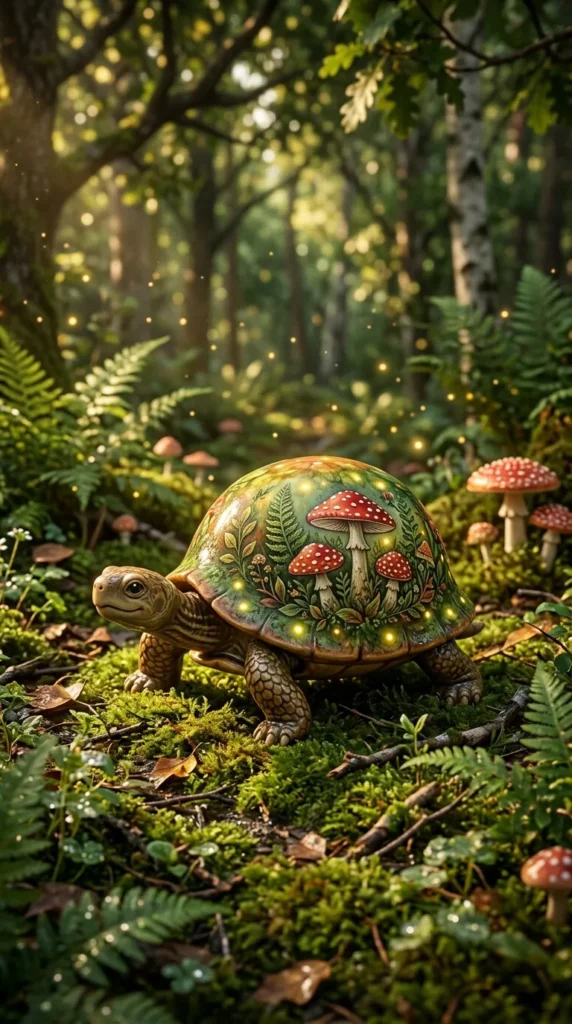
12. Whimsical Fairytale Mushroom & Moss Forest Turtle
What This Idea Means
Tapping into fairy tales and forest folklore, this charming idea reimagines the turtle as a wandering woodland creature carrying a mini forest ecosystem on its back. Red toadstools, lush green moss, and glowing fireflies evoke magical storybook adventures.
How to Make It
- Texture the turtle shell base with stippled shades of moss green, olive, and chartreuse using a coarse sponge.
- Paint charming red fly agaric mushrooms sprouting upward along the shell grooves using opaque red and cream paints.
- Add tiny, crisp white dots onto the red mushroom caps once dry.
- Paint tiny glowing yellow fireflies floating near the top of the shell, adding a faint white halo ring around each for a luminous effect.
- Highlight the turtle’s eyes with a glossy coat to give it a lively, whimsical personality.
Tips & Variations
- Tip: Mix real craft sand or textured plaster into your moss green paint to give the shell authentic, raised moss texture.
- Variation: Use glow-in-the-dark paint on the mushroom undersides and fireflies so the piece lights up at night.
What You Need
- Ceramic turtle bisque
- Acrylic paints (Red, Cream, Moss Green, Olive, Yellow, White)
- Glow-in-the-dark paint (optional)
- Coarse texture sponge and detail brushes
13. Minimalist Black & White Single-Line Art Turtle
What This Idea Means
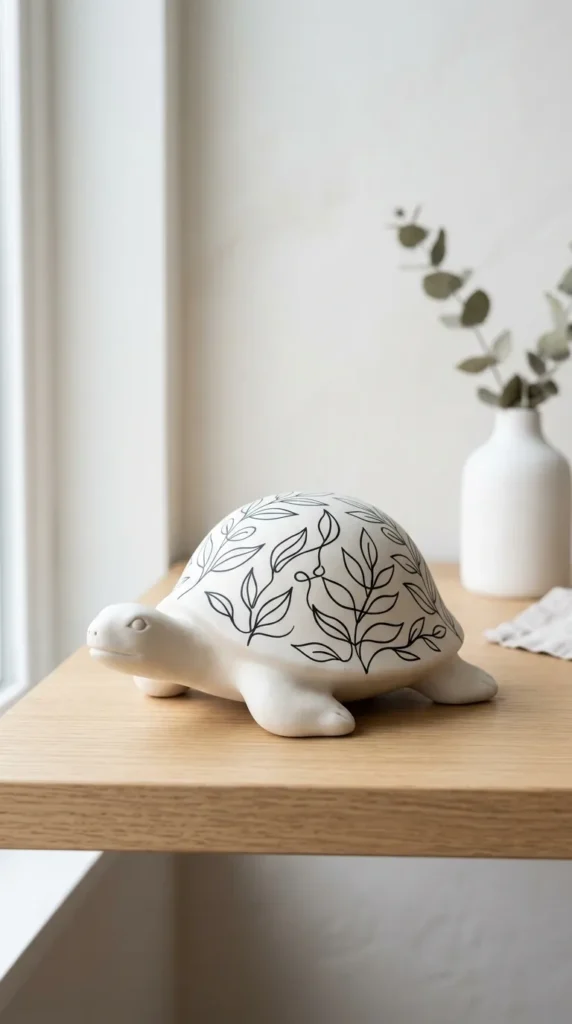
Modern minimalism focuses on stripping away clutter to reveal beauty in pure line and form. Using continuous single-line art principles on a clean white ceramic shell produces an understated visual piece that fits seamless into modern Scandinavian decor.
How to Make It
- Paint the entire ceramic turtle in a flawless, smooth chalky white or stark alabaster finish.
- Lightly pencil continuous line drawings—such as abstract face profiles, leaves, or flowing ribbons—across the smooth shell surface.
- Trace over the pencil lines with a steady hand using a fine-tip black acrylic paint marker or liquid ink pen.
- Ensure the drawn lines flow seamlessly from one shell scute into the next without stopping or breaking abruptly.
- Seal with a flat matte varnish to preserve the crisp contrast without glare.
Tips & Variations
- Tip: If you make a mistake with the paint pen on sealed white paint, gently wipe it away immediately with a damp cotton swab.
- Variation: Use a brilliant liquid metallic copper or gold pen instead of black for an elevated, glamorous line-art look.
What You Need
- Ceramic turtle
- Matte white chalk or acrylic paint
- Fine-tip black acrylic paint pen (1mm)
- HB pencil and soft eraser
- Flat matte spray varnish
14. Opulent Gold Leaf & High-Gloss Black Turtle
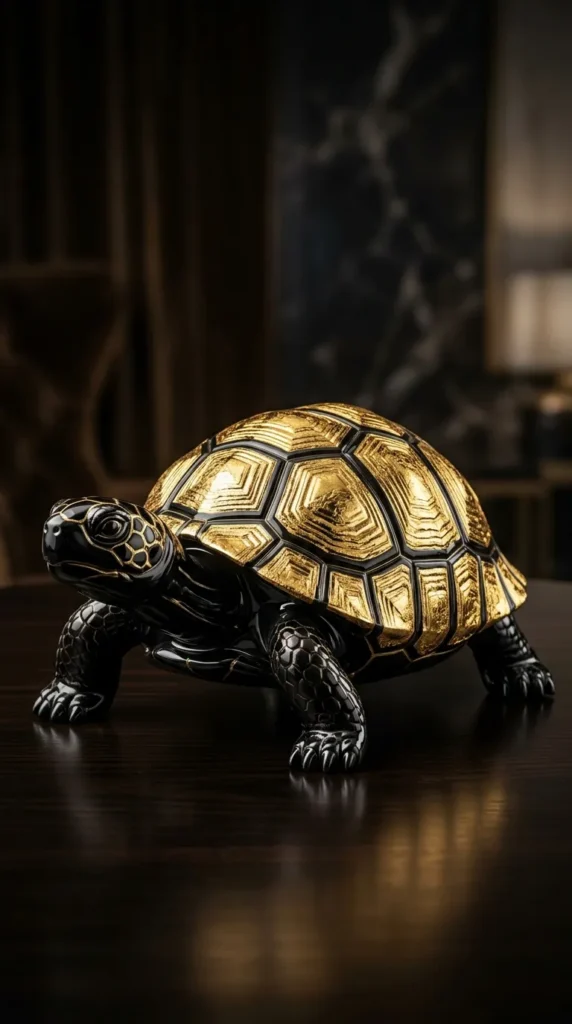
What This Idea Means
High-contrast luxury meets organic form in this high-end art concept. Combining deep black with genuine metallic gold leaf gilding creates an upscale accent piece that looks like it belongs in a high-end interior design boutique.
How to Make It
- Paint the entire turtle in an ultra-deep, opaque jet black acrylic or enamel coat.
- Apply thin brushstrokes of gilding adhesive (gold size) selectively over the shell scute rims or central grooves.
- Wait 5 to 10 minutes until the adhesive becomes tacky, then lay sheets of gold leaf foil over the tacky areas.
- Use a soft, dry mop brush to smooth the gold leaf down and gently sweep away excess unattached foil flakes.
- Coat the entire turtle with a high-gloss glaze sealer to seal the leafing and protect against tarnishing.
Tips & Variations
- Tip: Allow some gold leaf edges to remain slightly organic and jagged for a modern, abstract gilded aesthetic.
- Variation: Swap traditional yellow gold leaf for rose gold or leafed copper foil to suit warmer interior tones.
What You Need
- Ceramic turtle
- Jet black acrylic/enamel paint
- Metallic gold leaf sheets & gilding size adhesive
- Soft mop brush for gilding
- High-gloss glaze varnish
15. Pastel Opal Sea Shell Iridescent Turtle
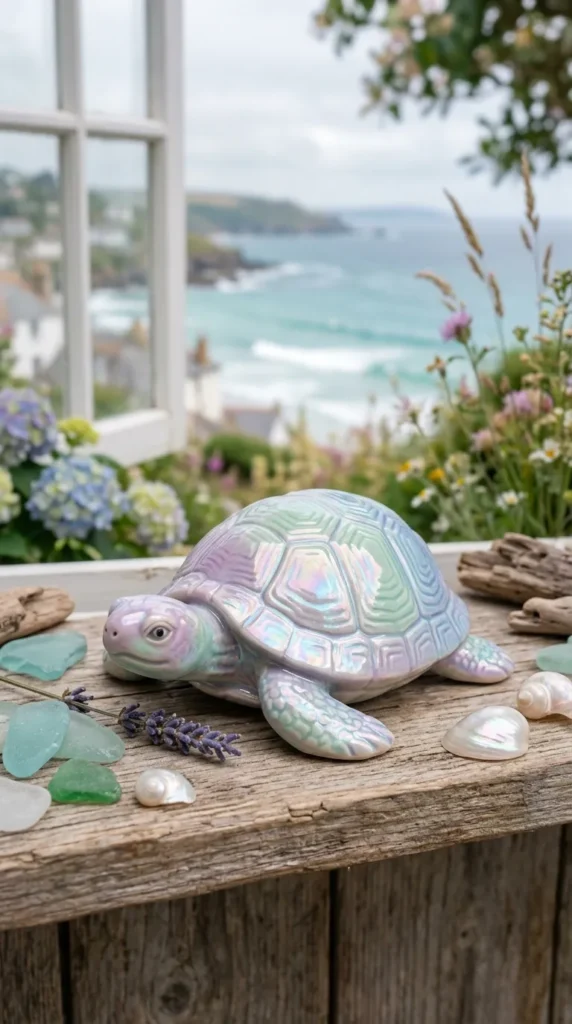
What This Idea Means
Inspired by the inner mother-of-pearl sheen of sea shells and pearls, this fairytale-inspired coastal style uses soft pastel color gradients topped with an iridescent pearlescent finish. It radiates a dreamy glow as light dances across its curves.
How to Make It
- Prime the ceramic turtle in a smooth white base coat.
- Sponge soft pastel gradients of lavender, baby pink, mint green, and pale sky blue across the shell scutes.
- Blend the pastel colors gently where they meet using a damp sponge to eliminate harsh lines.
- Coat the entire turtle with two generous layers of iridescent pearl glaze or pearlescent topcoat medium.
- Seal with a high-gloss varnish to maximize light reflection and pearlescent shimmer.
Tips & Variations
- Tip: Iridescent topcoats show up best over light, pastel base colors—avoid dark base coats for this specific pearl effect.
- Variation: Glue small real micro-pearls along the shell seams for added three-dimensional texture.
What You Need
- Ceramic turtle
- Pastel acrylic paints (Lavender, Pink, Mint, Sky Blue, White)
- Iridescent pearl medium / glaze
- Cosmetic sponges
- High-gloss clear topcoat
16. Scandinavian Folk Art Floral Turtle (Dala Style)
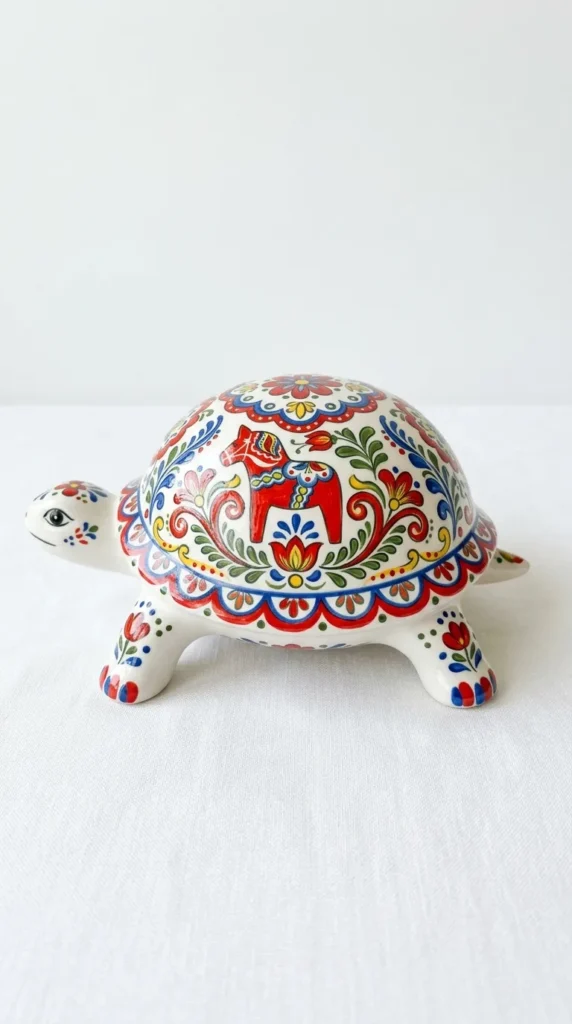
What This Idea Means
Inspired by traditional Swedish Dala horse paintings and Scandinavian rosemaling, this style features cheerful, stylized floral motifs, symmetrical flourishes, and bright primary accent colors against a clean background.
How to Make It
- Paint the ceramic turtle in a classic folk background shade, such as Swedish blue, deep matte red, or crisp white.
- Pencil symmetrical floral flourishes (tear-shaped leaves, stylized tulip buds, and sweeping scrolls) on each shell scute.
- Fill in the floral shapes using bright, opaque folk colors: vivid red, royal blue, sunny yellow, and forest green.
- Add crisp white accent dashes and teardrop dabs along the edges of the painted flowers to create traditional folk art detail.
- Seal with a smooth satin or semi-gloss finish.
Tips & Variations
- Tip: Use the natural symmetry of the turtle’s shell scutes to keep your folk art patterns balanced left-to-right.
- Variation: Paint a traditional Swedish harness or saddle pattern across the center of the turtle’s shell.
What You Need
- Ceramic turtle
- Acrylic paints (Swedish Blue/Red base, White, Red, Blue, Yellow, Green)
- Round detail brushes (#1 and #3)
- Satin sealer
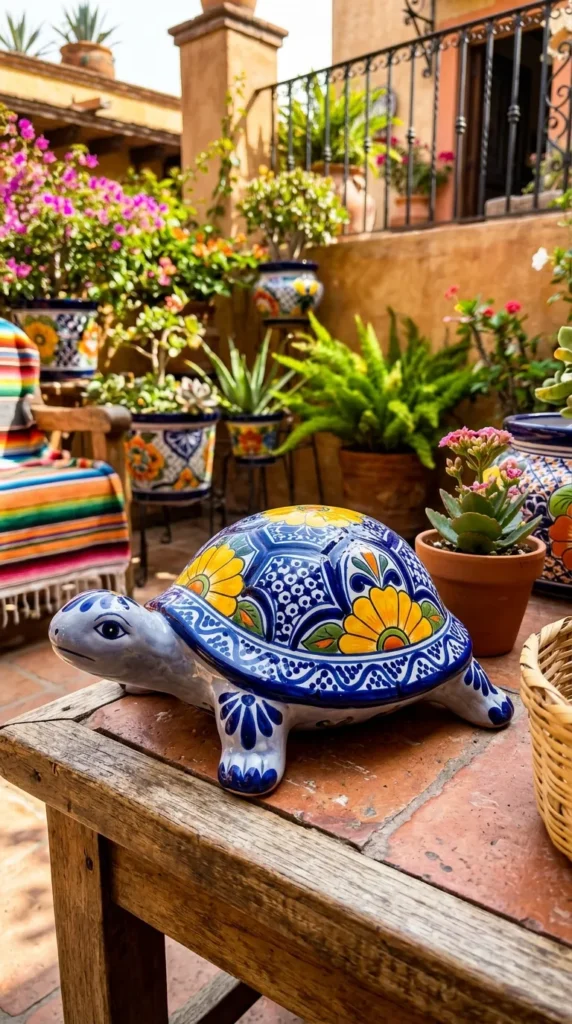
17. Vibrant Mexican Talavera Pottery Turtle
What This Idea Means
Talavera is a traditional Mexican ceramic style famous for its bold, cheerful hand-painted patterns, high-contrast borders, and rich cobalt blue, marigold, and green glazes. A Talavera-style turtle adds festive warmth and artisanal charm to gardens and patios.
How to Make It
- Paint the entire turtle in a crisp, bright white base coat to mimic glazed tin pottery.
- Outline large floral centers, feather patterns, and scalloped arches on the shell using a fine brush and deep cobalt blue paint.
- Fill in the floral centers with vibrant marigold yellow, terracotta orange, and bright emerald green paints.
- Fill in background areas around the flowers with dense cobalt blue hatching or polka dot fill patterns.
- Finish with two thick coats of high-gloss varnish to mimic glazed ceramic tile.
Tips & Variations
- Tip: Leave bold white margins around your painted floral elements—high contrast between white and cobalt blue is the signature mark of Talavera pottery.
- Variation: Paint the turtle’s legs and head in solid cobalt blue with white floral lace overlays.
What You Need
- Ceramic turtle
- Opaque acrylic paints (White, Cobalt Blue, Marigold, Orange, Emerald)
- Fine and medium round brushes
- High-gloss clear varnish
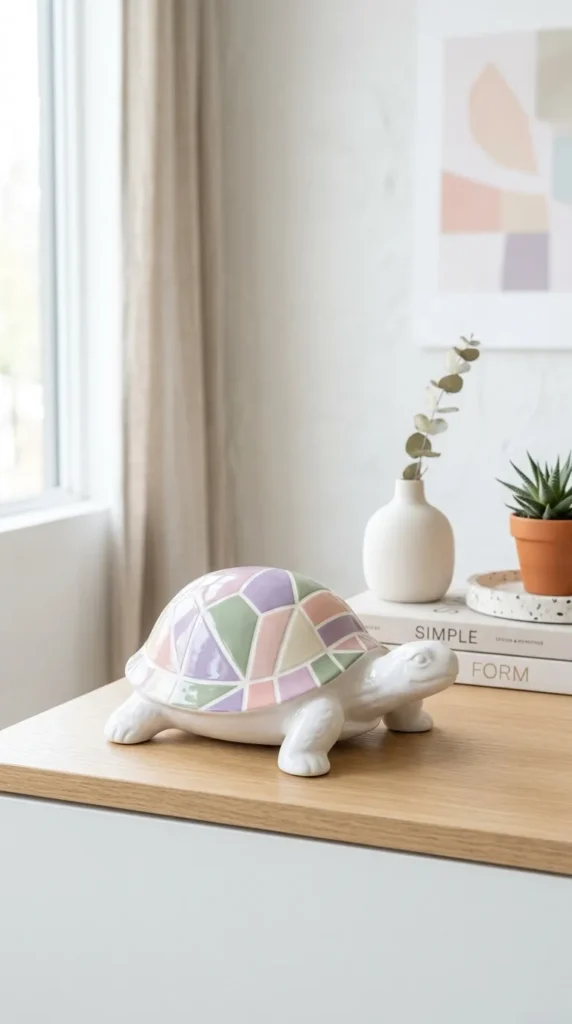
18. Modern Geometric Color-Blocked Pastel Turtle
What This Idea Means
Color blocking uses bold, contrasting shapes arranged in clean geometric layouts. Decorating a ceramic turtle with pastels and crisp diagonal cutlines gives it a fresh, playful aesthetic perfect for modern apartments and creative workspaces.
How to Make It
- Base coat the entire turtle in a smooth matte white finish and let dry completely.
- Use low-tack painter’s tape to section off sharp diagonal, triangular, and half-circle zones across the shell scutes.
- Paint each section with a different pastel shade (such as lilac, butter yellow, sage green, blush pink, and peach).
- Carefully peel away the painter’s tape while the paint is still slightly tacky to reveal ultra-sharp white division lines.
- Apply a satin clear coat to protect the clean color transitions.
Tips & Variations
- Tip: Burnish (press down) the edges of your painter’s tape firmly with a fingernail or craft stick to prevent paint from bleeding underneath.
- Variation: Add thin metallic gold tape strips over the white seams for a geometric glam finish.
What You Need
- Ceramic turtle
- Pastel acrylic paints (Lilac, Yellow, Sage, Pink, Peach, White)
- Fine-line painter’s tape
- Flat synthetic brushes
- Satin clear finish
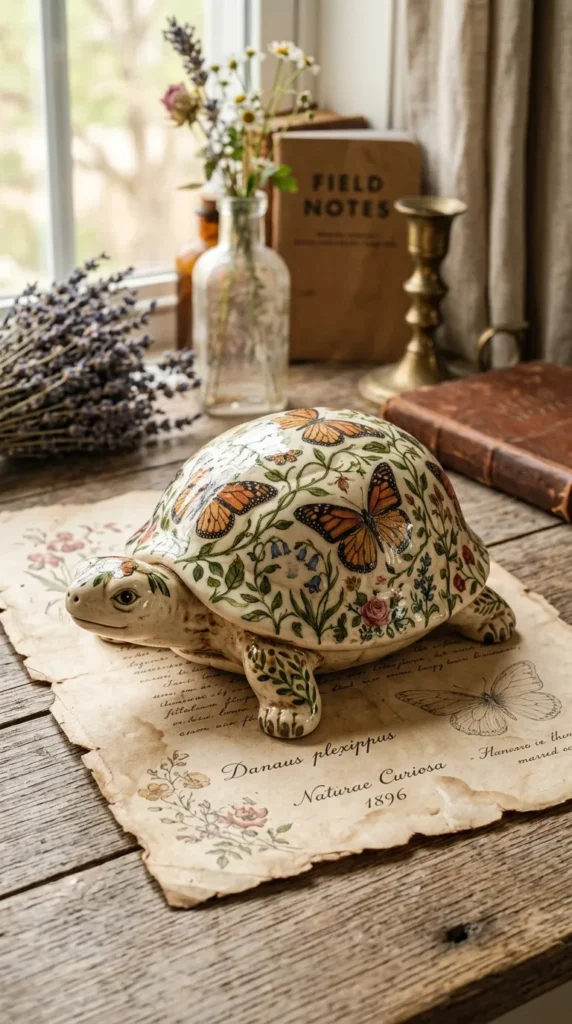
19. Vintage Botanical Butterfly & Vine Decoupage Turtle
What This Idea Means
Combining hand painting with decoupage allows crafters to incorporate vintage scientific illustrations of monarch butterflies, moths, and botanical vines onto three-dimensional ceramic forms with effortless detail.
How to Make It
- Paint the ceramic turtle in a soft, vintage parchment or antique cream acrylic shade.
- Cut out delicate vintage illustrations of butterflies and botanical leaves from paper napkins or decoupage paper using small craft scissors.
- Apply a thin, even coat of Mod Podge or decoupage glue onto a shell scute.
- Smooth the cut paper illustration down onto the wet glue using a soft, damp sponge or brush, smoothing out air bubbles working from the center outward.
- Paint delicate green tendrils connecting the paper elements, and seal the entire turtle with decoupage sealer.
Tips & Variations
- Tip: If using multi-layer paper napkins, separate and discard the blank white back layers, using only the thin top printed ply for seamless blending.
- Variation: Lightly age the edges of the ceramic shell with a brown ink pad to enhance the antique paper look.
What You Need
- Ceramic turtle
- Antique Cream acrylic paint
- Vintage butterfly decoupage paper or printed napkins
- Mod Podge (Matte or Satin)
- Small detail scissors and soft decoupage brush
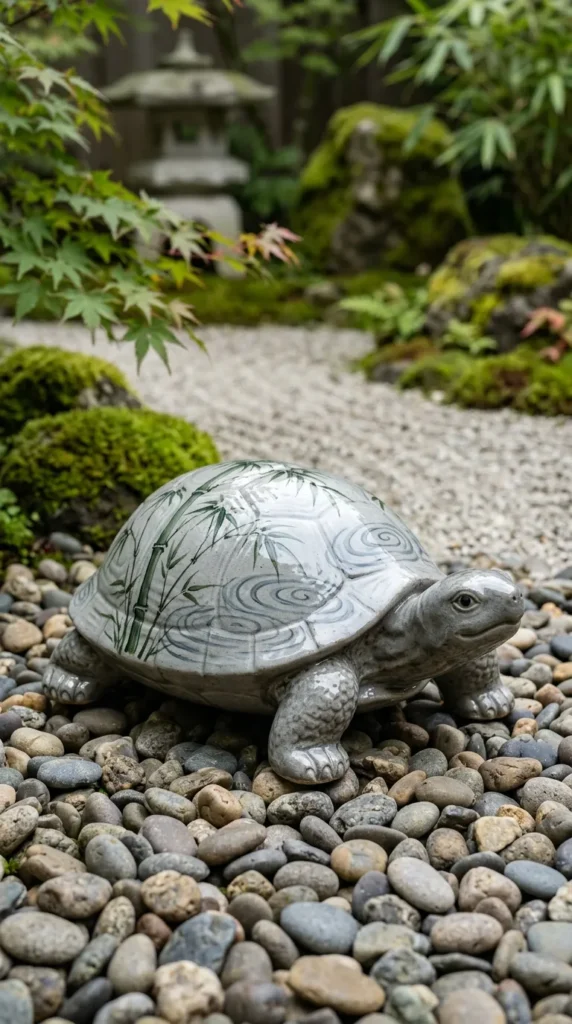
20. Zen Stone Garden Bamboo & Water Ripple Turtle
What This Idea Means
Rooted in Japanese garden design, this calm aesthetic captures natural bamboo stalks and soft water ripple rings. It transforms a ceramic turtle into a peaceful, meditative art piece suitable for indoor plant setups and relaxing garden spaces.
How to Make It
- Paint the turtle in a calm, neutral stone gray or soft slate background color.
- Draw upright bamboo stalks along the side of the shell using olive green and sage paints, adding dark green node lines along the stems.
- Add delicate, tapered bamboo leaves extending from the nodes using quick, flicking brushstrokes.
- Using a fine liner brush and light sky blue or white paint, trace concentric oval water ripple rings expanding across the top of the shell.
- Seal with a smooth matte finish to retain a stone-like texture.
Tips & Variations
- Tip: Practice your bamboo leaf stroke on paper first—press down firmly at the start of the stroke, then lift quickly while dragging to form a sharp point.
- Variation: Paint a small, realistic koi fish swimming through the water ripples near the bamboo stalks.
What You Need
- Ceramic turtle
- Matte acrylic paints (Stone Gray, Olive, Sage, Light Blue, White)
- Fine script liner brush (#00)
- Matte spray sealer