Pinecone garlands bridge organic outdoor texture with refined interior design. A well-crafted garland adds tactile depth, warmth, and sculptural presence to mantels, staircases, doorways, and tablescapes without feeling dated or overly rustic. By incorporating modern design elements—such as muted palettes, mixed metals, sculptural spacing, and botanical pairings—you can elevate everyday foraged pinecones into high-end, statement-making decor pieces.
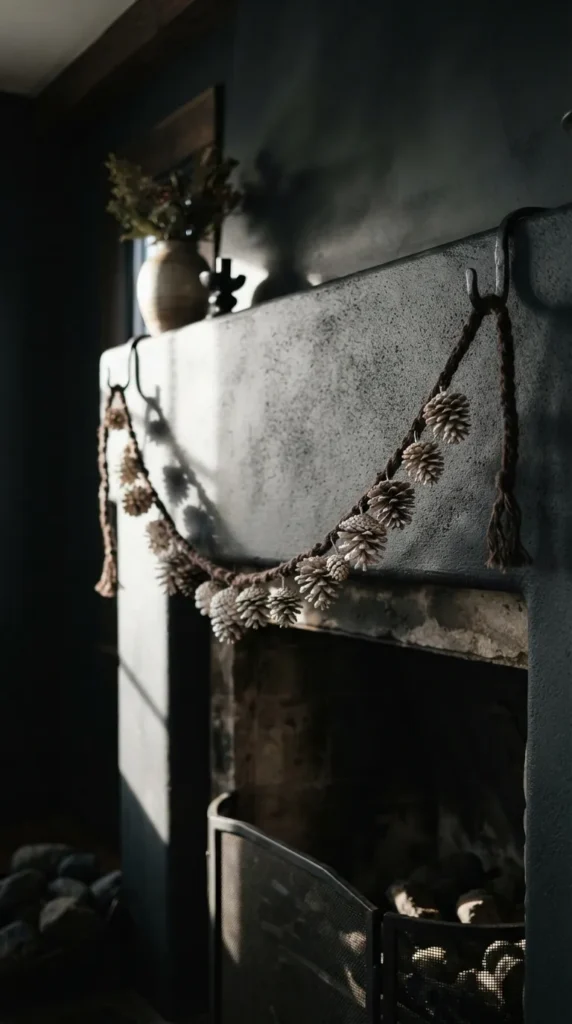
1. Bleached Minimalist Pinecone Garland
A bleached pinecone garland strips away heavy woodland brown tones, revealing soft, weathered driftwood hues and creamy bone textures. This design fits effortlessly into Scandinavian, Japandi, or modern neutral aesthetics where light, airy textures take center stage.
- What This Idea Means: This concept treats pinecones as sculptural, sun-bleached organic artifacts. It shifts the visual weight from heavy winter warmth to seasonless, modern organic minimalism.
- Materials Needed:
- 20–30 medium foraged pinecones
- Standard household bleach or hydrogen peroxide (for an eco-friendly alternative)
- Large bucket and heavy ceramic plate (to keep cones submerged)
- Natural ivory linen cord or raw cotton macramé rope
- Small silver or brass eyelet screws
- How to Make It:
- Submerge clean pinecones in a 50/50 water-and-bleach solution inside a bucket. Weigh them down with a plate for 12 to 24 hours. The scales will close during soaking.
- Remove the cones and place them on baking sheets lined with foil.
- Bake at 95°C (200°F) for 2 to 3 hours until completely dry, fully open, and lightened to an ivory-driftwood shade.
- Twist a small screw eye into the flat wooden base of each cone.
- Thread the linen cord through each eyelet, spacing the cones evenly at 4-inch intervals.
- Tips and Variations: For a softer almond finish, soak cones in hydrogen peroxide instead of chlorine bleach. If you prefer asymmetry, group three cones closely together, followed by a wide 6-inch cord gap.
2. Gilded Brushed-Gold & Velvet Pinecone Garland
Combining the rough, serrated texture of pinecones with high-sheen liquid gold leaf and deep velvet ribbon creates a rich, textural contrast suited for formal mantels and festive holiday banquets.
- What This Idea Means: This design merges botanical foraging with luxury metalwork, relying on tactile contrast—rough scales against smooth, light-catching metallic leafing and soft, matte velvet.
- Materials Needed:
- Assorted pinecones (medium and large)
- Liquid gold leafing paint or warm brass gilding wax
- Fine-bristle artist brush
- 1.5-inch wide emerald green, moody taupe, or midnight black silk-velvet ribbon
- Hot glue gun or brass jewelry wire
- How to Make It:
- Clean the cones by baking them at 100°C for 45 minutes to remove sap and moisture.
- Using a semi-dry brush, apply liquid gold leaf sparingly to the tips and ridges of the pinecone scales, leaving the deep brown core exposed.
- Allow the metallic paint to cure for 2 hours.
- Cut long velvet ribbon lengths and tie small hanging loops onto each pinecone top.
- Attach the loops along the main velvet ribbon at varied drop lengths (between 2 to 5 inches) for a cascading chandelier effect.
- Tips and Variations: Use rose gold or antique pewter gilding wax to match specific interior hardware. Leave the ribbon ends raw and frayed for an effortless, vintage-luxury feel.

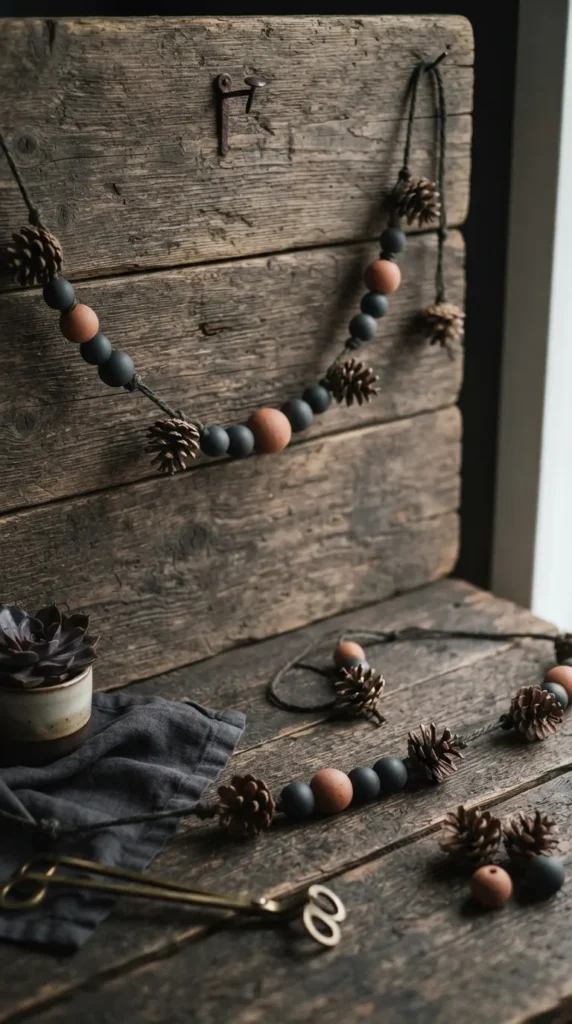
3. Nordic Clay Bead & Spaced Pinecone Garland
A celebration of clean Scandinavian lines, this garland alternates matte terracotta or white polymer clay beads with small, symmetrically placed pinecones strung on natural hemp.
- What This Idea Means: This layout emphasizes negative space and geometric contrast, pairing smooth, matte sphere shapes with jagged, fibrous botanical cones.
- Materials Needed:
- 15–20 small, uniform pinecones (such as Eastern white pine or hemlock)
- Air-dry white terracotta clay or pre-made matte ceramic beads (sizes 16mm and 20mm)
- Thick jute twine or natural leather cord
- Needle-nose pliers and fine floral wire
- How to Make It:
- If making your own beads, roll air-dry clay into smooth spheres, pierce center holes with a skewer, and allow them to dry for 24 hours.
- Wrap a 4-inch piece of floral wire snugly around the bottom scale tier of each pinecone, twisting the top into a secure threading loop.
- String 5 clay beads, followed by one pinecone loop, then another 5 clay beads.
- Repeat this pattern consistently across the entire cord length.
- Finish each end with a knotted loop wrapped in natural hemp.
- Tips and Variations: Mix geometric clay shapes—such as faceted polyhedrons or flat wooden discs—between the round beads for added visual interest.
4. Frosted Matte Chalk Pinecone Garland
Moving away from glittery holiday snow sprays, this modern frosted garland uses chalk paint to deliver a soft, powdery, ultra-matte winter aesthetic.
- What This Idea Means: It evokes the quiet, quiet aesthetic of an alpine forest blanketed in early morning frost, relying on flat, powdery pigments rather than reflective sparkle.
- Materials Needed:
- 25 medium pinecones
- Ultra-matte chalk paint in crisp white, ivory, or soft mist gray
- Dense foam sponge dabber
- Clear fishing line or braided white cotton twine
- Small cup hooks or eye screws
- How to Make It:
- Dip the foam sponge lightly into chalk paint and dab the exterior scale edges of each cone with quick, stippling motions.
- Keep the paint application uneven so the natural warm wood undertones show through beneath the “snow.”
- Let the paint dry completely (chalk paint cures within 30 minutes).
- Fasten small eyelet hooks into the stems.
- Thread the cones along clear fishing line to create the illusion of pinecones floating gracefully across a wall or mantel.
- Tips and Variations: Mix 5% baking soda into the chalk paint before dabbing to create a gritty, realistic crystalline texture that mimics freshly frozen rime ice.

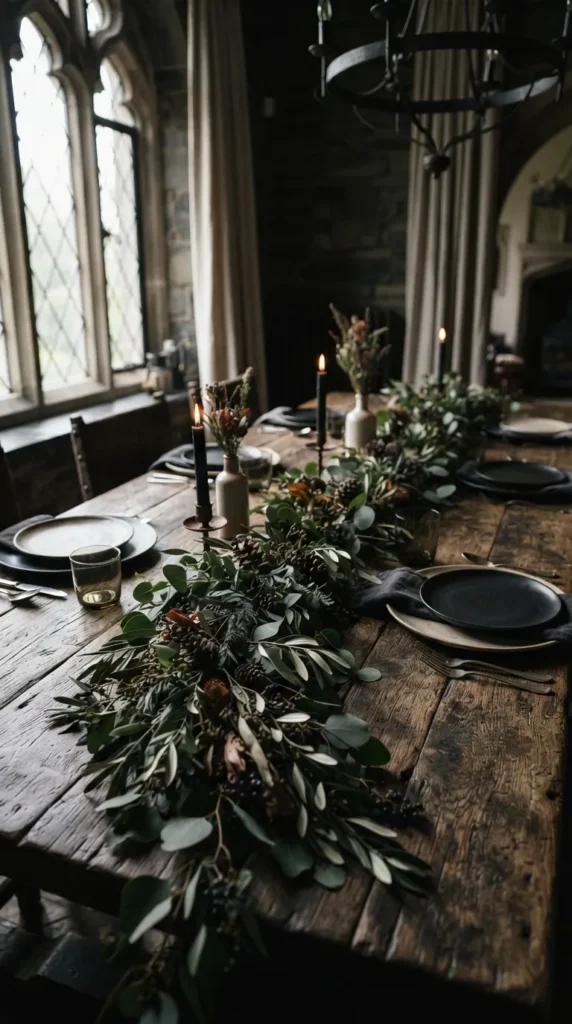
5. Eucalyptus, Olive Branch & Pinecone Botanical Garland
This lush, modern botanical garland pairs fresh or faux eucalyptus and silver olive leaves with rich, woody pinecones, making it ideal for year-round dining room table runners or staircase decor.
- What This Idea Means: An organic design that highlights mixed foliage foliage textures, blending soft, muted green tones with deep, earthy woodland accents.
- Materials Needed:
- Fresh or preserved seeded eucalyptus branches
- Silver-dollar olive leaf sprigs
- Medium pinecones
- 22-gauge paddle floral wire
- Heavy-duty natural rope base
- How to Make It:
- Cut eucalyptus and olive stems into uniform 6-to-8-inch sprigs.
- Bundle 2 eucalyptus stems, 1 olive stem, and 1 pinecone together using thin floral wire.
- Secure the first bundle to the main rope base using paddle wire.
- Layer the second bundle directly over the stems of the first, overlapping like fish scales to hide all wires.
- Continue down the length of the garland, alternating cone sizes for a lush, balanced drape.
- Tips and Variations: Incorporate dried bay leaves or preserved silver dust foliage to introduce deeper tonal gradients across the greenery.
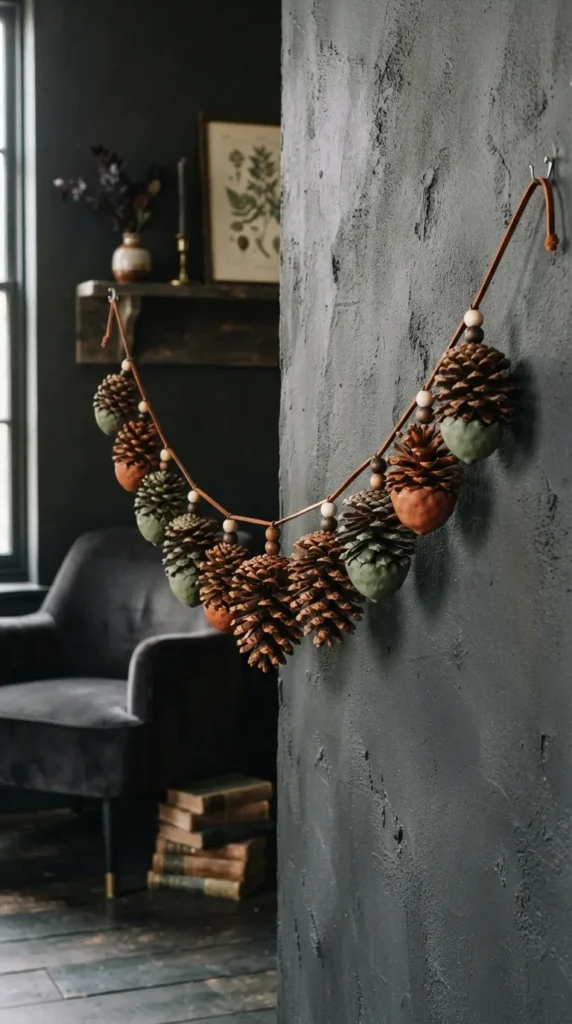
6. Monochromatic Dip-Dyed Modern Pinecone Garland
A bold, contemporary statement that pairs natural pinecone scales with crisp, geometric color blocks created by dipping the bottom half of each cone into modern designer paints.
- What This Idea Means: Color-blocking introduces structured modernity to natural shapes, transforming foraged woodland items into graphic art pieces.
- Materials Needed:
- 20 uniform sugar pine or ponderosa pinecones
- Matte latex paint (sage green, charcoal, warm sand, or terracotta)
- Deep disposable dipping containers
- Drying rack with wax paper underneath
- Smooth leather cord
- How to Make It:
- Pour paint into a deep container.
- Hold a pinecone by its tip and submerge the bottom half straight down into the paint at a clean 90-degree angle.
- Lift smoothly and let excess paint drip back into the container for 15 seconds.
- Set upright on a wax-paper-lined cooling rack to cure for 6 hours.
- Secure small screw eyes into the top tips and string them onto a rich tan leather cord.
- Tips and Variations: Dip at an intentional 45-degree angle to create an asymmetric, modern diagonal paint line across the pinecone body.


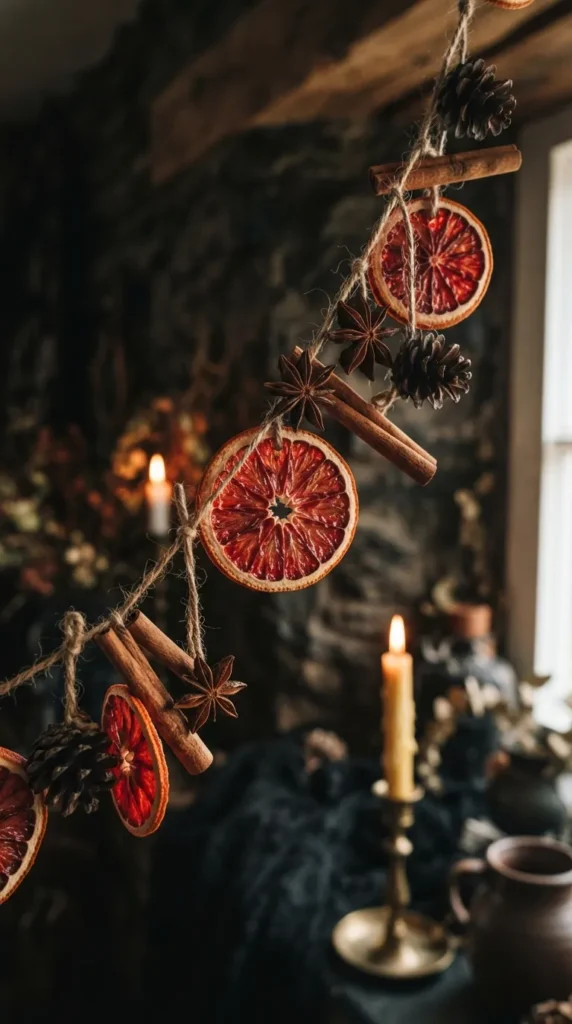
7. Dried Citrus, Cinnamon & Scented Pinecone Garland
Infusing modern decor with natural fragrance, this garland combines dehydrated blood orange wheels, star anise, raw cinnamon sticks, and aromatic pinecones.
- What This Idea Means: A multi-sensory design combining visual warmth, artisanal texture, and natural spice notes without artificial fragrances.
- Materials Needed:
- Dehydrated orange, grapefruit, or blood orange slices
- Whole star anise pods and 3-inch cinnamon sticks
- Small aromatic pinecones
- Cinnamon, clove, and sweet orange essential oils
- Raw jute twine and large-eye embroidery needle
- How to Make It:
- Add 5 drops of essential oils into a sealed zip-top bag with the pinecones; shake and let infuse for 48 hours.
- Dehydrate sliced citrus in an oven at 90°C (190°F) for 4 hours until translucent and dry.
- Thread the needle with jute twine.
- String alternating elements: pinecone, cinnamon bundle tied with twine, citrus wheel, star anise pod.
- Leave 2 inches of bare twine between clusters for a clean, balanced look.
- Tips and Variations: Layer deep ruby-red blood orange wheels alongside bright yellow lemons for a subtle, natural ombre color gradient.
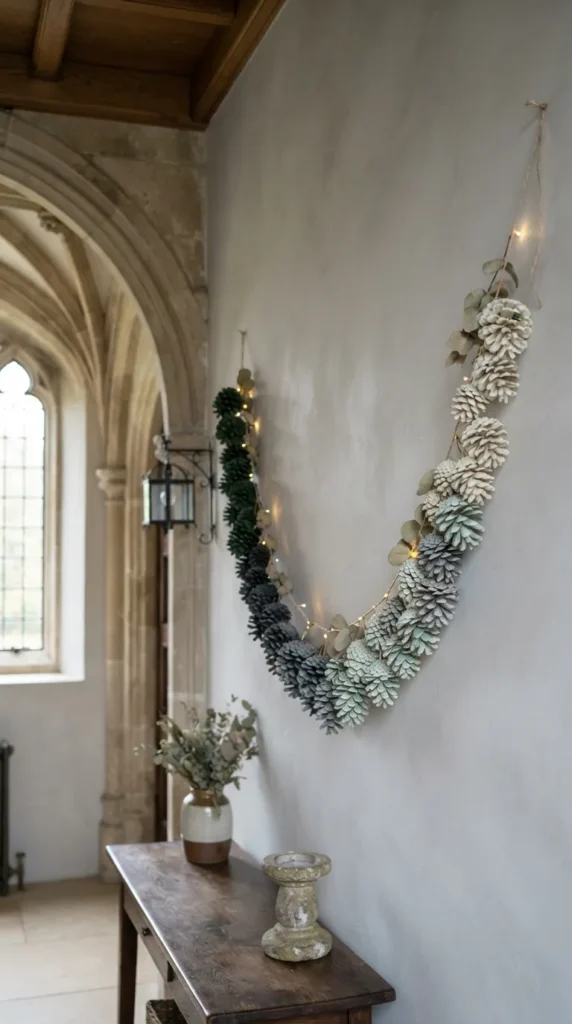
8. Ombre Gradient Painted Pinecone Garland
A tonal display where pinecones transition smoothly from deep forest tones to airy cream, adding a curated focal point across wide fireplace mantels.
- What This Idea Means: Ombre gradients create a sense of movement and visual flow, drawing the eye naturally across the full width of an architectural feature.
- Materials Needed:
- 25 to 30 medium pinecones sorted by size
- Acrylic craft paints: deep forest green, sage green, celadon, light pistachio, and off-white
- Soft flat artist brushes
- Braided nylon or cotton cord
- How to Make It:
- Sort pinecones into 5 distinct groups of 5 to 6 cones each.
- Paint each group in its designated tonal shade, coating all scales evenly from top to bottom.
- Allow the paint to dry completely.
- Arrange the cones in order: dark forest green -> medium sage -> light celadon -> soft pistachio -> off-white.
- Fasten each cone onto the cord in strict sequence to preserve the smooth gradient transition.
- Tips and Variations: This ombre technique works equally well with moody slate grays transitioning into cloud white, or warm espresso transitioning to sandy beige.
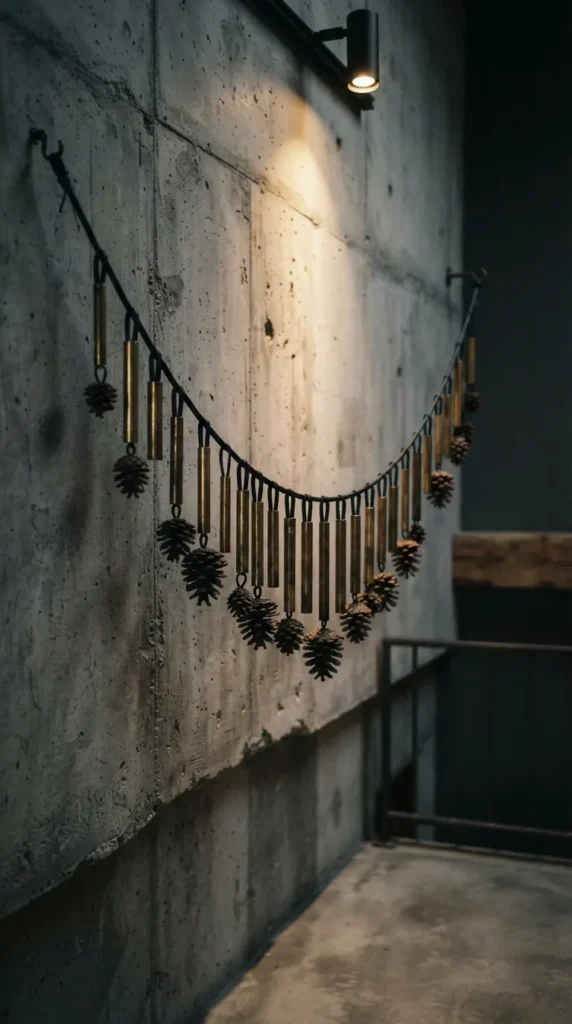
9. Geometric Brass Tubing & Suspended Pinecone Garland
A striking architectural piece combining industrial brass conduit pipes with organic pinecones hung at precise intervals.
- What This Idea Means: A modern industrial statement that contrasts hard, polished metallic lines with irregular, natural woodland forms.
- Materials Needed:
- 1/4-inch hollow brass tubing (cut into 3-inch and 5-inch segments)
- High-grade mini pipe cutter
- 15 large, pristine lodgepole pinecones
- Fine brass wire or black waxed leather cord
- Brass jump rings
- How to Make It:
- Cut brass tubing into clean segments using the mini pipe cutter.
- Thread the leather cord through a 5-inch brass tube segment.
- String a suspended drop loop holding a single pinecone.
- Thread the next 5-inch brass segment to create a structured metallic spacer bar.
- Repeat across the cord, keeping spacing clean, geometric, and level.
- Tips and Variations: Swap round brass tubing for square-profile copper tubing to create a distinctive, warm modern aesthetic.
10. Chunky Merino Wool Pom-Pom & Pinecone Garland
Soft, tactile, and cozy, this design pairs fluffy, oversized wool pom-poms in cloud white and warm oatmeal with rustic pinecones.
- What This Idea Means: The pairing of high-texture, fluffy wool fibers with crisp, woody pinecone scales creates a warm, inviting focal point for modern bedrooms and nurseries.
- Materials Needed:
- Skeins of chunky 100% merino wool or felted roving wool yarn
- Cardboard pom-pom maker rings (3-inch diameter)
- 15 to 20 medium pinecones
- Heavy cotton cord and blunt tapestry needle
- How to Make It:
- Wrap wool yarn around the pom-pom rings to create dense, spherical pom-poms; trim the edges cleanly.
- Wrap floral wire around the base scales of each pinecone, leaving a 2-inch loop at the top.
- Use the tapestry needle to thread the heavy cord directly through the center of a wool pom-pom.
- Thread the cord through a pinecone loop, followed immediately by another wool pom-pom.
- Continue alternating pom-poms and cones across the entire length of the garland.
- Tips and Variations: Keep the pom-pom colors monochromatic in creamy neutrals, or add charcoal heather wool for a modern high-contrast look.
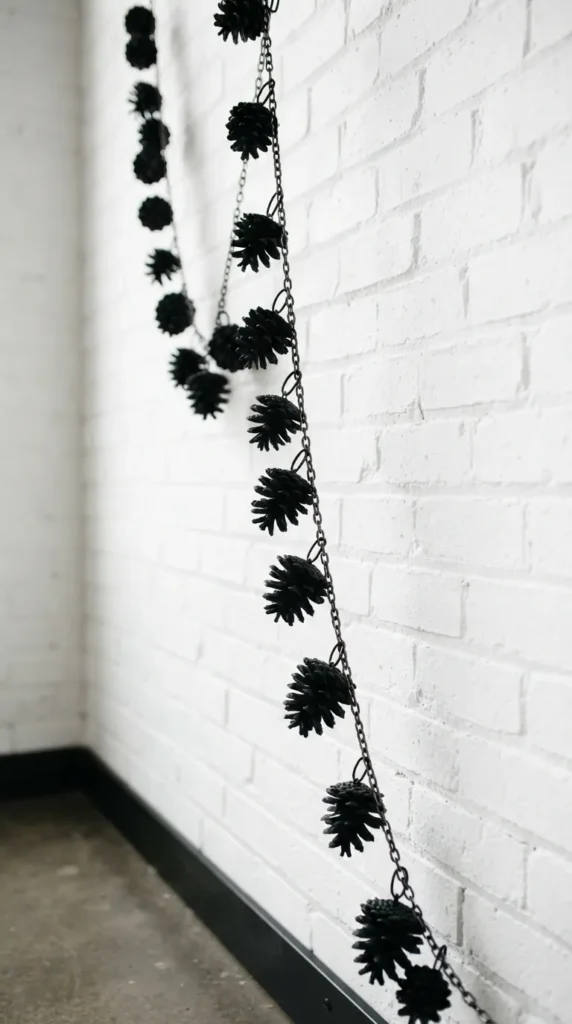
11. Sleek Matte Black Industrial Pinecone Garland
Drenched completely in flat matte black paint, this modern garland transforms pinecones into striking, contemporary sculptural shapes.
- What This Idea Means: Stripping away the natural wood color forces the eye to focus purely on the pinecone’s intricate spiral geometry and structural silhouette.
- Materials Needed:
- 20–25 large, wide-scaled pinecones
- Matte black spray paint with primer
- Matte acrylic clear protective sealant
- Black paracord or dark gunmetal steel jewelry chain
- Black screw eye hooks
- How to Make It:
- Place clean pinecones in a well-ventilated spraying booth or outdoors on drop cloths.
- Apply two light, even coats of matte black spray paint, rotating the cones to cover all hidden angles within the scales.
- Seal with a matte topcoat to prevent scuffing.
- Insert black screw eyes directly into the base of each cone.
- Attach the eyelet screws along the black chain links using small jump rings or directly onto the black paracord.
- Tips and Variations: Hang this garland against a white brick wall, light concrete backdrop, or light oak wood mantel for bold visual contrast.
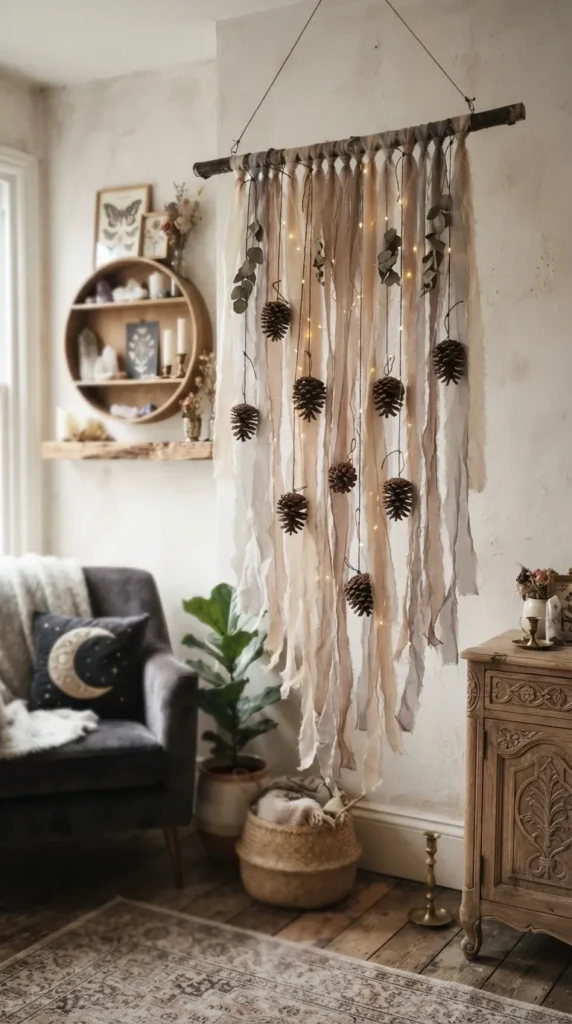
12. Cascading Ribbon Drop Pinecone Garland
Rather than stringing pinecones horizontally along a cord, this vertical drop design hangs cones at staggered, cascading heights from a sleek horizontal support rod.
- What This Idea Means: A waterfall effect that draws the eye downward, adding vertical movement and height to tall windows, deep fireplace openings, or blank gallery walls.
- Materials Needed:
- 18 to 24 assorted pinecones (small, medium, and large)
- Slim birch branch, brass curtain rod, or long wooden dowel
- Raw-edge silk or chiffon ribbons in varying widths (taupe, ivory, or slate)
- Hot glue gun or small wood eye screws
- How to Make It:
- Mount the birch branch or brass rod securely in your designated display area.
- Cut ribbon lengths ranging from 12 inches to 36 inches to create a layered waterfall profile.
- Secure one pinecone to the bottom end of each ribbon using a dab of hot glue or an eyelet screw.
- Tie the top end of each ribbon around the rod using an effortless, simple knot.
- Arrange the ribbon lengths randomly to produce an organic, staggered cascade.
- Tips and Variations: Use varying ribbon widths (from 0.5-inch to 2-inch silk strips) to create a relaxed, romantic, bohemian-modern look.
13. Preserved Cedar, Juniper & Mini-Pinecone Garland
A fresh, aromatic garland featuring weeping cedar greens, blue juniper berries, and petite pinecones arranged in clean, sweeping arcs.
- What This Idea Means: A nature-inspired garland that brings the outdoors in, combining soft, flowing greenery with sturdy pinecone accents.
- Materials Needed:
- Preserved or fresh flat cedar boughs
- Juniper branches with blue berries intact
- Small miniature pinecones (such as alder or hemlock cones)
- Fine dark green floral wire
- Thick twisted cotton rope base
- How to Make It:
- Lay out the twisted cotton rope to your desired garland length.
- Wire small clusters of cedar and juniper branches securely along the rope base.
- Group mini pinecones in tight clusters of three.
- Nestle these pinecone clusters into the greenery every 8 to 10 inches using fine wire.
- Mist lightly with water if using fresh greenery to maintain suppleness and vibrant color.
- Tips and Variations: Add dried white statice flowers or delicate star-flower blooms for tiny, subtle pops of floral contrast.
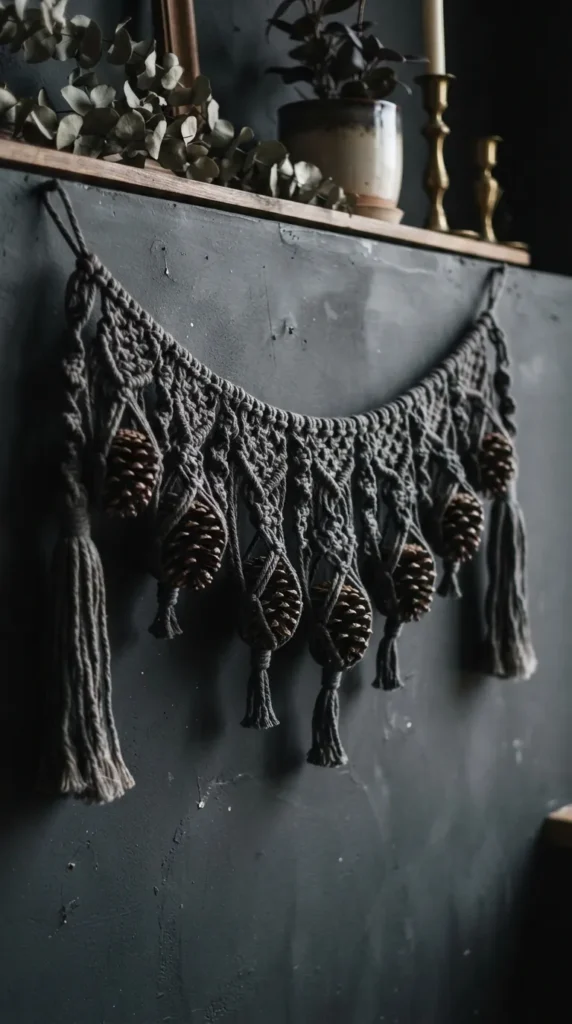
14. Modern Macramé Knotted Pinecone Garland
Intricate, geometric macramé square knots, spiral sennits, and fringed loops cradle natural pinecones within an artisanal fiber-art runner.
- What This Idea Means: Merging fiber craft with natural woodland elements, where knotted cord cradles raw pinecones as woven structural gems.
- Materials Needed:
- 4mm 3-ply natural unbleached cotton macramé cord
- 15 medium-to-large symmetrical pinecones
- Sharp fabric shears and macramé fringe comb
- How to Make It:
- Cut several 8-foot lengths of macramé cord.
- Work square knot sequences and half-hitch patterns across the cords to form small woven pockets or hanging loops.
- Insert a pinecone snugly into each woven macramé pocket, pulling the knots tight around its bottom scale ring.
- Add 4 inches of alternating flat knots between each pinecone cradle.
- Fringe and brush the bottom cord ends with a comb for a soft, textured finish.
- Tips and Variations: Dip the hanging macramé fringe tassels into warm coffee or black tea to add an artisanal, natural dye gradient.



15. Fairy-Lit Luminous Wire Pinecone Garland
Ultra-fine copper fairy lights are woven tightly around pinecones and sheer greenery, turning the garland into a warm, glowing light installation at night.
- What This Idea Means: An ambient lighting feature that casts soft shadows through pinecone scales, highlighting their natural geometry in low light.
- Materials Needed:
- 20 medium pinecones
- 10-meter warm-white micro LED wire lights (battery or USB powered)
- Clear crafting wire or translucent fishing line
- Faux frosted boxwood or delicate evergreen garland base
- How to Make It:
- Lay out the greenery base flat on a work surface.
- Wrap the micro-LED copper wire around the pinecone scales, securing each cone with 2 to 3 tight wire passes.
- Space illuminated cones 4 inches apart along the length of the garland.
- Weave the remaining length of fairy lights through the surrounding greenery base.
- Conceal the slim battery pack behind a mantel clock, planter, or architectural trim.
- Tips and Variations: Choose LEDs with a 2200K ultra-warm color temperature to produce a soft, amber, candle-like glow.
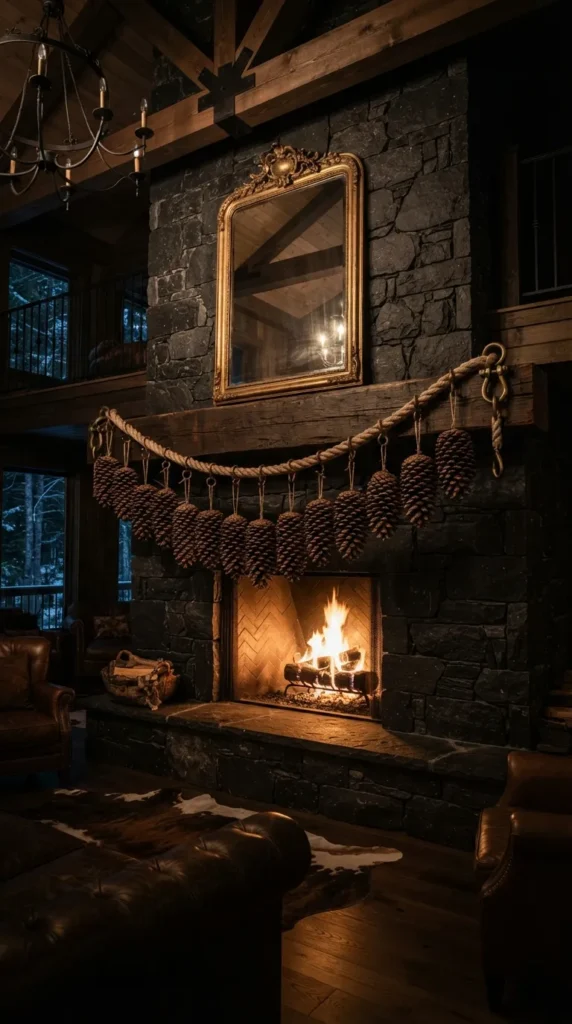
16. Sculptural Giant Sugar Pine Statement Garland
Using oversized sugar pinecones (8 to 12 inches long) spaced widely along a heavy natural rope, this design creates an architectural statement for large fireplaces or entryways.
- What This Idea Means: A bold installation that uses fewer, larger pinecones as high-impact sculptural elements rather than many small repeated pieces.
- Materials Needed:
- 6 to 8 large sugar pinecones or coulter pinecones
- 1-inch thick twisted manila rope or unbleached cotton yachting cord
- Heavy-duty screw eyes (1/2-inch eyelet)
- Heavy brass S-hooks or leather hanging straps
- How to Make It:
- Carefully drill a small pilot hole into the top stem of each large sugar pinecone.
- Screw in the heavy-duty eye hooks securely.
- Loop leather straps around the main 1-inch rope at generous 12-to-15-inch intervals.
- Clip the pinecone eyelets directly onto the leather loops using brass S-hooks.
- Drape the heavy rope with deep, dramatic swoops across a large wall or mantle.
- Tips and Variations: Leave the cones raw and unfinished, allowing their natural weathered gray and amber wood tones to stand out against the thick cordage.
17. Delicate Metallic Leaf & Silver Dipped Pinecone Garland
A shimmering, winter-inspired piece where the tips of each pinecone scale are gilded with genuine silver leaf or chrome pigment.
- What This Idea Means: A modern take on winter metallics that pairs silver and nickel hues with cool-toned neutral interiors and modern stone mantels.
- Materials Needed:
- 20 small-to-medium pinecones
- Silver leaf sheets and gilding adhesive (size)
- Soft mop gilding brush
- Fine silver jewelry wire or slate-gray satin cord
- How to Make It:
- Apply a thin layer of gilding adhesive exclusively to the outer scale tips of each pinecone.
- Let the adhesive become tacky (about 10 minutes).
- Carefully apply sheets of silver leaf over the cones, pressing the foil into the scales with a dry mop brush.
- Brush away excess silver leaf, leaving clean, shimmering metallic edges on the scale tips.
- String the silver-tipped cones onto a fine slate-gray satin ribbon.
- Tips and Variations: Combine silver leaf with matte gunmetal spray paint on the inner core for a striking, moody multi-metal contrast.
18. Modern Coastal Driftwood & Pinecone Garland
A breezy coastal design alternating tumbled sea driftwood segments, raw sea-glass stones, and salt-bleached pinecones on thick marine rope.
- What This Idea Means: Brings seaside textures into the home, blending weathered driftwood, sea-softened glass, and beach-foraged pinecones.
- Materials Needed:
- 15 weather-bleached coastal pinecones
- Pre-drilled natural sea driftwood pieces (3 to 4 inches long)
- Matte frosted sea glass beads (aqua, seafoam, and mist)
- Braided unbleached hemp cord
- How to Make It:
- Drill small 1/8-inch holes through the center of your driftwood pieces.
- Thread a driftwood piece onto the hemp cord, tying a small overhand knot on either side to hold it in place.
- String 2 frosted sea glass beads, then wire a bleached pinecone onto the cord.
- Repeat the driftwood -> beads -> pinecone sequence consistently along the cord.
- Finish the ends with natural nautical loop knots.
- Tips and Variations: Soak the pinecones in a light sea-salt water bath before drying to leave a faint, crystalline salt crust on the scales.
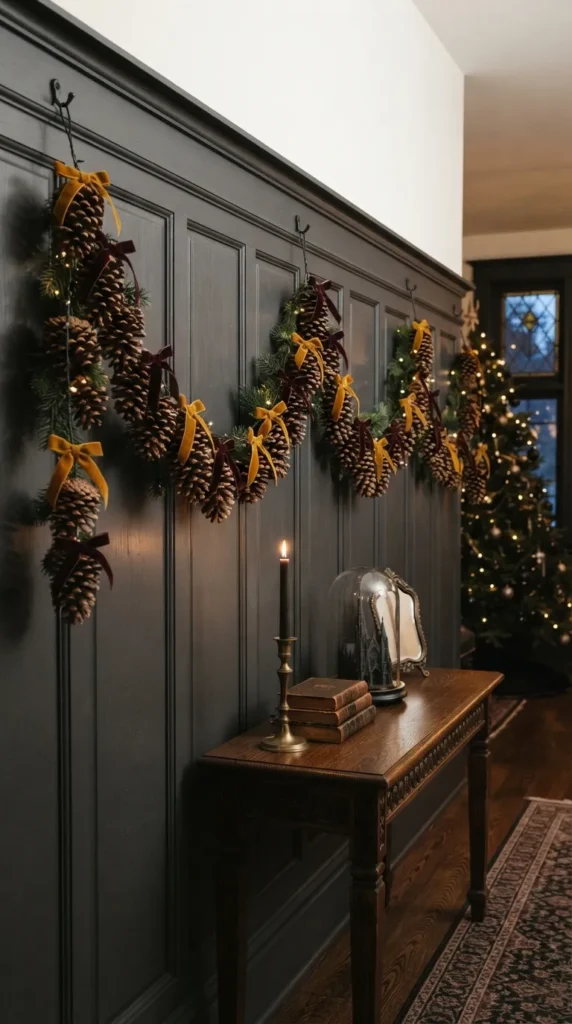
19. Velvet Bow Tie-Off Pinecone Garland
This classic-meets-contemporary garland features individually wired pinecones tied to a main cord with tailored, minimalist velvet ribbon bows.
- What This Idea Means: Uses structured ribbon bows as crisp geometric anchors, adding tailored softness and tailored symmetry across the garland.
- Materials Needed:
- 20 medium, open pinecones
- 3/8-inch French velvet ribbon in dusty rose, mustard, or deep espresso
- Narrow brass floral wire
- Braided neutral cord or leather lace
- How to Make It:
- Cut the velvet ribbon into uniform 8-inch strips.
- Wire a small length of floral wire around the base of each pinecone.
- Fasten the pinecone wire onto the main leather cord.
- Tie an 8-inch velvet ribbon strip into a clean bow directly over the wire connection point to hide all mechanics.
- Trim the ribbon tails with sharp angled cuts for a clean, tailored profile.
- Tips and Variations: Choose ribbon colors that complement your living room’s accent pillows or wall art for a cohesive interior color palette.
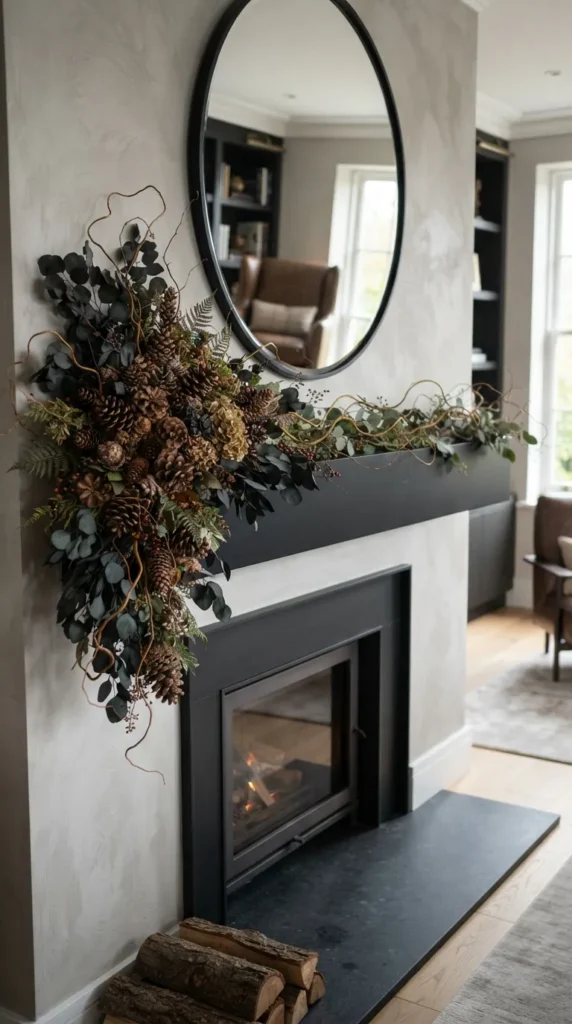
20. Layered Asymmetrical Ashen Pinecone Mantel Runner
An organic, asymmetrical garland design that builds dense, layered pinecone clusters on one side of a fireplace mantel before tapering into a clean single strand.
- What This Idea Means: Breaks away from rigid symmetry, using an intentional, organic visual weight that mirrors natural botanical growth patterns.
- Materials Needed:
- 35 to 40 assorted pinecones in various sizes (small, medium, large)
- Dried eucalyptus, curly willow branches, and dried bunny tails
- Heavy armature wire and dark green floral tape
- How to Make It:
- Construct a sturdy 6-foot wire armature base.
- On the left side of the armature, cluster large pinecones, dried willow branches, and dense greenery into a thick, dramatic focal point.
- As you move toward the center, gradually transition to medium pinecones spaced further apart.
- Taper the right side into a single, delicate strand of small cones and fine eucalyptus leaves.
- Drape across the mantel, allowing the heavy cluster side to cascade 12 inches down the mantel’s edge.
- Tips and Variations: Anchor the heavy cluster side with a cluster of pillar candles of varying heights to balance the visual composition.
Essential Preparation & Preservation Techniques
To ensure your handmade pinecone garlands remain pristine, clean, and bug-free year after year, follow these essential preparation steps:
Cleaning and Sanitizing
- Water & Vinegar Bath: Submerge raw foraged pinecones in a large tub filled with warm water and 1 cup of white distilled vinegar for 20 minutes. This removes loose dirt, pollen, and debris.
- Oven Baking (De-bugging and De-sapping): Line baking sheets with aluminum foil. Spread the wet pinecones in a single layer. Bake at 100°C (212°F) for 1.5 to 2 hours. The heat kills lingering insects, liquefies sticky tree sap into a natural glossy glaze, and fully reopens the pinecone scales.
- Cooling and Curing: Allow the pinecones to cool completely at room temperature for at least 1 hour before painting, drilling, or stringing.
Sealing and Long-Term Storage
- Clear Protective Sealing: Spray finished pinecones with a matte or semi-gloss acrylic aerosol sealer. This locks in colors, prevents moisture absorption, and keeps the scales from closing up in humid rooms.
- Seasonal Storage: Store garlands loosely coiled in breathable plastic storage bins or wrapped in tissue paper. Avoid heavy stacking to prevent delicate pinecone scales from breaking.