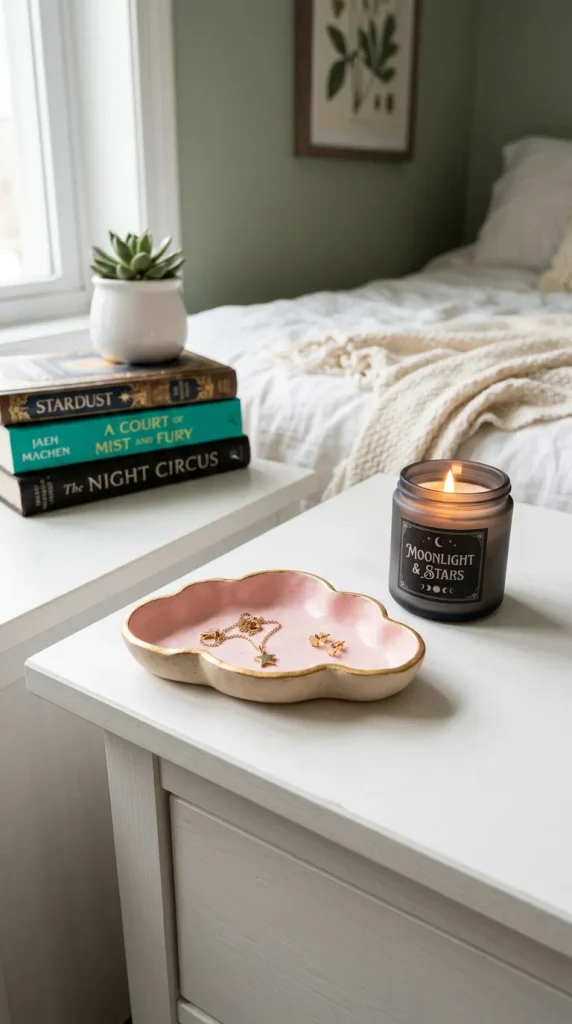
Keep your rings, earrings, and daily jewelry organized on a gorgeous, hand-sculpted clay dish featuring delicate painted edges.
- Materials Needed: Air-dry clay, a rolling pin, a small round bowl or cookie cutter for tracing, fine-grit sandpaper, acrylic paints, and a metallic gold paint pen.
- How to Make It:
- Pinch off a handful of air-dry clay and knead it until soft and pliable.
- Roll the clay out flat on a smooth surface to a uniform thickness of about one-quarter inch.
- Use a bowl as a template to cut out a clean circle using a butter knife, or cut the clay into organic shapes like clouds, flowers, or shells.
- Gently press the flat clay circle down inside a small, shallow bowl to give the edges an upward curve, creating the dish basin.
- Let the dish dry for 48 hours. Once hardened, sand any rough edges smooth.
- Paint the interior of the dish with a soft pastel color, and use your metallic gold pen to trace a luxurious border along the rim.
- Tips: Keep a small bowl of water nearby to wet your fingertips and smooth out any surface cracks while molding the clay.
- Variations: Press real leaves or fern fronds into the wet clay before it dries to leave a permanent organic fossil imprint on the bottom of the dish.
8. Painted Sunset Mirror
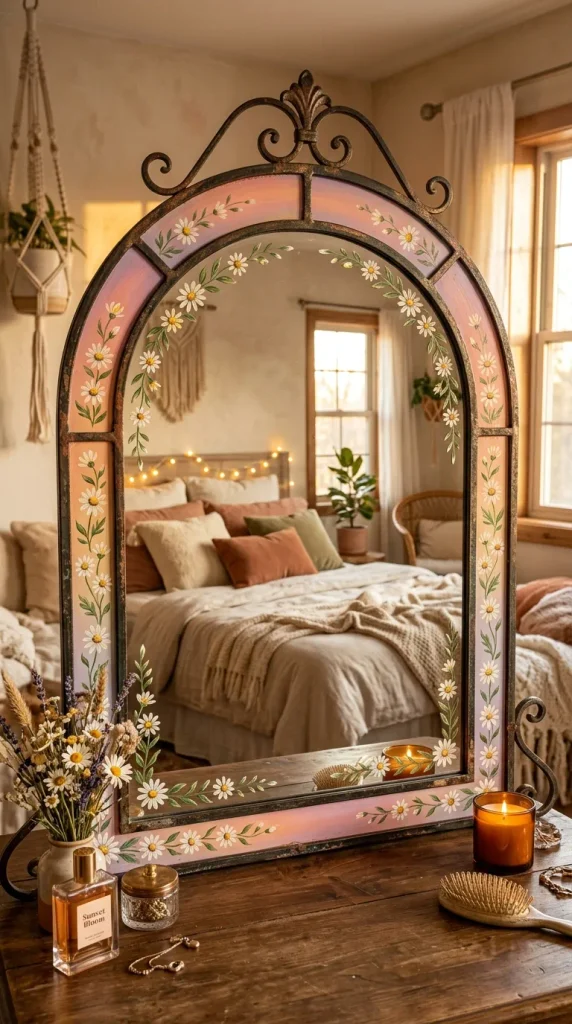
Transform a basic thrifted vanity mirror into a dreamy, golden-hour statement piece with vibrant glass paint.
- Materials Needed: A plain round or arched mirror, glass-safe acrylic paints or permanent glass paint markers in sunset shades (peach, lavender, soft yellow, warm pink), and glass cleaner.
- How to Make It:
- Clean the mirror surface thoroughly with glass cleaner and wipe it dry with a lint-free cloth.
- Plan out your design—such as an arching gradient sunset, abstract pastel shapes, or floating daisy motifs—along the outer edges of the glass.
- Use your glass paint markers or fine brushes to apply the colors directly onto the glass surface. Work from light background tones to darker foreground details.
- Let the paint cure completely according to the paint manufacturer’s instructions (some require baking, while others air-dry permanently).
- Hang the mirror where it can catch natural sunlight, casting colorful glows across your walls.
- Tips: If you make a mistake while painting on glass, simply wipe it away immediately with a cotton swab dipped in rubbing alcohol and start over.
- Variations: Paint delicate vine leaves and tiny mushrooms creeping up from the bottom corners of the mirror for a cottagecore aesthetic.
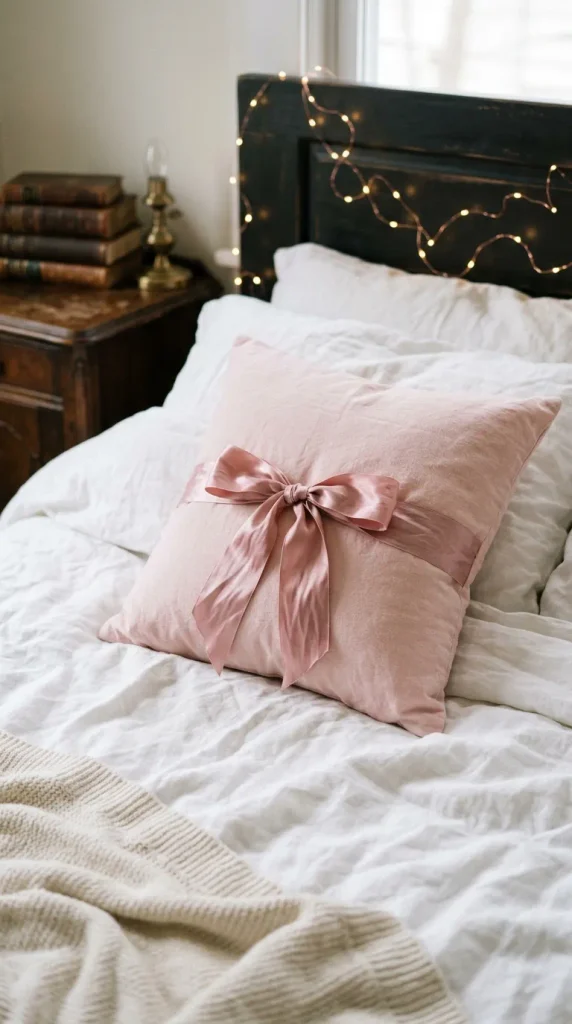
9. Aesthetic Ribbon Bow Pillows
Add a touch of coquette charm to your bed or desk chair by sewing or gluing oversized satin ribbon bows onto plain throw pillows.
- Materials Needed: A plain solid-color throw pillow, wide double-faced satin ribbon (at least 2 inches wide), fabric scissors, and fabric glue or a needle and thread.
- How to Make It:
- Cut two long strips of satin ribbon: one long enough to wrap completely around the pillow like a gift box, and another to form a separate bow.
- Wrap the first ribbon tightly around the center of the pillow, securing the ends securely on the back with hot glue or hand-stitching.
- Tie your second piece of ribbon into a full, fluffy bow with long, elegant tails.
- Attach the finished bow directly over the intersection of the wrapped ribbon on the front of the pillow.
- Trim the ends of the ribbon at a clean diagonal angle to prevent fraying.
- Tips: Use a lighter to quickly and carefully wave the cut edges of the satin ribbon through the flame; this melts the synthetic fibers so they never fray.
- Variations: Mix and match contrasting ribbon colors, such as baby pink bows on a crisp white linen pillow or black velvet bows on a sage green background.
10. Pressed Flower Resin Coasters
Create durable, glossy glass-like coasters filled with delicate dried petals to rest your iced coffees and study mugs upon.
- Materials Needed: A silicone coaster mold kit, clear casting epoxy resin and hardener, dried pressed flower petals, and a small heat gun or butane torch.
- How to Make It:
- Set up your workspace in a well-ventilated room, protecting your table with a silicone mat or plastic sheet.
- Mix equal parts resin and hardener in a plastic cup according to the package instructions, stirring slowly for three minutes to minimize air bubbles.
- Pour a thin base layer of clear resin into the bottom of your silicone coaster molds.
- Use tweezers to carefully arrange your dried flower petals face-down into the wet resin.
- Pour a second top layer of resin over the flowers until the mold is filled to the brim.
- Pass a heat gun quickly over the surface to pop any trapped bubbles. Let the coasters cure undisturbed for 24 to 48 hours before popping them out of the molds.
- Tips: Always wear gloves and work in a well-ventilated area when mixing casting epoxy resin for safety.
- Variations: Add a pinch of metallic gold leaf flakes into the resin mix alongside the flowers for an extra touch of sparkle.
11. Aesthetic Book Stack with Custom Dust Jackets
Curate a cohesive bookshelf display by wrapping old paperback or hardcover books in custom aesthetic paper covers.
- Materials Needed: Old books with damaged or mismatched covers, heavy craft paper or neutral cardstock, scissors, double-sided tape, and a custom printable label template.
- How to Make It:
- Measure the height and width of your books when opened flat.
- Cut your craft paper to size, leaving an extra two inches on the left and right sides to fold inward.
- Wrap the paper tightly around the book cover, folding the excess paper neatly inside the front and back covers like jacket flaps. Secure the folds with invisible tape.
- Design and print minimalist spine labels featuring your favorite aesthetic quotes, poetry lines, or simple volume numbers.
- Stick the labels onto the spines and stack the books horizontally on your nightstand or desk, topped with a candle or small plant.
- Tips: Use neutral kraft paper, muted sage green paper, or textured linen cardstock to achieve a clean, cohesive Scandinavian library aesthetic.
- Variations: Stamp floral patterns or hand-write poetry onto the plain paper covers using a calligraphy pen before wrapping the books.
12. Hanging Test Tube Propagation Station
Combine a love for indoor plants with aesthetic wall decor by building a minimalist wooden propagation station.
- Materials Needed: A small, narrow piece of stained wood, test tubes or small glass vials, leather cord or twine, a drill with a spade bit, and water propagation cuttings (like pothos or ivy).
- How to Make It:
- Sand your wooden plank until smooth, and apply a light wood stain or clear protective sealer.
- Use a drill to bore circular indentations or holes across the top surface of the wood just large enough for your glass test tubes to slide into securely without falling through.
- Drill small holes at the top corners of the wood plank and thread your leather cord through to create a sturdy hanging loop.
- Slide the glass test tubes into the bored holes, fill them three-quarters full with fresh water, and insert your plant cuttings.
- Hang the station on a wall that receives bright, indirect sunlight.
- Tips: Change the water in the test tubes every week to keep your plant cuttings healthy and encourage fast root growth.
- Variations: Hang multiple wooden planks staggered at different heights to create a multi-tiered vertical indoor jungle garden.
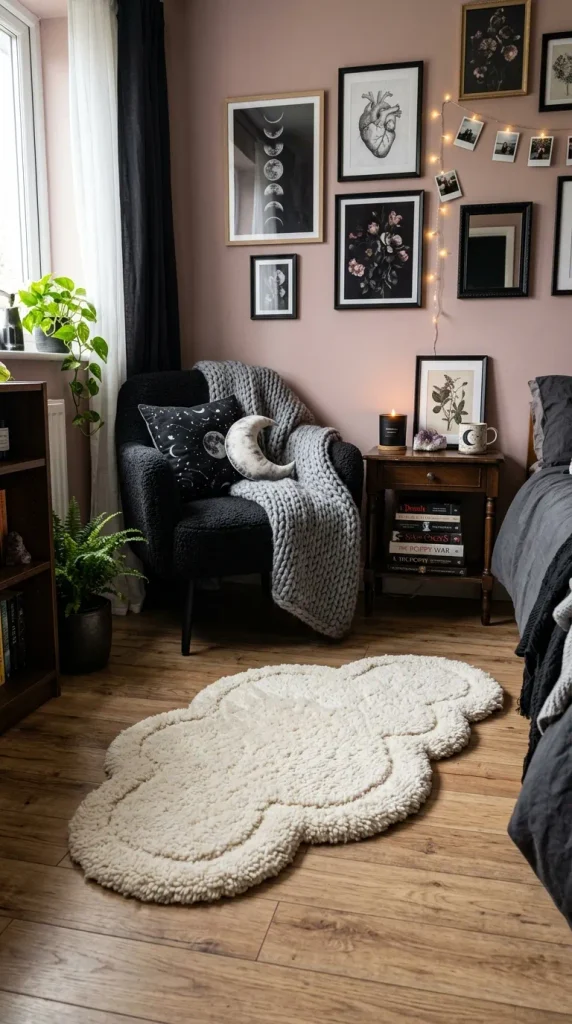
13. Cloud-Shaped Tufted Rug
Add supreme coziness to your floor space with a soft, handmade latch-hook or punch-needle rug shaped like a fluffy cloud.
- Materials Needed: Monks cloth or rug canvas, a punch needle tool or latch hook, bulky yarn in white, cream, and soft gray, and non-slip rug backing spray.
- How to Make It:
- Draw a large, billowy cloud outline onto your monks cloth using a fabric marker.
- Stretch the cloth tightly inside a wooden rug frame or embroidery hoop.
- Thread your punch needle with white yarn and punch loops closely across the surface of the cloud design, working from the outside edges inward.
- Use soft gray yarn to add subtle shadows along the bottom curves of the cloud for a 3D effect.
- Trim any loose yarn ends, apply non-slip latex spray to the back of the cloth to lock the loops in place, and trim the excess fabric borders.
- Tips: Keep your loops uniform in height by pressing the punch needle down fully into the fabric every single time.
- Variations: Shape your rug like a pastel daisy flower or a shimmering star instead of a cloud to match your room’s specific theme.
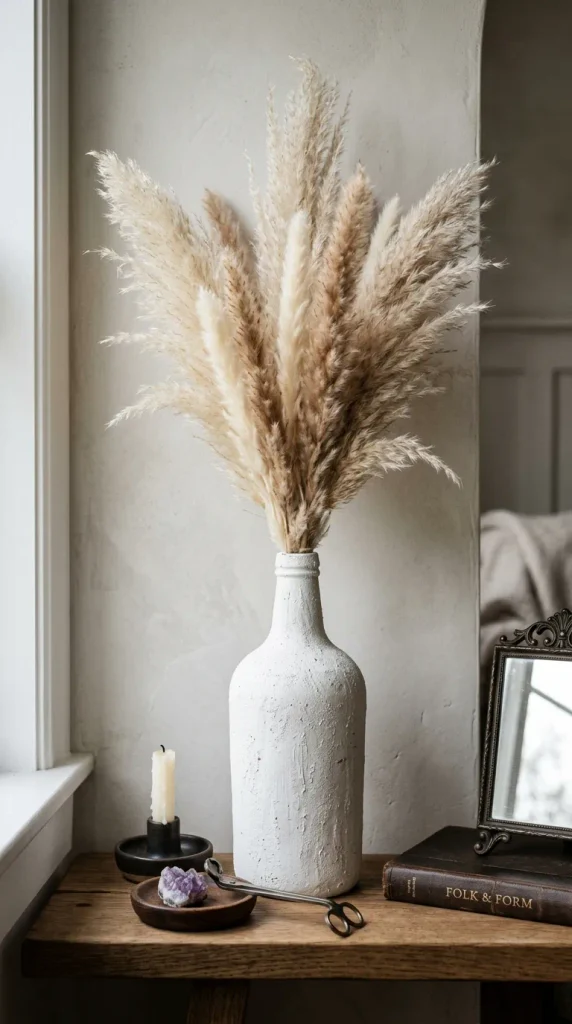
14. Ceramic-Look Textured Vase from Glass Bottles
Upcycle ordinary glass jars or wine bottles into high-end ceramic artisanal vases using baking soda and acrylic paint.
- Materials Needed: Clean glass bottles or jars, matte acrylic paint in white or beige, standard baking soda, a paintbrush, and a mixing bowl.
- How to Make It:
- Wash and dry your glass bottles thoroughly, removing all sticky labels and residue.
- In a small mixing bowl, combine your matte acrylic paint with baking soda (use about three parts paint to one part baking soda). Stir thoroughly until it forms a thick, textured paste.
- Use a paintbrush to coat the entire glass bottle with a thick layer of the textured paint mixture.
- Let the first coat dry for an hour, then apply a second coat using stippling motions with your brush to maximize the rustic, ceramic-like stoneware texture.
- Allow the vase to dry completely for 24 hours before filling it with dried pampas grass or faux eucalyptus stems.
- Tips: Do not use real water inside these upcycled vases, as the paint and baking soda mixture is porous and not fully waterproof. Stick to dry florals!
- Variations: Mix a pinch of fine sand into your paint mixture along with the baking soda for an even rougher, authentic terracotta stone finish.
15. Aesthetic LED Neon Wire Wall Quote