Introduction
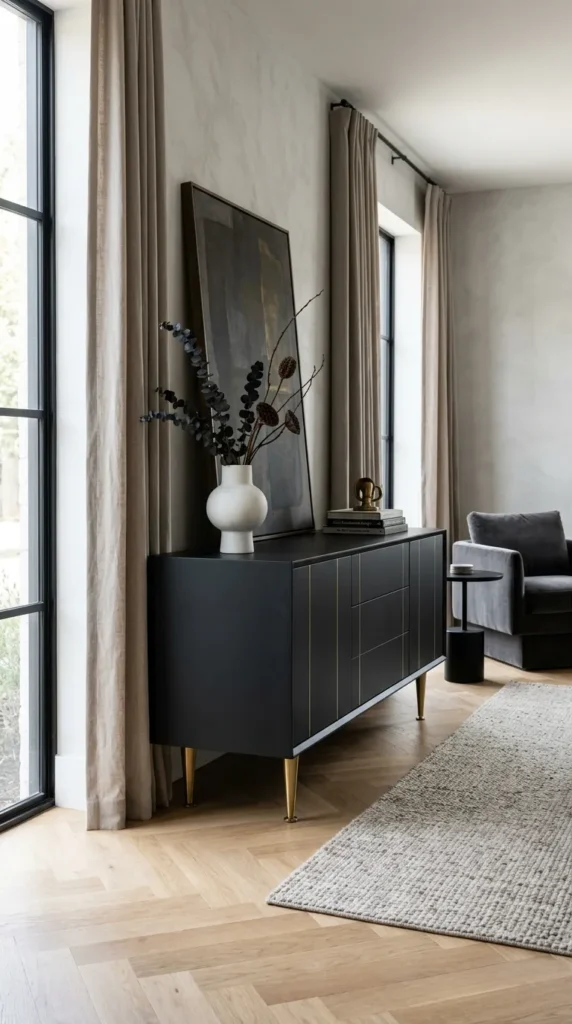
Matte charcoal combined with warm metallic accents creates an understated, high-end aesthetic. This finish absorbs light evenly, producing a velvety depth that grounds any modern living room, dining room, or home office.
What This Idea Means
This technique utilizes an ultra-matte or flat mineral charcoal paint applied uniformly over the body of a piece, paired with precision-applied metallic brass or gold accents on edges, recessed lines, or original hardware. The contrast between light-absorbing dark paint and reflective warm metal delivers a tailored architectural balance.
How to Make It
- Thoroughly clean the furniture surface with a degreasing agent like TSP (trisodium phosphate) to remove oils and dirt.
- Sand the entire surface with 120-grit sandpaper to break any existing topcoat, followed by 220-grit sandpaper for smoothness. Wipe away all residual dust with a tack cloth.
- Apply a high-adhesion stain-blocking bonding primer, letting it cure completely for 4 to 6 hours.
- Paint two even coats of deep charcoal ultra-matte acrylic mineral paint or chalk paint using a synthetic smooth-finish roller and high-density angle sash brush. Sand lightly with 320-grit between coats.
- Use delicate-surface painter’s tape to mask precise geometric accent zones, trim, or chamfered edges.
- Apply metallic brass liquid gilding paint or fine metallic leafing sizing along the masked areas.
- Seal the entire piece with a matte polycrylic clear protective topcoat to preserve the non-reflective finish while locking in durability.
Tips and Variations
- Tip: Always remove masking tape while the metallic paint is slightly wet to ensure crisp, razor-sharp lines without edge tearing.
- Variation: Swap the brass trim for brushed champagne bronze or matte copper for an earthy, industrial-modern aesthetic.
2. Modern Fluted Wood and Alabaster White
Introduction
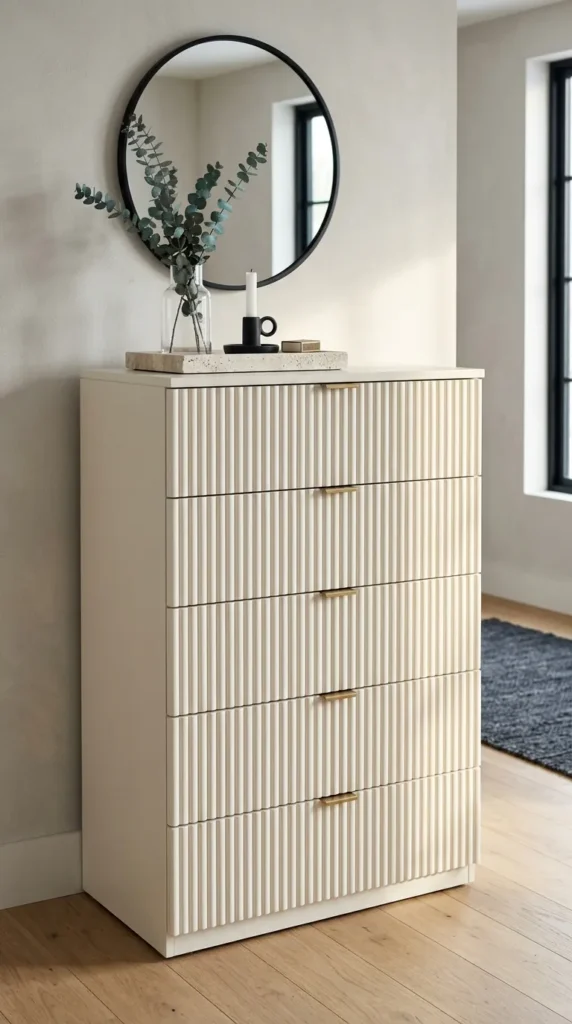
Texture is a defining pillar of modern interior design. Applying slender wood dowels or fluted moldings onto flat furniture surfaces before painting yields dynamic shadows and tactile interest.
What This Idea Means
Fluting involves attaching half-round wood strips or reeds vertically across drawer fronts or cabinet doors, followed by a uniform coating of soft, warm alabaster white paint. This softens boxy silhouettes and transforms builder-grade pieces into sculptural statement furniture.
How to Make It
- Measure the height and width of cabinet doors or drawer fronts accurately.
- Cut half-round pine dowels or prefabricated MDF fluted panels to match your exact measurements using a miter box and handsaw.
- Sand the cut dowel edges with 180-grit sandpaper.
- Secure the fluting strips side by side across the surface using strong construction adhesive or wood glue, reinforcing them with 18-gauge headless pin nails if necessary.
- Wipe away any excess glue squeeze-out with a damp rag before it hardens.
- Fill small pinholes or seam imperfections with sandable wood filler and sand smooth once dry.
- Prime the entire assembly with an oil-based or high-solid water-based primer to prevent wood grain raising.
- Spray or brush two generous coats of warm alabaster white furniture enamel with a satin finish.
- Finish with a clear satin polyurethane topcoat for everyday wipeability.
Tips and Variations
- Tip: Use a continuous straight edge as a guide while gluing to prevent subtle creeping or angled misalignment of the vertical dowels.
- Variation: Paint the fluted panels in a tonal contrast—such as soft putty gray on the fluting with warm ivory on the main structural frame.
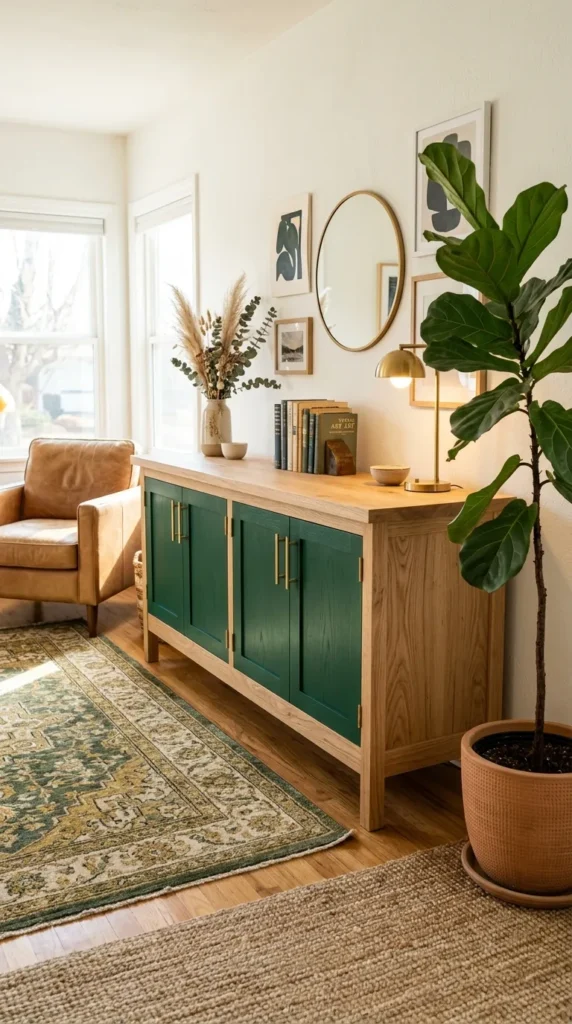
3. Moody Emerald Green with Raw Wood Contrast
Introduction
Juxtaposing rich, jewel-toned paint with stripped, natural raw wood surfaces brings warmth, organic earthiness, and modern luxury into balance.
What This Idea Means
This concept leaves specific architectural components of the furniture—such as the natural tabletop, exposed interior shelves, or tapered mid-century legs—in their raw, pale wood state, while enveloping the surrounding cabinetry in deep forest or moody emerald green satin paint.
How to Make It
- Strip old stain and varnish from selected wooden parts using a non-toxic citrus-based paint stripper.
- Neutralize the stripped raw wood, let dry, and sand from 80-grit progressively up to 220-grit to expose fresh, pale grain.
- Mask off the exposed raw wood sections tightly with high-grade multi-surface masking tape.
- Prep and sand the remaining body sections of the furniture piece.
- Apply a high-hide tinted primer across the painted frame sections.
- Apply two smooth coats of deep moody emerald green acrylic enamel.
- Remove the tape carefully.
- Coat the raw wood areas with an invisible, non-yellowing dead-flat water-based matte polycrylic sealer or white-pigmented wood oil to preserve the natural pale tone without ambering.
- Protect the painted body with an ultra-durable satin lacquer or polyurethane.
Tips and Variations
- Tip: Use a specialized pre-stain wood conditioner on softwoods like pine to keep the natural wood looking clear and blotch-free before sealing.
- Variation: Replace emerald green with deep Prussian blue or rich midnight navy for a maritime modern look.
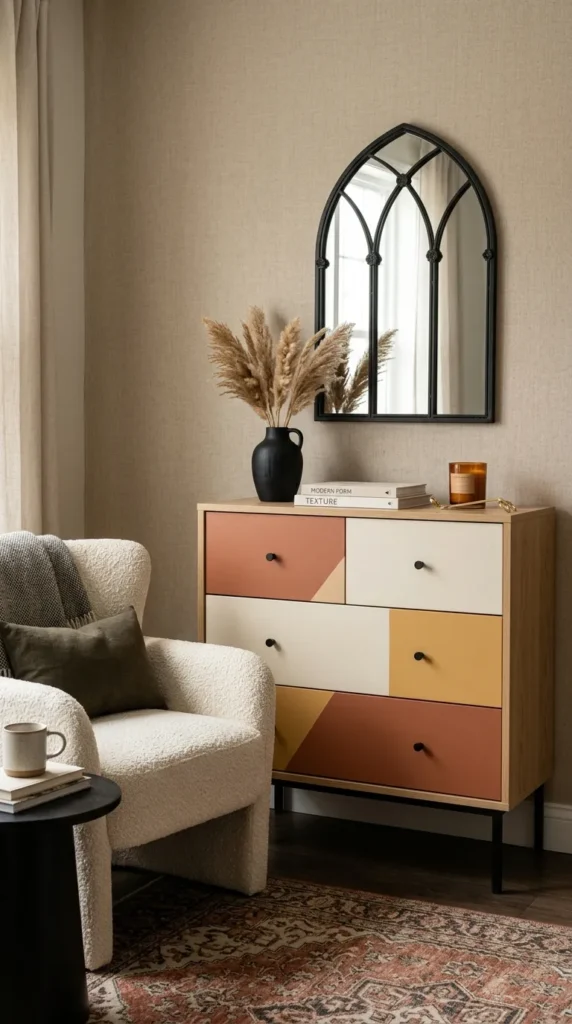
4. Organic Terracotta and Cream Color Blocking
Introduction
Color blocking with warm, earthy Mediterranean tones gives older furniture pieces a vibrant, artistic overhaul suitable for bohemian, Japandi, and contemporary rooms.
What This Idea Means
Large, deliberate zones of the piece—such as alternating drawers, angled diagonal divisions, or arches—are painted in warm baked terracotta, ochre, and warm cream. This technique visually breaks up heavy massing and highlights geometric flow.
How to Make It
- Disassemble hardware and thoroughly clean all surfaces with detergent and water.
- Sand lightly with 220-grit sandpaper and apply a bonding waterborne primer across all sections.
- Measure and pencil in your desired blocking zones, such as a painted arch spanning across multiple drawer fronts or bold horizontal stripes.
- Apply low-tack fine line painter’s tape along the drafted lines, burnishing the edge firmly with a putty knife or credit card to stop paint bleed.
- Paint the lighter cream sections first with two coats, allowing adequate drying time between coats.
- Re-tape along the dried seam and apply the saturated baked terracotta paint in two light, uniform coats.
- Carefully pull the painter’s tape back at a sharp 45-degree angle while the second coat is still slightly tacky.
- Seal the finished design with two coats of water-based clear matte varnish.
Tips and Variations
- Tip: Paint a tiny amount of the base color over the taped edge before applying the second color; this completely locks the seal and ensures zero bleeding under the tape.
- Variation: Introduce an arch motif over two vertical cabinet doors using a pencil attached to string as a compass for drafting the curved line.
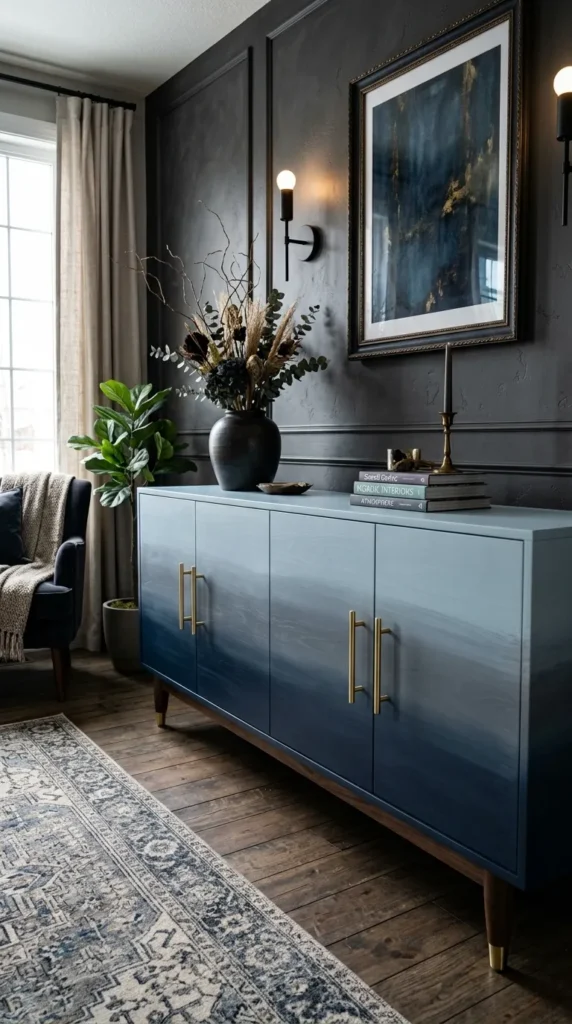
5. Seamless Ombré Gradient Fade
Introduction
An ombré paint transition creates a soft, ethereal diffusion of color that moves fluidly from dark to light, instantly transforming a standard dresser or chest of drawers into a gradient focal point.
What This Idea Means
Two or three neighboring shades within the same color family (for instance, deep indigo, dusty slate, and pale sky blue) are blended together seamlessly on the surface while wet, eliminating harsh lines and yielding a smooth, atmospheric transition.
How to Make It
- Prep the entire furniture surface with thorough sanding and a solid white base primer coat.
- Select your gradient colors: dark bottom, mid-tone center, and light top tone.
- Pour each paint color into separate roller trays and keep a spray bottle filled with clean water on hand.
- Paint the bottom third in the deepest shade and the top third in the lightest shade using separate microfiber mini-rollers.
- Apply the intermediate mid-tone color quickly to the center section.
- While all three paint bands are still wet, lightly mist the boundaries between colors with water.
- Use a wide, dry, natural-bristle blending brush held at a 45-degree angle, sweeping back and forth in continuous horizontal cross-hatch strokes to feather the wet paint edges into one another.
- Allow the blended surface to dry completely for 24 hours.
- Finish with an even, protective coat of satin spray lacquer or clear furniture wax.
Tips and Variations
- Tip: Work quickly in small sections, or use an acrylic paint extender (glaze medium) to slow drying time and allow comfortable blending.
- Variation: Apply an ombré blend that moves horizontally from left to right across a wide horizontal buffet or sideboard.
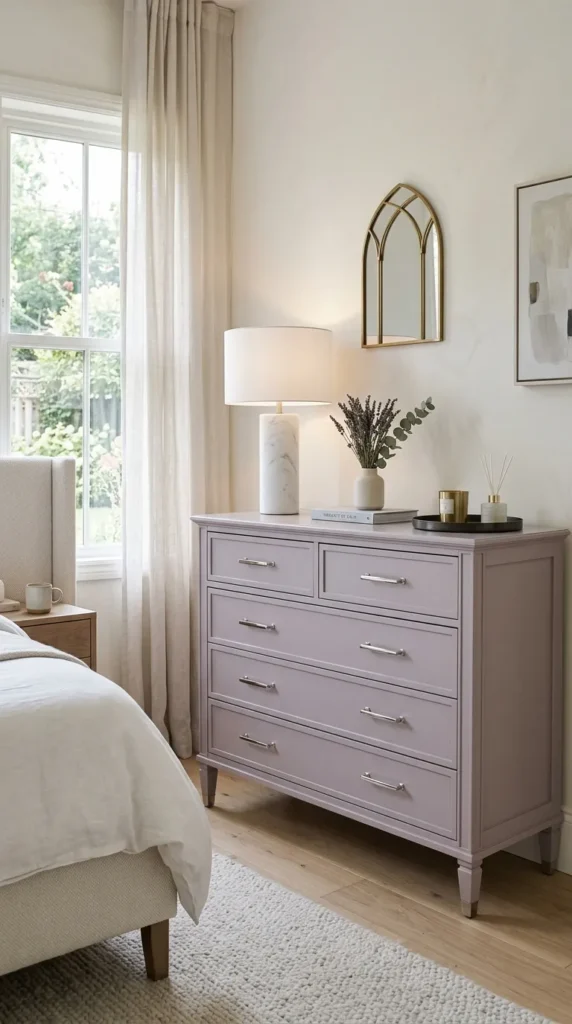
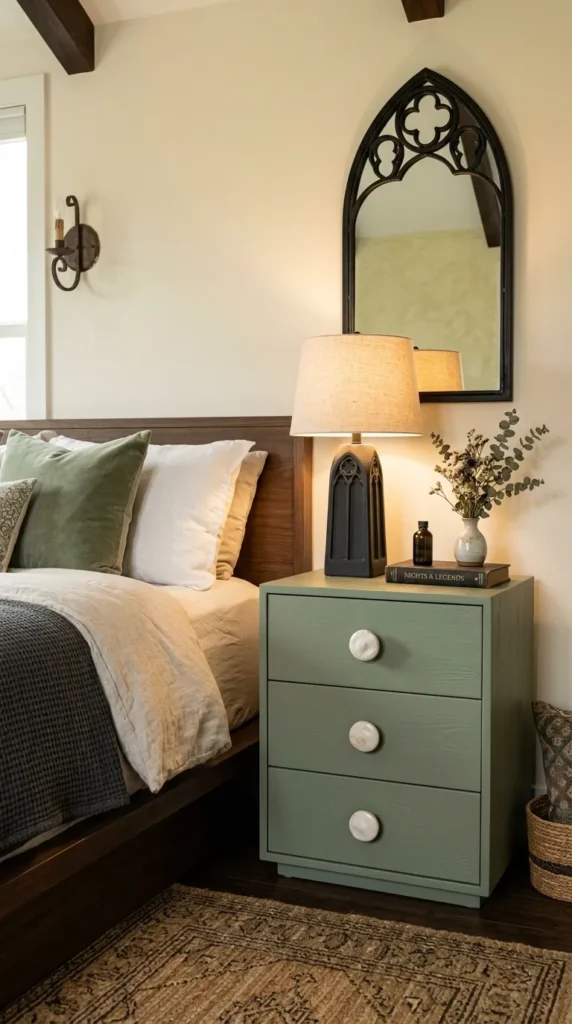
6. Modern Soft Sage Green with Ceramic Pulls
Introduction
Soft sage green brings the tranquility of nature indoors. It serves as a gentle, serene alternative to gray or beige, fitting seamlessly into transitional and modern organic spaces.
What This Idea Means
This look focuses on a monochromatic, ultra-clean application of pale, muted eucalyptus or sage green chalk/mineral paint, accentuated by textured off-white ceramic, plaster, or unglazed porcelain drawer pulls.
How to Make It
- Remove all old hardware, fill oversized holes with wood putty, and sand smooth once cured.
- Clean thoroughly with rubbing alcohol or a mild degreaser.
- Scuff sand with 180-grit sandpaper and prime with a shellac-based or high-build bonding primer.
- Apply two to three coats of sage green mineral furniture paint using a fine-finish synthetic bristle brush, moving strictly with the grain of the wood.
- Sand very lightly between coats with ultra-fine 400-grit sandpaper to remove brush marks and airborne dust nubs.
- Measure and drill new centralized pilot holes for replacement hardware.
- Seal the paint with an ultra-matte non-yellowing topcoat for a soft, velvety feel.
- Install handcrafted off-white unglazed ceramic knobs or organic clay hardware.
Tips and Variations
- Tip: Add a splash of mineral paint conditioner to eliminate brush marks and achieve a factory-smooth self-leveling finish.
- Variation: Pair the sage green body with a natural bleached oak wood top for an understated Scandinavian aesthetic.
7. Distressed Scandinavian Limewash Finish
Introduction
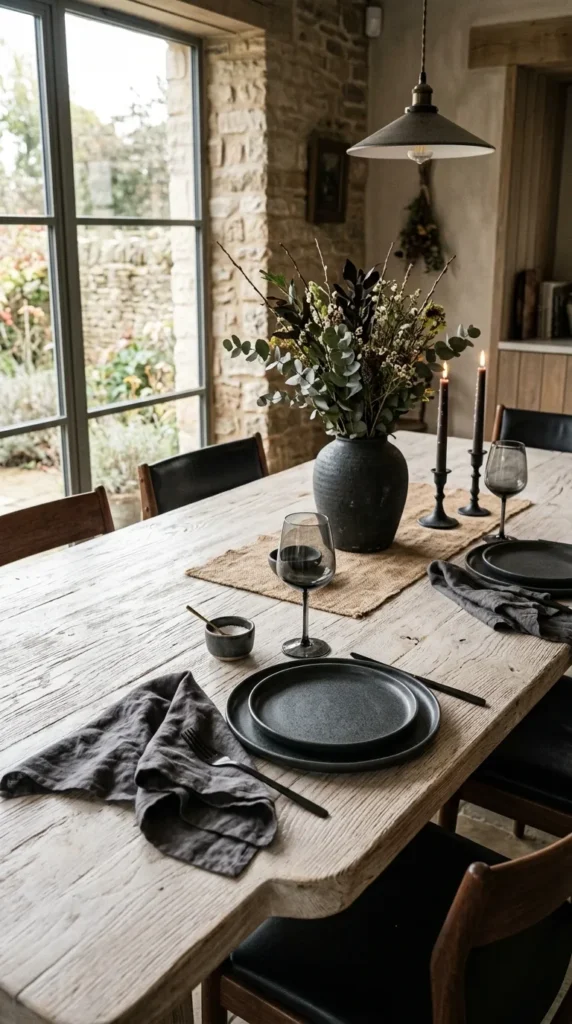
Limewashing and chalk-wash finishes bring out the rich, textural grain of wood while muting harsh yellow or orange undertones into an airy, chalky, weathered aesthetic.
What This Idea Means
Instead of creating an opaque layer of solid color, this technique uses thinned mineral or lime-based paint brushed over textured wood and partially wiped away, lodging pale mineral pigments deep within open grain grooves.
How to Make It
- Strip all existing varnish, sealers, or paints down to the bare, untreated wood grain.
- Use a brass-bristle wire brush to sweep along the natural wood grain lines, clearing out soft grain fibers to deepen the natural texture.
- Mix a limewashing glaze or dilute matte off-white mineral paint with water at a 1:1 ratio.
- Work in manageable 2×2 foot sections, applying the wash generously with a broad utility paintbrush.
- Let the wash sit for 2 to 3 minutes, then gently wipe back the excess paint across the grain using a damp lint-free cotton cloth.
- Adjust opacity by wiping off more paint for a transparent look, or leaving more behind for a chalkier finish.
- Allow the wood to dry for 12 hours.
- Protect the powdery finish with a matte polyurethane sealer or clear microcrystalline furniture wax.
Tips and Variations
- Tip: Oak, ash, and chestnut work best for limewashing due to their prominent, open-pore cellular structures.
- Variation: Apply a charcoal-tinted dark wash instead of white for a weathered, charred-oak modern rustic look.
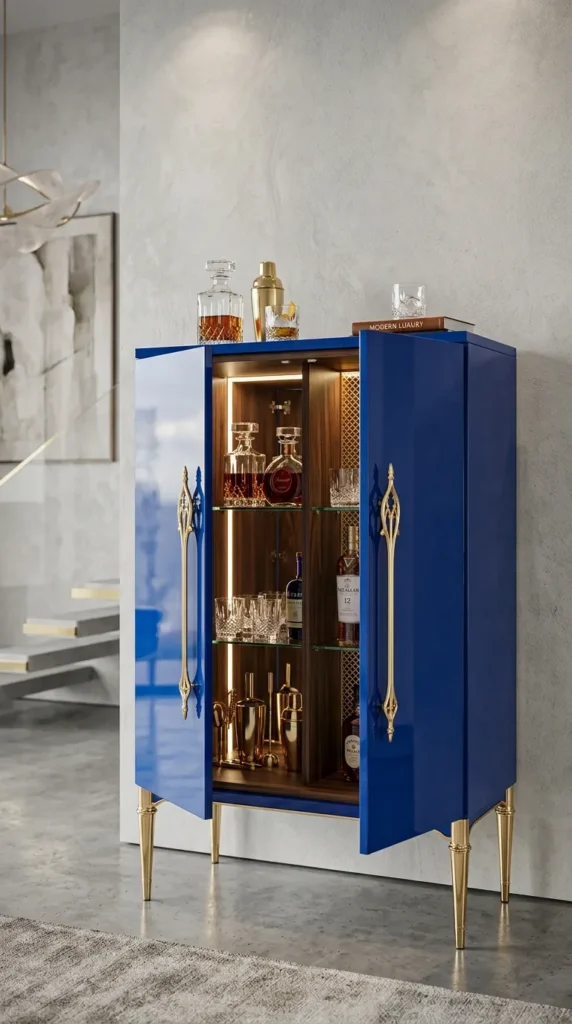
8. High-Gloss Lacquered Cobalt Blue
Introduction
A high-gloss lacquer finish turns an ordinary piece of furniture into a gleaming, high-impact design centerpiece that reflects ambient light throughout the room.
What This Idea Means
Lacquering requires building multiple layers of high-gloss, ultra-saturated cobalt or royal blue enamel, meticulously wet-sanded and polished to a mirror-like, glass-smooth sheen.
How to Make It
- Sand the furniture down completely, ensuring the wood is flat with no dents, scratches, or uneven texture.
- Apply high-build sanding primer; once dry, sand down with 320-grit, then 400-grit sandpaper until completely level.
- Thoroughly clean the work area to ensure no airborne dust or lint particles are present.
- Using an HVLP (high volume, low pressure) paint sprayer, apply a light, even coat of high-gloss cobalt blue urethane enamel paint.
- Allow each coat to dry for 24 hours, then wet-sand lightly with 800-grit automotive wet/dry sandpaper lubricated with water.
- Apply three to four successive coats of gloss enamel, wet-sanding between each layer (progressing through 1000, 1500, and 2000 grits).
- Apply a final high-gloss clear coat.
- Buff the cured clear surface using a mechanical rotary polisher paired with a fine-grit automotive polishing compound and a finishing pad.
Tips and Variations
- Tip: High-gloss reveals every tiny surface flaw; spend 80% of your time on substrate preparation and sanding.
- Variation: Apply this treatment in ultra-deep Chinese red or lustrous emerald green for an eclectic Hollywood Regency mood.
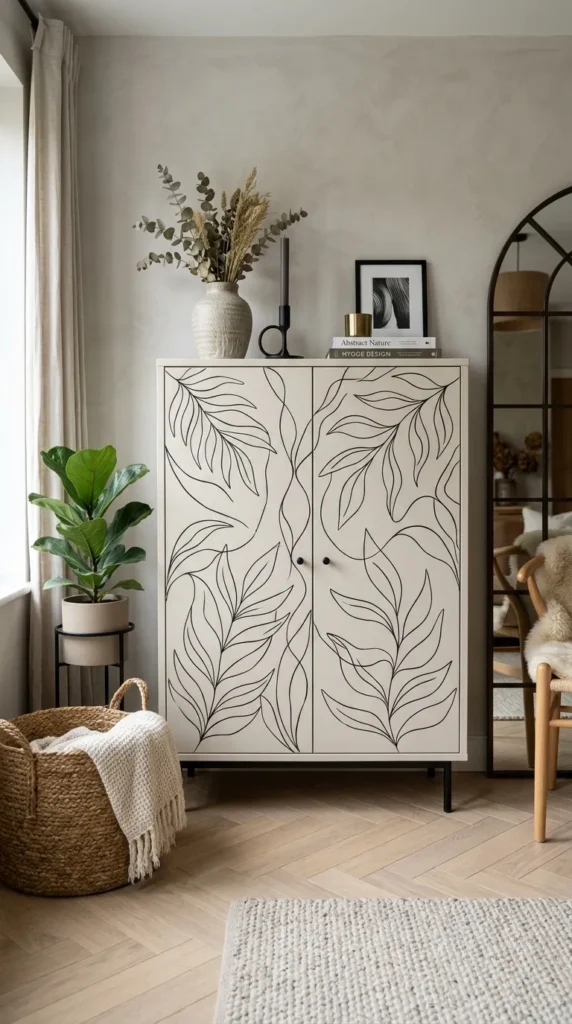
9. Minimalist Line Art and Line Mural Painting
Introduction
Turning plain furniture panels into blank canvases for continuous line drawings creates one-of-a-kind, museum-worthy custom pieces.
What This Idea Means
Abstract human silhouettes, botanical sprigs, or undulating continuous ribbons are hand-painted in crisp black, white, or terracotta line work across plain, monochromatic furniture doors or sides.
How to Make It
- Paint the entire furniture piece in a clean, neutral base tone such as oat milk, warm linen, or matte taupe.
- Let the base paint dry and cure for at least 48 hours.
- Sketch your minimalist line design lightly onto the furniture surface using a soft graphite pencil, or project the image onto the cabinet doors using a digital mini-projector for exact scale.
- Using a fine-tipped long-bristle script liner or rigger artist brush, paint along the graphite lines with a fluid acrylic paint or acrylic paint pen.
- Keep your hand steady by bracing your wrist with a painter’s mahl stick or resting your forearm on a stable support.
- Let the line work dry completely for 6 to 8 hours.
- Erase any visible residual pencil guidelines using a soft art kneaded eraser.
- Seal the finished artwork with two coats of spray-applied satin polycrylic to prevent hand smudging.
Tips and Variations
- Tip: Acrylic paint markers with reversible chisel/bullet nibs provide superior line thickness control for beginners compared to traditional brushes.
- Variation: Reverse the tones by using a solid matte black base with delicate metallic gold or warm white continuous line work.
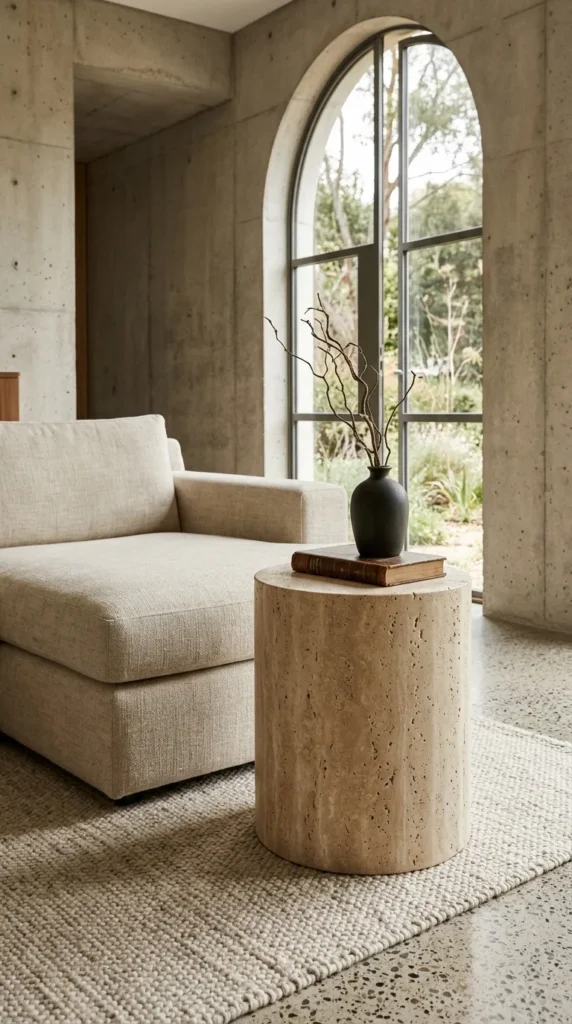
10. Textured Stone and Faux Travertine Finish
Introduction
Faux stone techniques replicate the heavy, sculptural presence of solid stone, concrete, or travertine at a fraction of the weight and cost.
What This Idea Means
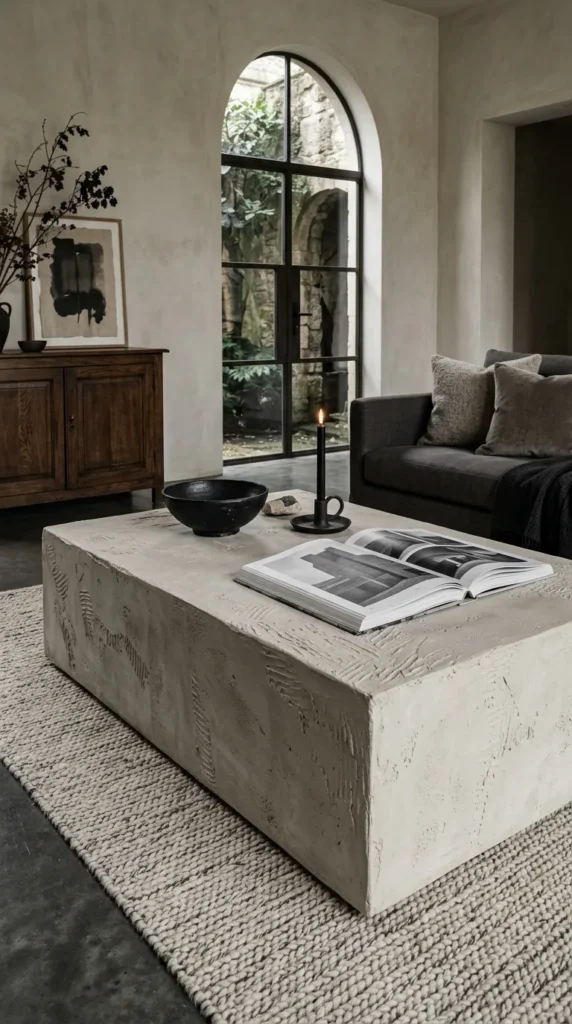
By mixing lightweight textured mediums—such as baking soda, plaster, or joint compound—directly into warm beige and sand-toned paints, you create a tactile, porous stone-like surface on plinths, side tables, or consoles.
How to Make It
- Lightly sand the entire furniture piece with 120-grit sandpaper to give the textured medium strong grip.
- In a paint bucket, mix matte beige or sand acrylic paint with fine baking soda or calcium carbonate powder in a 3:1 paint-to-powder volume ratio until it forms a creamy paste.
- Apply the textured mixture to the furniture using a broad, stiff masonry brush, stippling and dragging across the surface to mimic porous stone sediment layers.
- While the surface is damp, lightly press a sea sponge or plastic grocery bag onto areas to form organic pitting and natural limestone texture.
- Allow the textured coat to dry completely for 12 hours.
- Gently knock down excessively sharp peaks with a 220-grit sanding block.
- Brush on an earthy, diluted warm gray glaze wash into recessed areas to build depth and realism.
- Seal with two coats of dead-flat, penetrating water-based matte sealer.
Tips and Variations
- Tip: Avoid glossy sealers on faux stone, as any surface reflection immediately breaks the illusion of natural, porous rock.
- Variation: Mix in darker charcoal and light gray streaks to create a brutalist cast-concrete look for modern industrial interiors.
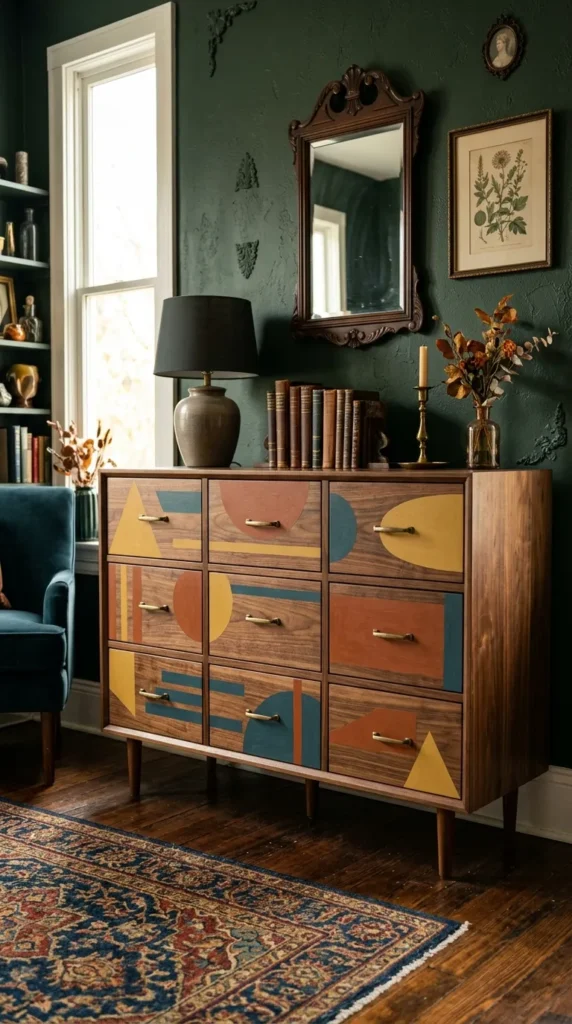
11. Mid-Century Geometric Bauhaus Color Inlay
Introduction
Retro modern design thrives on geometric balance. Bold, asymmetrical shapes honor the functional simplicity of Mid-Century and Bauhaus movements.
What This Idea Means
This look incorporates clean geometric shapes—such as semicircles, triangles, sharp rectangles, and intersecting arcs—painted across drawer banks using primary or muted retro hues (mustard yellow, dusty rust, petrol blue, and bone).
How to Make It
- Remove all drawers and place them sequentially side by side on a flat work table to align your overall design across drawer divisions.
- Sand down the faces and prime with an all-purpose stain blocker.
- Use drafting tools, straight edges, and a beam compass to draw crisp geometric shapes bridging multiple drawers.
- Mask off individual color zones using low-tack blue painter’s tape or automotive vinyl fine-line tape for curves.
- Apply colors one section at a time, allowing each shape to dry before masking the next intersecting plane.
- Apply two thin, smooth coats per color using a dense flock foam roller to avoid stippling texture.
- Carefully peel back masking tape at a 45-degree angle.
- Seal the finished multi-colored design with an all-over satin clear varnish.
- Reinstall drawers into the original frame and attach retro-style conical hardware.
Tips and Variations
- Tip: Keep the surrounding cabinet case in a rich, warm walnut stain to frame and highlight the painted geometric drawer fronts.
- Variation: Restrict your palette to a contemporary monochrome scheme of crisp white, dove gray, slate, and jet black.
12. Soft Muted Lavender and Lilac Modern Refinement
Introduction
Dusty lavender and muted lilac are sophisticated, calming hues that introduce unexpected color to contemporary rooms while maintaining a grounded, upscale aesthetic.
What This Idea Means
Unlike sugary pastel purples, modern dusty lavender features gray and brown undertones. Painted over refined silhouettes and complemented by satin nickel or polished chrome accents, it acts as a soft neutral.
How to Make It
- Clean the piece thoroughly and sand surfaces using 150-grit then 220-grit sandpaper.
- Prime the entire piece with a gray-tinted primer to deepen and balance the purple tones.
- Apply two coats of dusty lilac mineral furniture paint using an angled synthetic brush and a fine microfiber roller.
- Allow 4 hours of drying time between coats, scuffing lightly with a 320-grit sanding pad to keep the finish smooth.
- Apply a high-grade satin or eggshell waterborne topcoat to shield against daily use and wear.
- Install sleek, minimalist polished nickel, brushed chrome, or smoked glass hardware.
Tips and Variations
- Tip: Avoid bright daylight-tinted bulbs when color-testing purples; view your paint samples under your room’s actual ambient lighting to prevent unexpected cool blue undertones.
- Variation: Add soft white painted fluting or reeding on the drawer faces to create tonal variation against the lilac frame.
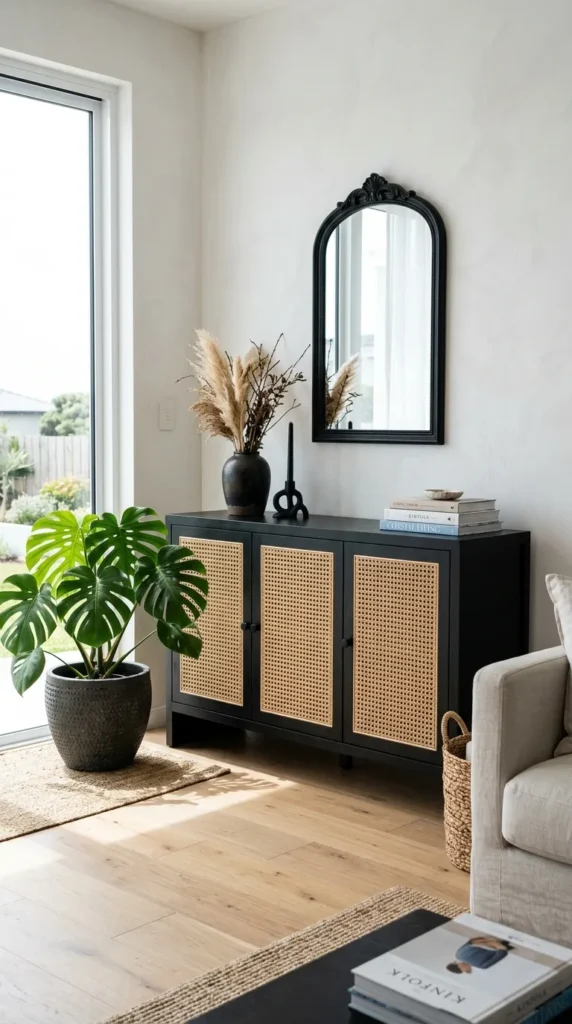
13. Deep Matte Black with Cane Webbing Inserts
Introduction
Pairing dark, structured matte black frames with light, textural rattan or cane webbing provides an organic, breathable aesthetic popular in modern coastal and contemporary styles.
What This Idea Means
Solid center panels of cabinet doors or drawer fronts are cut out and replaced with woven natural cane webbing, while the entire outer wooden structure is painted in an intense, non-reflective velvety matte black.
How to Make It
- Remove cabinet doors. Use a jigsaw or router to cut out the flat inner center panels of the doors, leaving only the outer structural stiles and rails.
- Sand the wooden framework smooth, round over any sharp interior cutout edges, and clean away all sawdust.
- Prime the frames with a black-pigmented bonding primer.
- Apply two to three coats of ultra-matte jet black mineral or furniture paint. Seal with a flat polyurethane topcoat.
- Soak raw cane webbing rolls in warm water for 30 to 45 minutes to make the fibers pliable.
- Blot excess water from the cane with a clean towel.
- Pull the wet cane webbing taut over the back opening of the painted door frames, securing it firmly using heavy-duty staples around the interior perimeter.
- Trim excess cane material with a sharp utility knife. As the cane dries, it shrinks and tightens naturally across the frame.
Tips and Variations
- Tip: Always staple the cane starting from the center of each side, moving outward toward the corners to maintain even weave tension.
- Variation: Paint the cane webbing itself in a matching matte black for a dark, tactile, monochromatic statement piece.
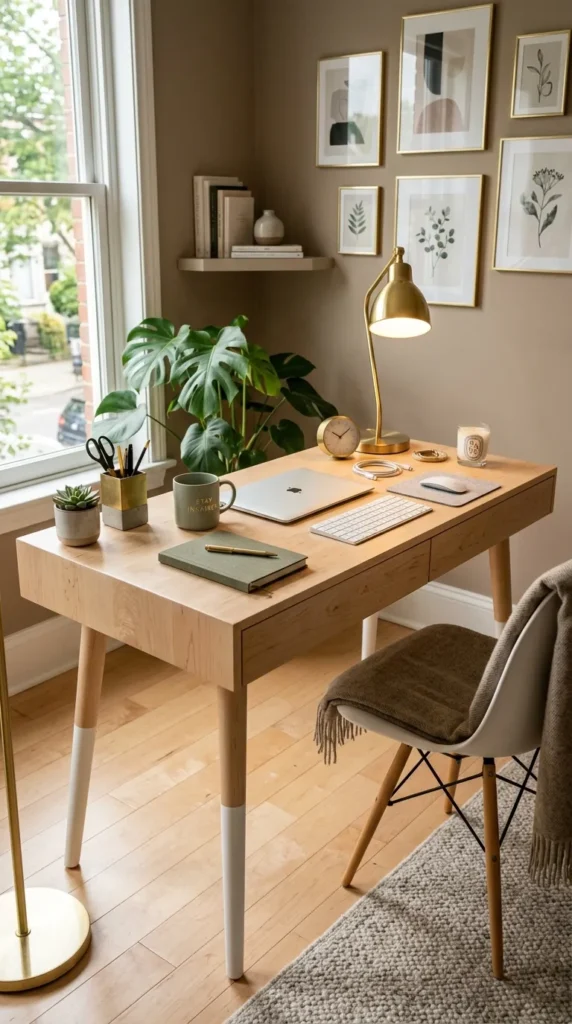
14. Modern Two-Tone Dip-Dye Effect
Introduction
The dip-dye technique adds modern playfulness to chairs, barstools, side tables, and desks by simulating an architectural immersion in paint.
What This Idea Means
The lower third or half of furniture legs—or the entire lower portion of a piece—is coated in a vibrant or high-contrast solid paint color, while the rest of the furniture remains in natural, clear-coated wood.
How to Make It
- Sand down the furniture legs or body, stripping away old stain and varnish down to raw wood.
- Measure an identical distance up from the bottom of each leg using a laser level or precise measuring tape.
- Wrap sharp painter’s tape firmly around each leg at the measured mark to establish the horizon line.
- Apply clear sanding sealer to the natural wood top portion and let dry.
- Apply a bonding primer to the lower leg sections beneath the tape boundary.
- Paint the bottom sections with two coats of contrasting paint (such as crisp white, olive green, or midnight navy).
- Pull the painter’s tape down and away while the paint is still slightly damp.
- Once dry, coat the entire piece—both natural wood and painted sections—with a clear satin water-based polycrylic.
Tips and Variations
- Tip: Invert the look by painting the upper two-thirds of the furniture solid and leaving the lower legs exposed as raw pale wood.
- Variation: Apply a fine, razor-thin metallic gold or bronze pinstripe directly on the line where the painted section meets the natural wood.
15. Subtle Tonal Color Wash and Staining
Introduction
Tonal washes allow the natural movement and grain of the wood to remain visible while infusing the timber with contemporary designer color palettes.
What This Idea Means
Unlike thick, opaque furniture paints, a color wash blends pigment with a translucent glaze or water vehicle. This technique penetrates the timber fibers, highlighting the grain in tones of moss green, denim slate, or warm honey charcoal.
How to Make It
- Completely sand and strip the furniture down to raw, porous wood, finishing with 180-grit sandpaper.
- Mix one part acrylic furniture paint (e.g., moody slate blue or forest green) with three parts clear glaze medium or water.
- Test the mixture’s transparency on an inconspicuous underside spot or a scrap piece of matching wood.
- Apply the tinted mixture along the direction of the wood grain using a sponge brush or lint-free cotton cloth.
- Use a dry microfiber cloth to wipe away excess wash before it sets, evening out any dark puddles or streaks.
- Apply a second thin layer if deeper color saturation is desired.
- Allow the stained piece to cure for a full 24 hours.
- Seal with a low-sheen satin hardwax oil or polyurethane clear coat for lasting moisture resistance.
Tips and Variations
- Tip: Always wipe back the wash along the continuous direction of the wood grain to avoid cross-grain swirl marks.
- Variation: Apply a white wash over a dark base wash to create a sun-bleached, textured drift-wood appearance.
16. Metallic Liquid Leaf and Modern Inlay Lines
Introduction
Clean, precise metallic accents bring instant sophistication, breaking up monochromatic paint with refined, light-catching elegance.
What This Idea Means
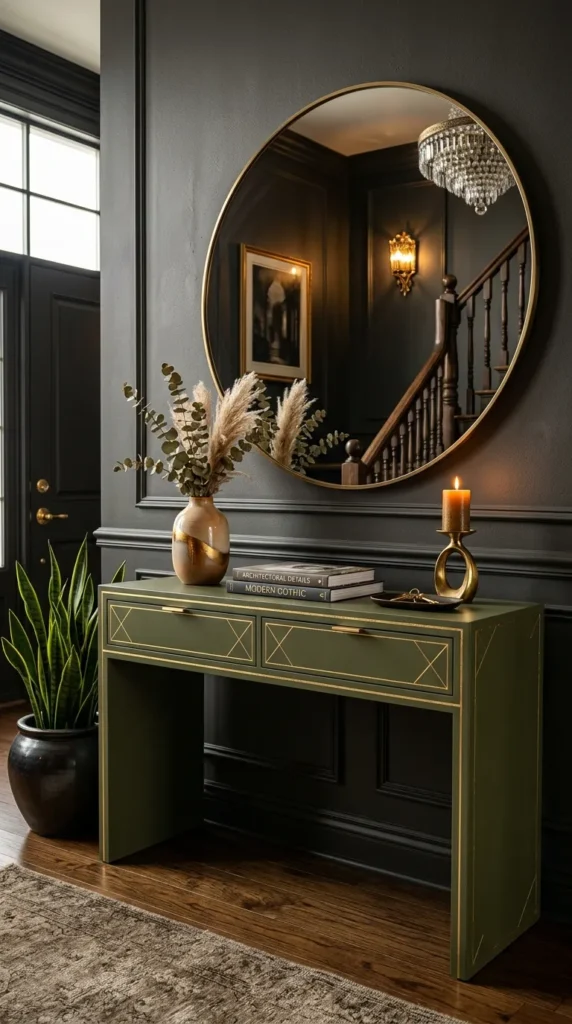
Fine, geometric channel lines, recesses, and perimeter borders are painted with real metal leaf sizing or metallic liquid gold leaf paint over a solid, satin-painted base.
How to Make It
- Prep, sand, and paint the entire furniture item in a smooth satin finish (such as deep olive, warm greige, or anthracite).
- Allow the base paint to cure fully for at least 72 hours so tape will not peel it away.
- Map out thin geometric channels, parallel stripes, or border frames using 1/4-inch or 1/8-inch precision automotive vinyl detailing tape.
- Seal the edges of the tape by brushing a thin coat of clear polycrylic over the masked lines.
- Paint the exposed narrow stripe with liquid gold or bronze leaf enamel using a fine watercolor sword-striper brush.
- Remove the detailing tape carefully while the metallic paint is partially tacky.
- Let the metallic enamel cure for 24 hours.
- Apply a spray-applied, water-based clear topcoat over the entire piece to prevent the metallic paint from tarnishing over time.
Tips and Variations
- Tip: Choose liquid leaf enamels with real metal pigments over standard craft paints for a bright, authentic mirror reflection.
- Variation: Use warm rose gold or champagne bronze leaf against a crisp off-white painted credenza for a soft, contemporary contrast.
17. High-Contrast Arched Door Murals
Introduction
Architectural arch motifs introduce visual height, softening the sharp rectilinear angles of boxy modern credenzas, sideboards, and wardrobes.
What This Idea Means
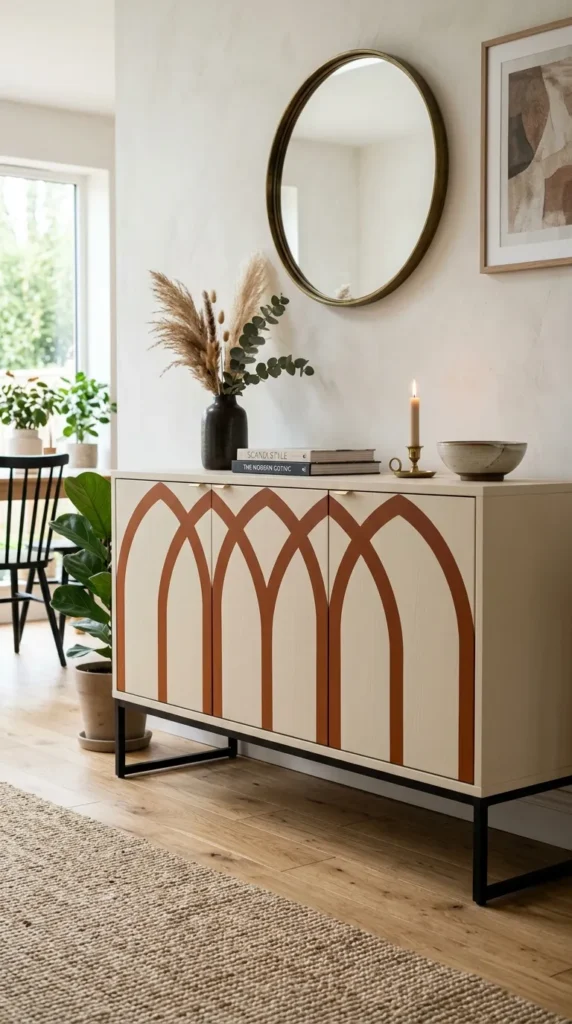
Arches are painted across the faces of flat-paneled cabinet doors, spanning across separations so the full architectural curve reveals itself when the doors are closed.
How to Make It
- Ensure cabinet doors are aligned and level on the furniture frame.
- Sand and apply a base coat of warm cream or linen paint across all door fronts.
- Measure the center point where the doors meet. Attach a length of non-stretching string to a pushpin placed at the center pivot point, tied to a pencil to create a compass.
- Draw the smooth half-circle top of the arch across the doors, then extend the two pencil lines straight down to the bottom edges using a long level.
- Apply flexible fine-line vinyl tape along the curved top arc, and standard painter’s tape along the straight vertical lines.
- Paint the interior of the arch with a contrasting hue—such as rich ochre, warm cocoa, or burnt sienna—using two to three light coats.
- Peel back all painter’s tape immediately after the final coat.
- Seal the entire surface with an all-over clear matte topcoat.
Tips and Variations
- Tip: Keep your paint coats thin along the center door split to prevent paint buildup from chipping when doors open and close.
- Variation: Paint concentric, multi-layered nesting arches in graduated shades for a striking Art Deco revival feel.
18. Monochromatic Plaster and Chalk-Textured Paint
Introduction
A monochromatic chalk and plaster finish creates a soft, minimalist look with subtle, hand-troweled character.
What This Idea Means
The entire piece—including its base, frame, drawer fronts, and hardware—is coated in a unified light tone (such as greige, chalk white, or limestone) using texture-rich mineral plaster paint to produce a sculpted, stone-like aesthetic.
How to Make It
- Sand the entire piece with coarse 100-grit sandpaper to create a strong mechanical bond.
- Mix synthetic plaster compound or slaked-lime mineral paint with chalk paint to create a thick, spreadable consistency.
- Apply the plaster-paint blend across all surfaces using a flexible Japanese plastic putty knife or drywall trowel, working in overlapping, random arc strokes.
- Build light textural peaks, ripples, and trowel chatter across flat surfaces.
- Allow the thick textured layer to dry for 24 hours.
- Sand down any uncomfortably sharp edges using a 220-grit sanding sponge, maintaining the soft organic waves.
- Apply a diluted matte wash of the base color to unify tone across any sanded areas.
- Seal thoroughly with a dead-flat penetrating mineral sealer to guard against spills and dust absorption.
Tips and Variations
- Tip: Keep the texture subtle on surfaces holding lamps or decor so objects rest flat and stable.
- Variation: Apply this technique to an ornate, vintage mirror frame to instantly convert it into a modern organic plaster sculpture.
19. Rich Walnut and Matte Midnight Navy Fusion
Introduction
The pairing of dark walnut wood tones with midnight navy creates a rich, balanced aesthetic suited for modern offices, bedrooms, and dining spaces.
What This Idea Means
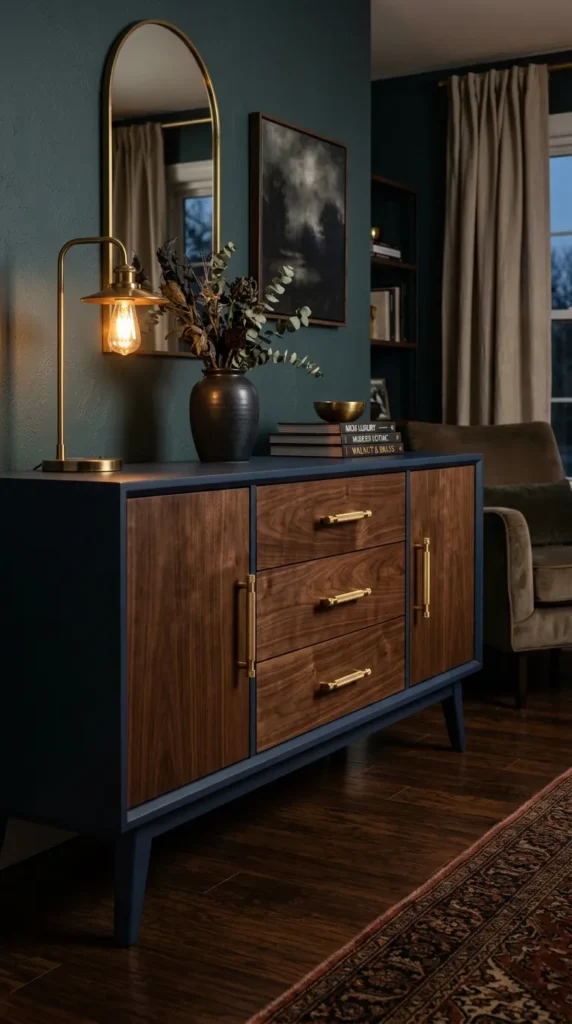
The structural outer chassis or selected drawer banks are finished with an opaque matte midnight navy paint, while the remaining drawer faces or top surface feature deeply stained, satin-finished real walnut grain.
How to Make It
- Disassemble the furniture, separating the wooden elements to be stained from those to be painted.
- Sand the wooden components destined for natural staining from 120-grit through 220-grit sandpaper.
- Apply a rich walnut penetrating oil stain, wipe away excess after 5 minutes, and allow to cure for 24 hours.
- Prep the frame components: sand, clean, and apply a stain-blocking gray bonding primer.
- Paint the frame with two coats of deep midnight navy acrylic enamel using a synthetic bristle brush and high-density roller.
- Apply three coats of clear satin polyurethane to the stained walnut pieces.
- Apply two coats of satin clear finish over the midnight navy painted components.
- Reassemble the furniture and install solid brushed brass or knurled gold handles.
Tips and Variations
- Tip: Choose a blue with deep charcoal-black undertones rather than royal tones to ensure it pairs seamlessly with dark walnut.
- Variation: Reverse the placement by painting the inner drawer faces midnight navy while keeping the outer surround frame stained in dark walnut.
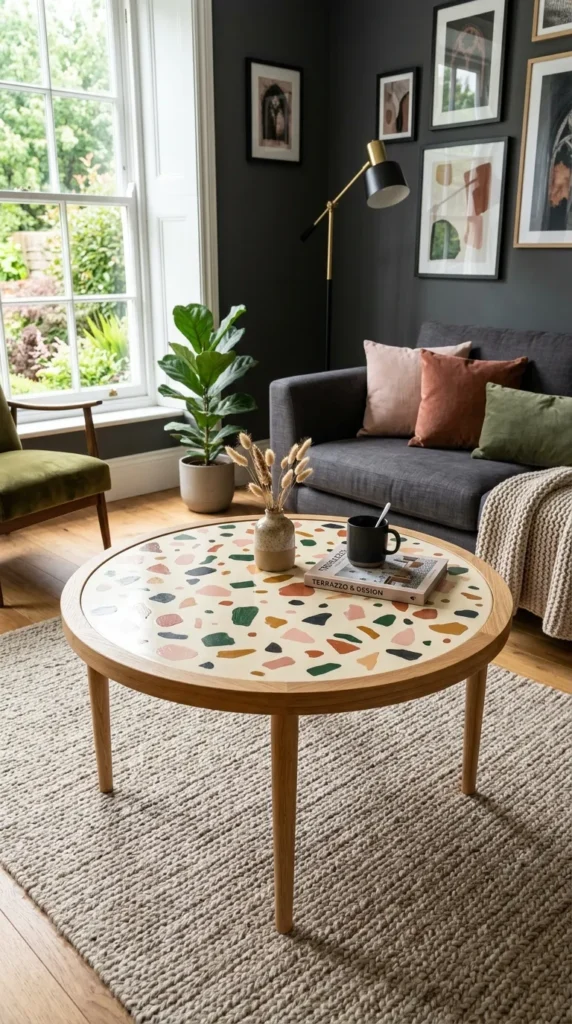
20. Stenciled Modern Terrazzo Pattern
Introduction
Terrazzo brings a playful, mid-century Italian pattern into modern interiors. Hand-painting a custom terrazzo pattern gives furniture a lively, bespoke character.
What This Idea Means
Abstract, asymmetrical stone-chip shapes in complementary colors (such as blush pink, ochre, forest green, terracotta, and slate) are hand-painted or stenciled over a clean, neutral white or ivory painted base.
How to Make It
- Sand, prime, and paint the entire surface of the furniture piece (ideally the tabletop or drawer fronts) in solid warm off-white.
- Allow the base coat to cure for 48 hours.
- Using custom-cut mylar stencils or freehand artist brushes, map out clusters of varied, irregular geometric “stone chips” across the surface.
- Paint the faux stone chips using small artist flat brushes with four to five complementary colors, alternating placement so shapes and colors disperse naturally.
- Add tiny flecks and dots of charcoal and burnt umber paint between the larger shapes using a small round detail brush to complete the composite stone effect.
- Let the painted terrazzo pattern dry for 12 hours.
- Apply three coats of high-durability clear gloss or semi-gloss polyurethane over the pattern, sanding lightly with 400-grit between coats to build a smooth, glass-like depth reminiscent of polished real terrazzo.
Tips and Variations
- Tip: Keep the scale of your painted chips proportionate to the furniture size; smaller pieces look best with fine 1/2-inch to 1-inch chips, while large buffets handle 2-inch to 3-inch chips comfortably.
- Variation: Apply the terrazzo motif exclusively to the top of a round coffee table or nightstand while painting the legs and body in a single matching accent color.