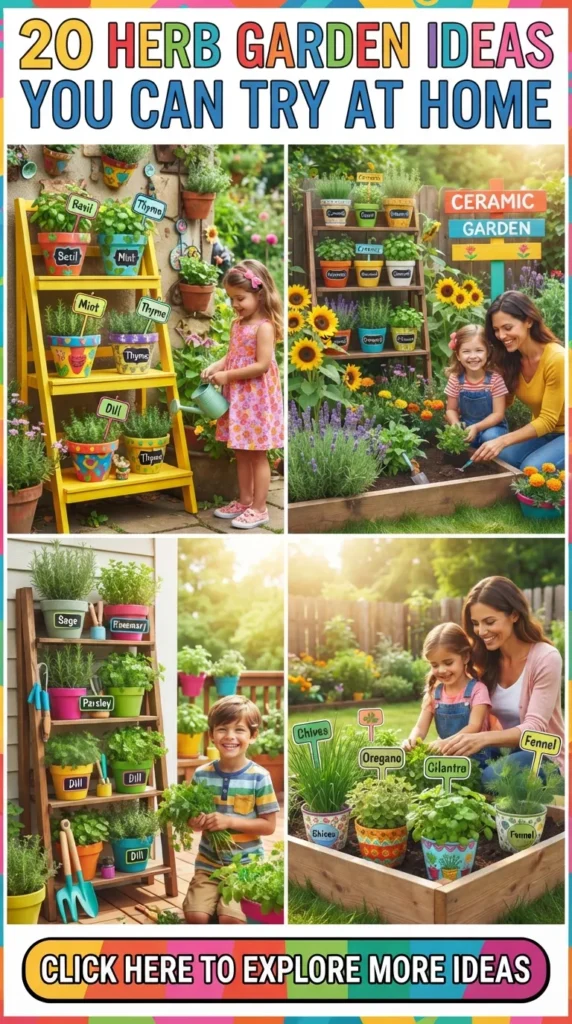
Transforming fresh herbs into a living design element elevates both your culinary adventures and your home decor. Whether you occupy a compact city apartment, a suburban townhouse with a sunny balcony, or a countryside home with expansive garden beds, growing your own herbs provides continuous access to fragrant, organic flavors while introducing lush greenery into your living space.
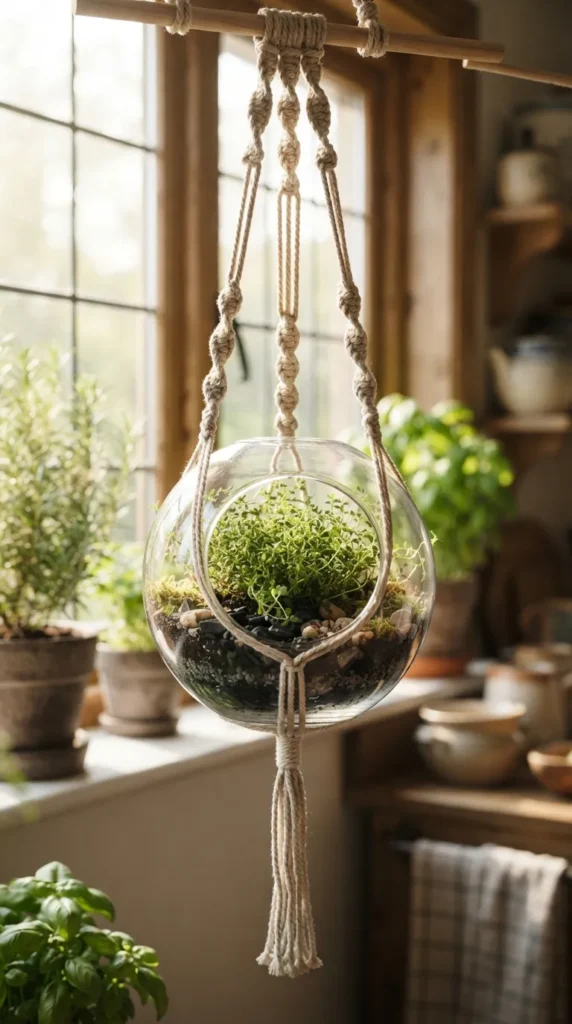
1. Minimalist Hanging Macramé Glass Globes
Introduction Suspended gardening merges textile artistry with functional indoor horticulture. Utilizing clear glass bubbles suspended in woven cords creates an airy, weightless aesthetic that draws the eye upward while keeping counter surfaces completely clear.
What This Idea Means This concept focuses on vertical space utilization using organic cotton cords, raw wooden rings, and spherical glass terrarium vessels. It pairs propagation style aesthetics with practical, light-loving culinary herbs in compact living areas.
How to Make It
- Measure and cut eight 2-meter strands of 3mm natural unbleached cotton cord.
- Loop the strands through a 2-inch untreated wooden ring, creating sixteen working ends, and secure with a wrapped gathering knot.
- Divide cords into four groups of four strands; knot alternating square patterns down 15 cm.
- Create a secure cradle basket at the base using crossed square knots spaced 5 cm apart.
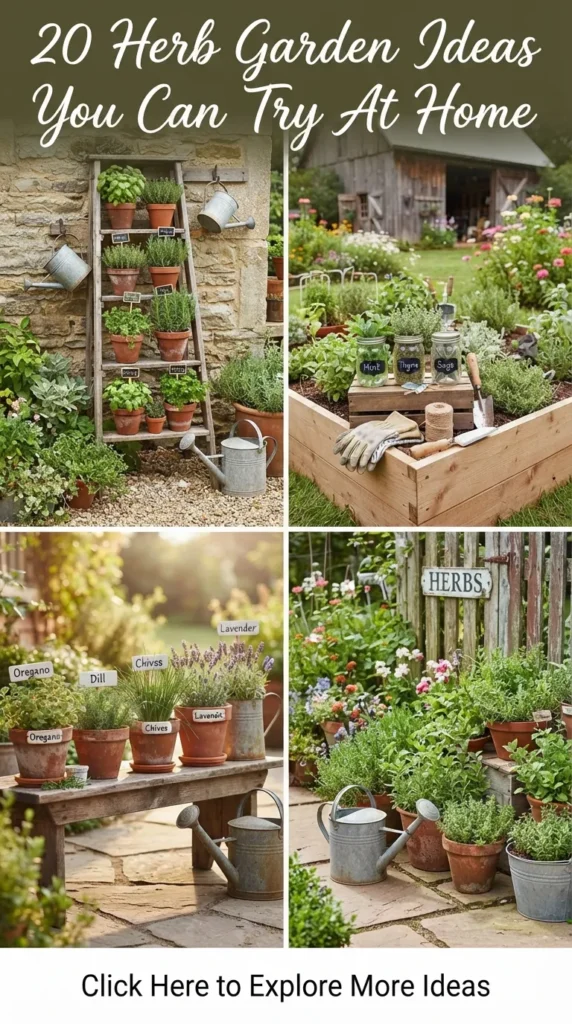
- Place a flat-bottomed, open-mouth glass orb inside the basket cradle.
- Add a 1-inch base layer of activated horticultural charcoal mixed with fine perlite.
- Layer light potting mix and insert rooted herb cuttings like trailing mint or creeping thyme.
- Hang near a bright, south-facing window with an anchored ceiling hook.
Tips and Variations
- Drainage Management: Glass vessels lack drainage holes; always water with a precision squeeze bottle to prevent root saturation.
- Variations: Swap cotton cord for natural jute or dyed linen twine for a moody aesthetic.
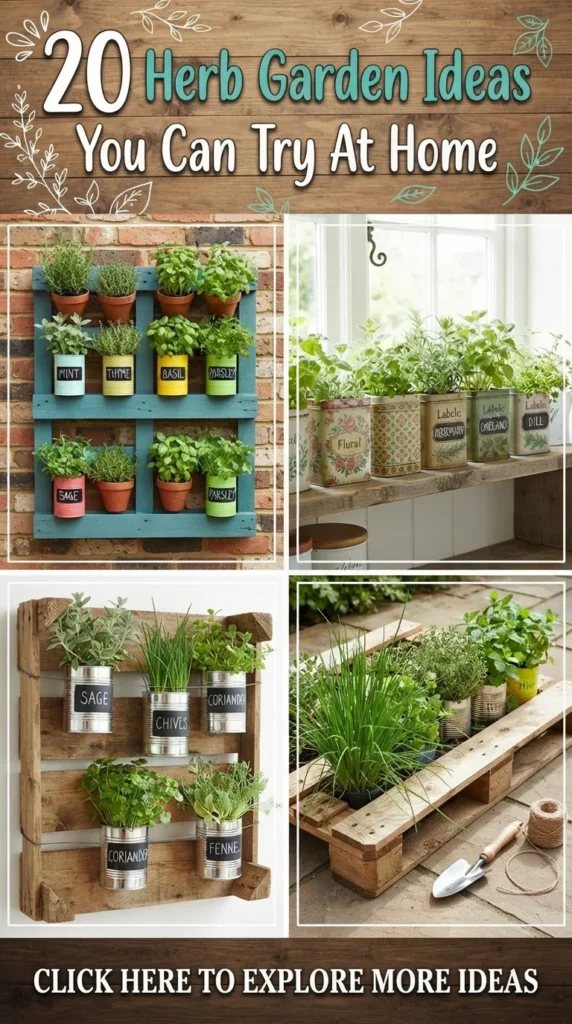
2. Tiered Italian Terracotta Tower
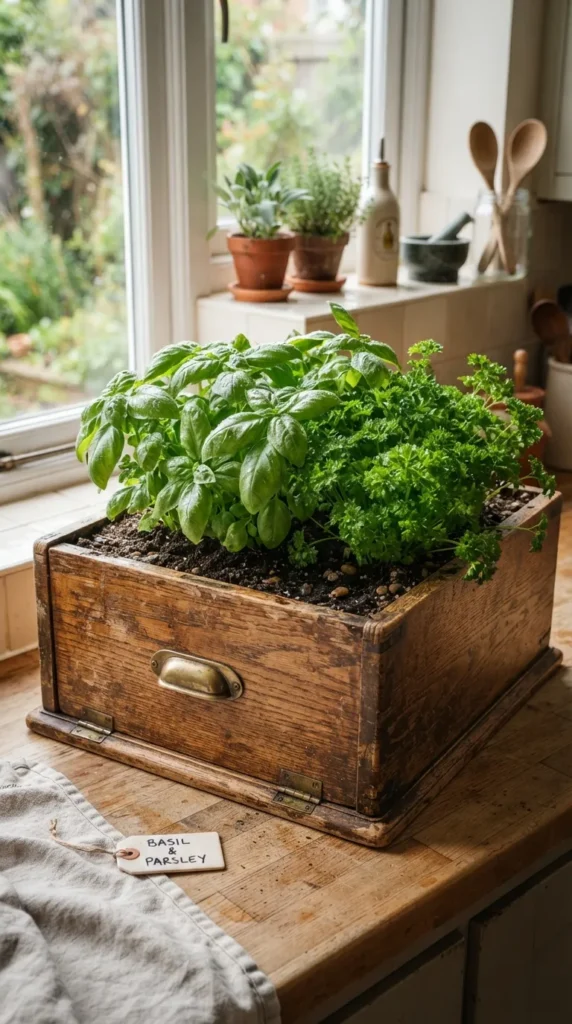
Introduction The tiered terracotta tower brings classic Mediterranean courtyard warmth to patios, stoops, or sunny indoor corners. Its stacked footprint delivers high yield while maximizing vertical space.
What This Idea Means By nesting graduated earthenware pots on top of each other, you form a conical column of soil pockets that accommodates diverse herbs with varying moisture needs in one footprint.
How to Make It
- Select four classic porous terracotta pots in decreasing diameters: 14-inch, 12-inch, 10-inch, and 8-inch, each with center drainage holes.
- Soak all pots in water for 30 minutes to prevent the dry clay from pulling moisture from fresh soil.
- Thread a sturdy 1/2-inch metal rebar rod into the ground or a heavy, stable base saucer.
- Slide the largest pot over the rod, filling it with well-draining potting soil up to 3 inches below the rim.
- Slide the second pot down the rod, tilting or centering it firmly into the soil base of the bottom pot.
- Repeat the stacking process with the remaining smaller pots, backfilling each tier with soil.
- Plant upright, woody herbs like rosemary and sage at the top, and trailing herbs like oregano and creeping thyme around the perimeter of the lower tiers.
Tips and Variations
- Soil Selection: Mix 20% coarse horticultural sand into your potting soil to mimic arid Mediterranean conditions.
- Variations: Paint the pot rims with chalk-based white lime wash for an aged Tuscan appearance.
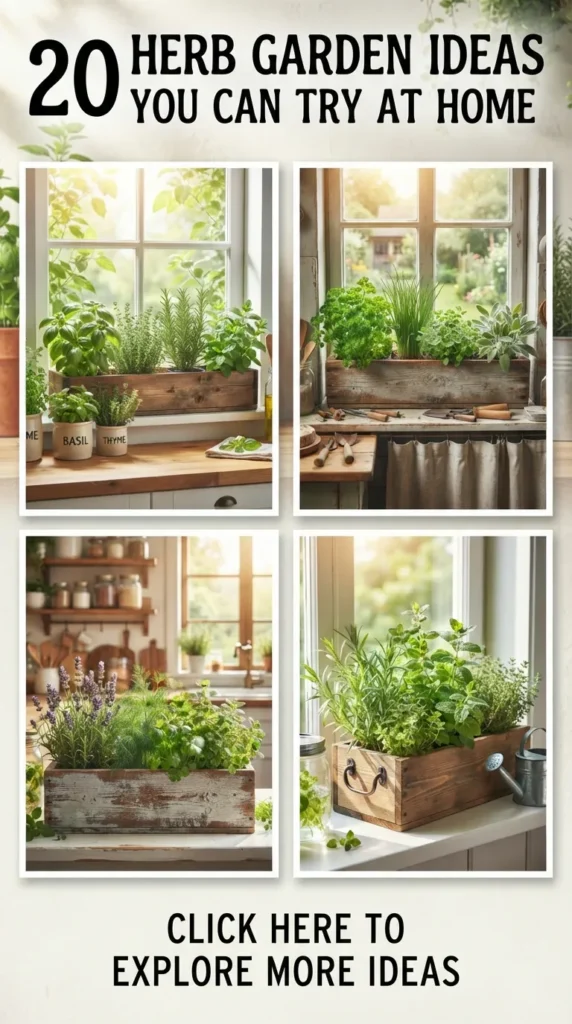
3. Vintage Wooden Bread Box Herb Planter
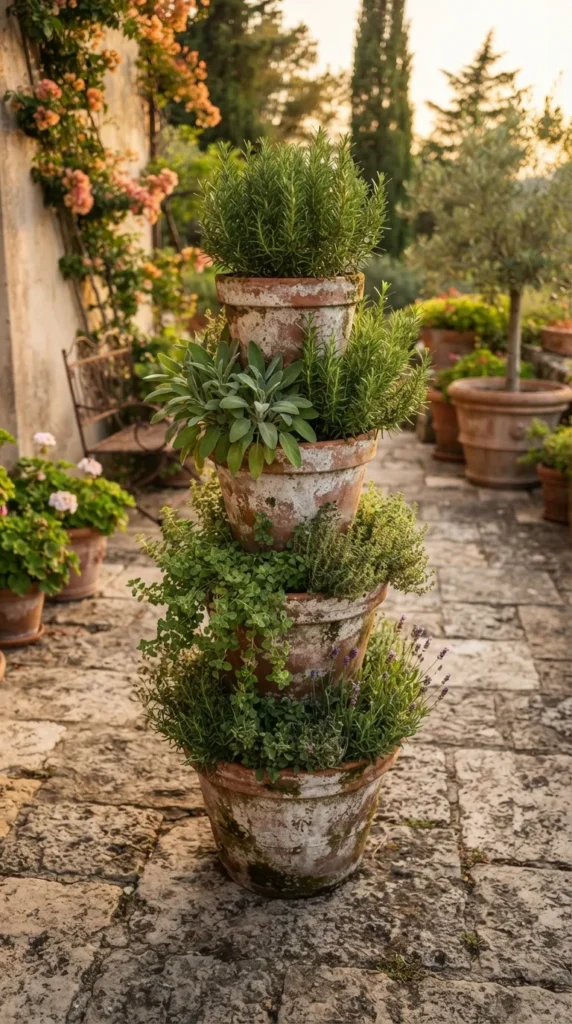
Introduction Repurposing antique kitchen items gives herb setups instant rustic charm. A vintage wooden bread box or dough trough provides ample root depth while functioning as an authentic farmhouse centerpiece.
What This Idea Means This approach pairs rustic upcycling with kitchen windowsill gardening, creating a dedicated culinary herb station right next to your food preparation space.
How to Make It
- Source a vintage solid wood bread box or wooden farmhouse crate.
- Sand any rough splinters while preserving the aged exterior patina and authentic distressing.
- Seal the interior wood surfaces with non-toxic, food-safe beeswax or pure tung oil.
- Line the entire interior with a heavy-duty 6-mil plastic pond liner, stapling the edges 1 inch below the top rim.
- Puncture five evenly spaced 1/4-inch drainage holes through the plastic and base wood, setting small drip trays underneath.
- Fill with a lightweight potting mix enriched with worm castings.
- Plant standard kitchen staples: Genovese basil, curly parsley, and French chives.
Tips and Variations
- Moisture Protection: Always elevate the wooden box slightly using adhesive rubber feet so air circulates beneath it.
- Variations: Install antique brass drawer pulls on the sides for easy transport between the windowsill and the dining table.
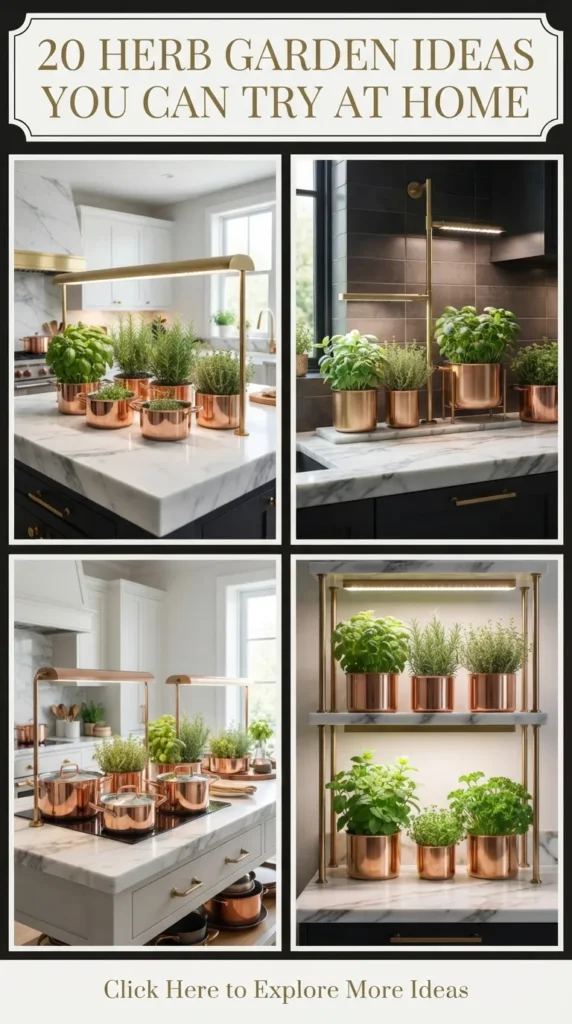
4. Copper Pipe Wall-Mounted Rail System
Introduction Industrial elegance meets clean functional design in a copper rail herb display. The warm metallic tones of pure copper provide a striking contrast against lush green foliage.
What This Idea Means A horizontal wall-hung copper conduit serves as a structural mounting bar for suspended metal pots, turning a blank kitchen wall into a functional, living art installation.
How to Make It
- Cut a 3/4-inch rigid copper pipe to your desired wall width (typically 36 to 48 inches).
- Secure matching copper pipe mounting flanges and 90-degree elbows to each end.
- Clean the pipe with vinegar and fine salt to bring out a bright rose shine, or leave untreated to develop a natural patina.
- Anchor the flanges into wall studs or heavy-duty drywall anchors using matching brass screws.
- Source small copper, matte black, or white enamel pots fitted with upper rim drainage trays.
- Attach leather straps or copper S-hooks to the pot rims and hang them along the copper bar.
- Plant compact, upright herbs like bush basil, chervil, and dwarf cilantro.
Tips and Variations
- Weight Support: Verify your wall anchors can support at least 15 kg of damp soil and plant weight combined.
- Variations: Add dual parallel copper rails vertically spaced 14 inches apart to create a full multi-tier culinary wall.

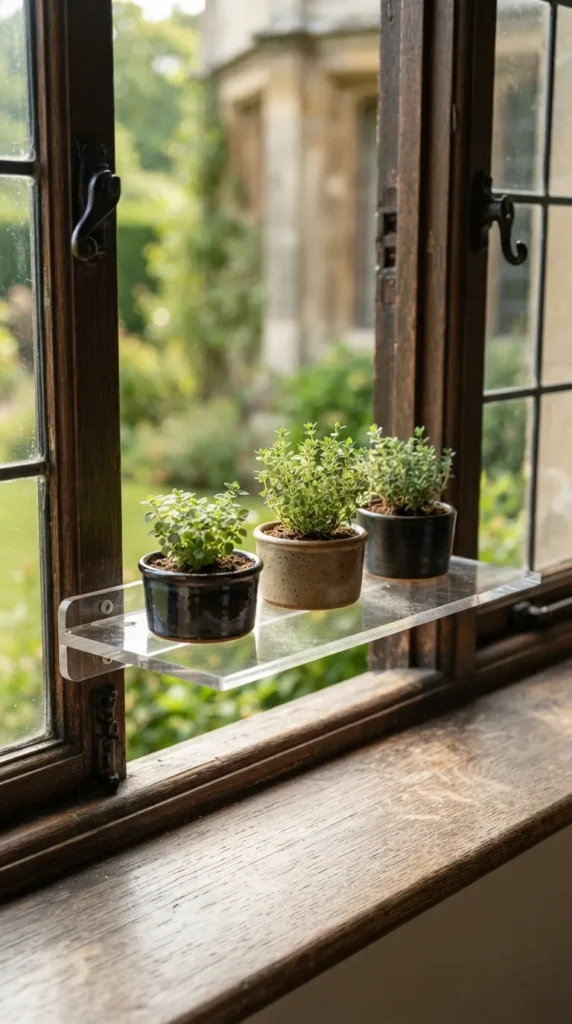
5. Floating Windowsill Shelf with Ceramic Ramekins
Introduction Maximize natural window light without sacrificing precious counter depth. Floating minimalist shelves sit within the window jamb itself, keeping herbs bathed in full-spectrum sunlight all day.
What This Idea Means This concept uses clean architectural lines to position potted herbs directly in prime window light, utilizing the window frame’s vertical height without ground supports.
How to Make It
- Measure the interior width of your window frame with precision.
- Cut clear acrylic sheets (1/2-inch thick) or sealed white oak boards to exact dimensions.
- Mount low-profile brushed brass or stainless steel shelf brackets directly into the window jambs.
- Place the shelf securely on brackets and test for levelness.
- Select matching handmade ceramic ramekins or small glazed stoneware planters (4- to 5-inch diameter).
- Drill drainage holes in pots using a diamond-core bit, placing small matching saucers underneath.
- Fill pots with a balanced mix of perlite, peat moss, and compost.
- Plant light-loving culinary plants: English thyme, sweet marjoram, and Greek oregano.
Tips and Variations
- Sun Protection: In hot southern exposures, use sheer curtains during peak summer heat to prevent foliage scorching.
- Variations: Use tension-mounted floor-to-ceiling brass poles flanking the window if you cannot drill into the window frame.
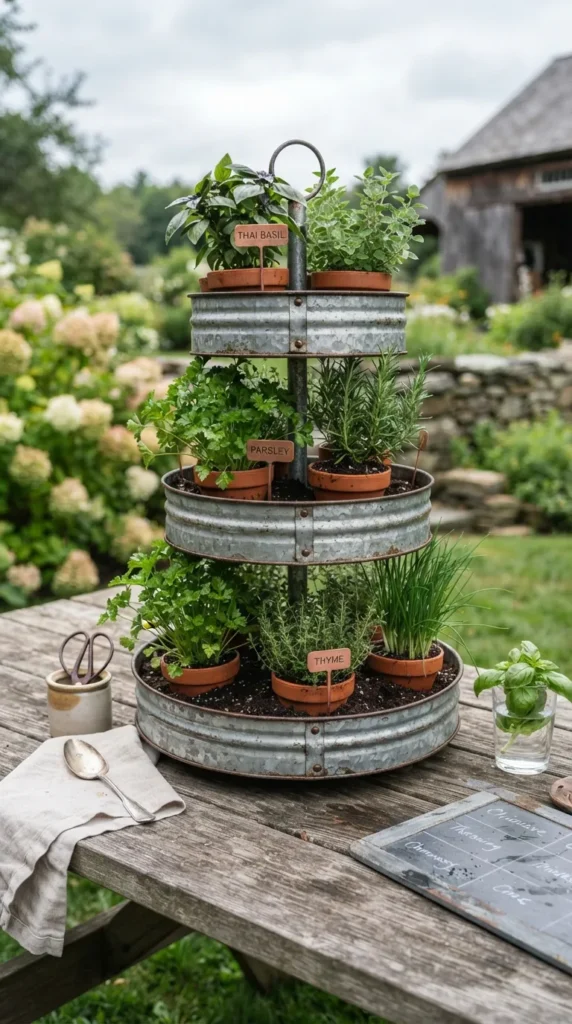
6. Repurposed Galvanized Metal Tiered Stand
Introduction Galvanized metal conveys an authentic vintage, cottagecore garden aesthetic. A three-tier galvanized serving tray converted into a herb station creates a durable, weather-resistant micro-garden.
What This Idea Means This design repurposes a multi-tiered farmhouse buffet stand into a self-contained, tiered herb organizer that fits comfortably on kitchen islands or patio dining tables.
How to Make It
- Procure a heavy-gauge 3-tier galvanized steel serving caddy.
- Drill three 1/4-inch drainage holes in the perimeter of each metal tier.
- Apply a clear coat of rust-inhibiting food-safe enamel to interior seam welds.
- Line each tier with natural needle-punched coco coir matting to contain soil while allowing free drainage.
- Add potting substrate mixed with expanded pumice for optimal aeration.
- Place trailing spearmint on the bottom rim, flat-leaf parsley and cilantro in the middle, and dwarf Thai basil on the top tier.
Tips and Variations
- Temperature Control: Galvanized metal can warm up rapidly in full sun; monitor root zone moisture daily during summer.
- Variations: Apply a dry-brush whitewash paint technique over the zinc coating for a French country look.
7. Indoor Hydroponic LED Herb Garden
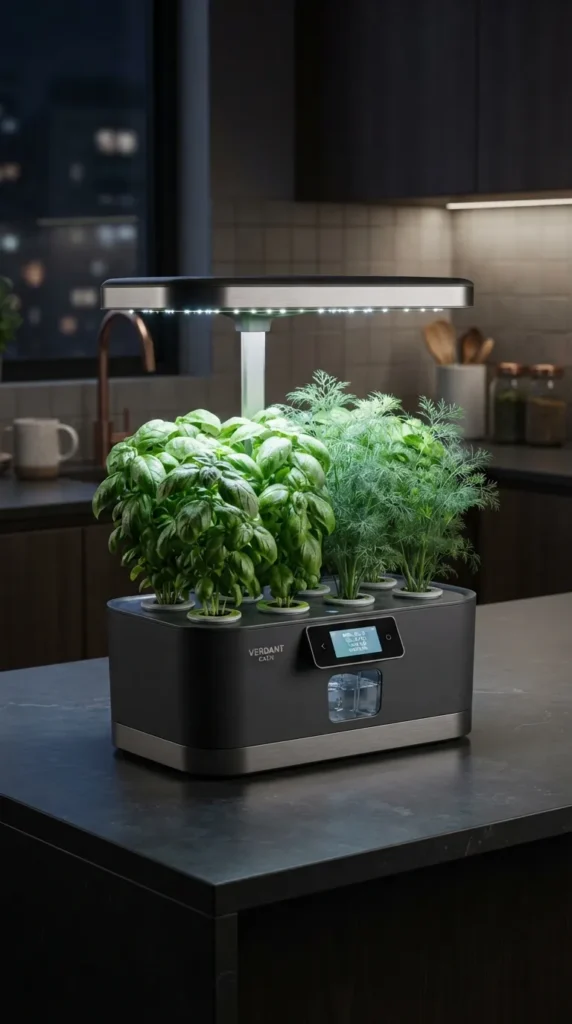
Introduction Pair modern design with soil-free horticulture through a clean, automated indoor hydroponic setup. Integrated LED lights allow you to grow fresh herbs anywhere in the home, regardless of natural sunlight.
What This Idea Means A closed-loop, water-based nutrient system with tailored full-spectrum LED lighting provides fast growth rates and a pristine, modern counter presence.
How to Make It
- Choose an enclosed smart countertop hydroponic reservoir with an adjustable LED hood.
- Fill the clean reservoir basin with reverse-osmosis or filtered tap water.
- Add pH-balanced liquid plant nutrients formulated for vegetative foliage growth.
- Insert pre-seeded biodegradable peat grow sponges into pod baskets (basil, dill, cilantro, and mint).
- Set the automated LED light timer for a 14-hour active photosynthetic cycle.
- Prune early vegetative growth above the second node to encourage dense, bushy branching rather than tall, leggy stems.
Tips and Variations
- Water Maintenance: Flush and replace the nutrient water reservoir completely every 14 days to prevent salt buildup.
- Variations: Encase the exterior hydroponic housing in a custom slatted walnut or bamboo wooden sleeve to soften the tech-heavy look.
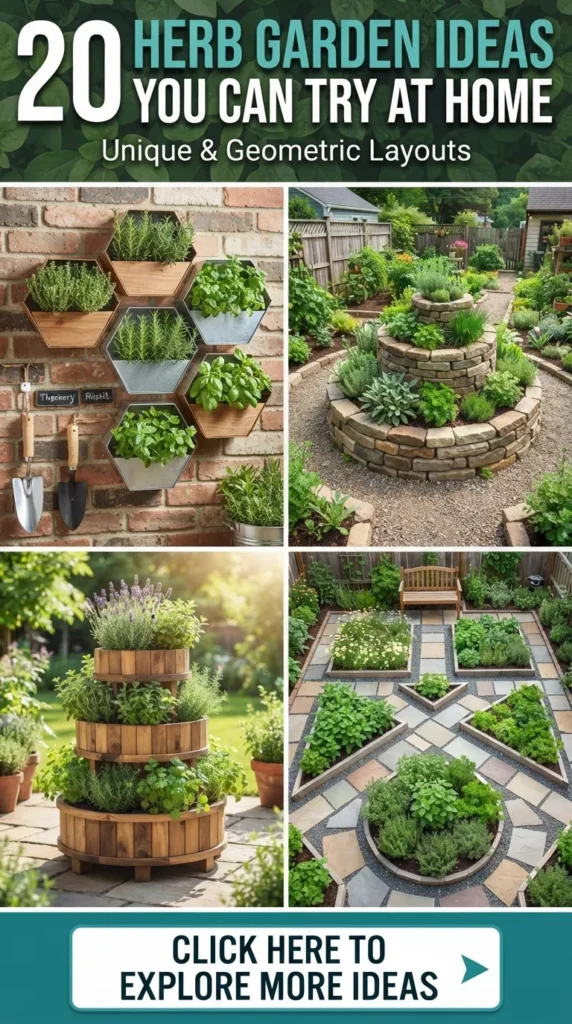
8. Vertical Modular Hexagonal Wall Tiles
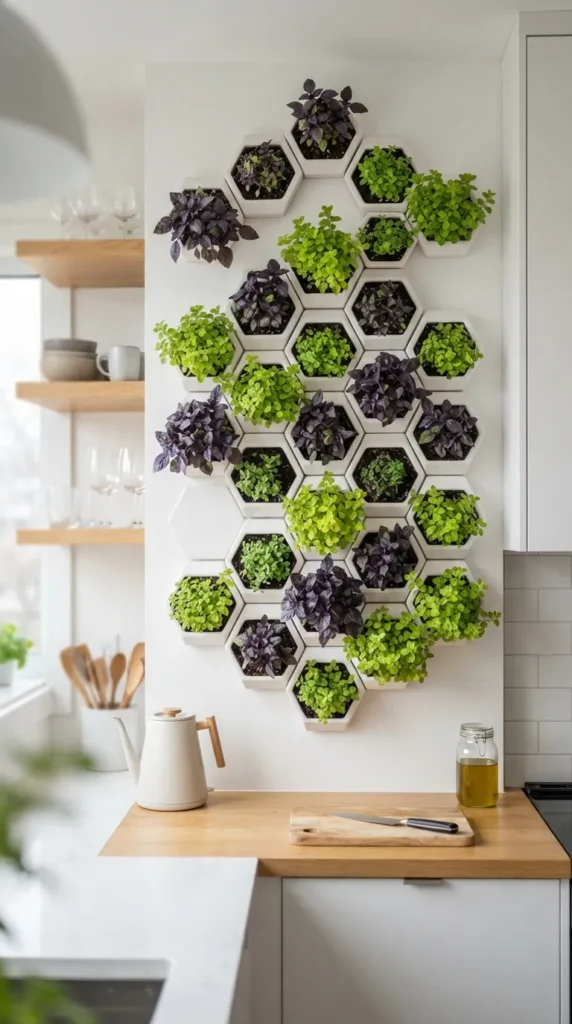
Introduction Turn your walls into geometric living mosaics. Hexagonal ceramic wall pockets let you build customizable vertical patterns while keeping kitchen herbs within arm’s reach.
What This Idea Means Geometric modularity meets biophilic interior architecture. Individual geometric planters clip together to create living geometric wall art.
How to Make It
- Purchase modular geometric ceramic wall planters featuring interior drainage catch basins.
- Layout your honeycomb design on butcher paper; trace anchor points onto your wall using a level.
- Drill holes, insert heavy-duty expanding drywall plugs, and screw mounting brackets into place.
- Slide the planters securely onto their respective mounting plates.
- Fill removable inner planting cups with a blend of porous coconut coir, vermiculite, and potting soil.
- Plant individual varieties per pod: purple basil, golden oregano, variegated sage, and curly parsley.
- Slot inner planting cups into their exterior wall-mounted geometric shells.
Tips and Variations
- Visual Balance: Interlock contrasting foliage colors—pair purple ruffles basil with lime-green golden oregano for dynamic visual interest.
- Variations: Frame the entire hexagonal cluster with a natural oak border to emphasize the wall-art aesthetic.
9. Upcycled Vintage Wooden Ladder Display
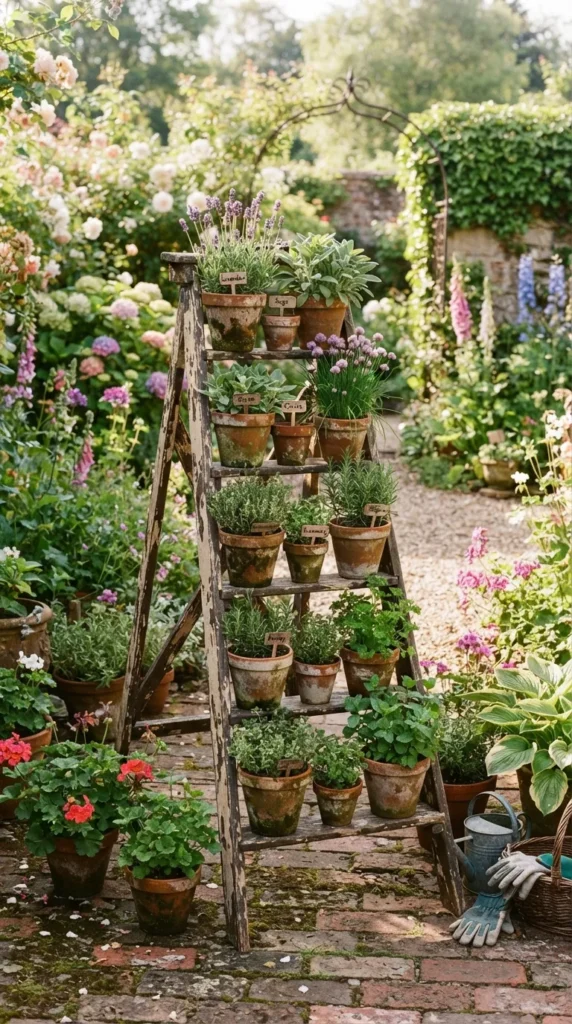
Introduction A weathered, freestanding wooden ladder provides instant vintage height and rustic texture. Transforming its rungs into a tiered plant stand allows you to grow dozens of herb varieties in a compact vertical footprint.
What This Idea Means An authentic orchard or painter’s ladder functions as a self-supporting vertical shelving unit, ideal for porch corners, sunny patio walls, or farmhouse kitchens.
How to Make It
- Source an antique 4- to 5-step wooden folding step ladder.
- Clean thoroughly with a stiff brush and mild castile soap; let dry completely in the sun.
- Sand loose flakes lightly and seal with an outdoor matte spar urethane to resist water damage.
- Secure wide, reclaimed cedar boards across opposing rungs to create deeper, stable shelf surfaces.
- Arrange uniform matching metal, enamel, or terracotta pots across the wooden step shelves.
- Place moisture-loving plants (mint, chervil) on lower, shaded tiers; place sun-loving woody herbs (rosemary, lavender) on top.
Tips and Variations
- Stability: Secure the ladder to the wall with a discreet earthquake strap or bracket if using heavy ceramic planters.
- Variations: Add small brass screw-in hooks underneath each rung to hang herb bundles upside down for air drying.
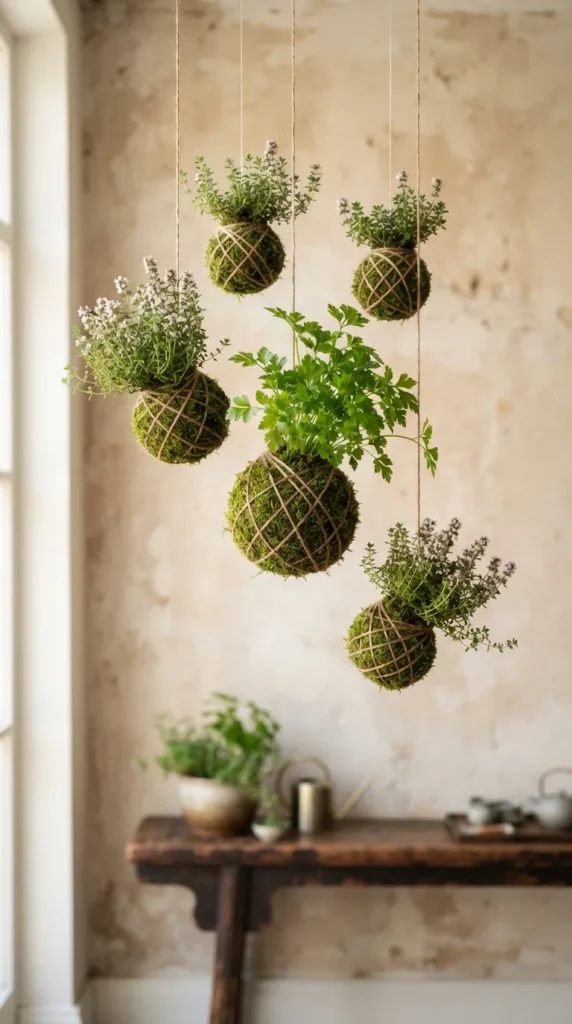
10. Japanese Minimalist Kokedama Herb Balls
Introduction Kokedama is a traditional Japanese planting method where root systems are encased in a sculpted moss sphere bound by string. Suspending these living moss globes creates an elegant, serene display for culinary herbs.
What This Idea Means Removing rigid pots entirely, this method relies on raw organic materials—moss, clay soil, and twine—to produce sculptural, living botanical art.
How to Make It
- Gently remove herb nursery stock (such as creeping thyme, rosemary, or parsley) and shake away excess loose soil.
- Prepare a malleable soil blend using 70% dark peat/akadama clay and 30% rich potting soil; moisten until it holds its form like modeling clay.
- Form a smooth ball of this soil mix around the exposed root system of your herb plant.
- Wrap sheets of damp, green sheet moss or sphagnum moss around the entire soil sphere.
- Wrap natural hemp cord or clear monofilament line around the moss sphere in crisscross patterns to secure the shape.
- Tie off the twine securely, leaving long leader lines for overhead ceiling suspension, or display the sphere on a raw slate plate.
Tips and Variations
- Watering Technique: Water by submerging the entire moss ball in a bowl of room-temperature water for 10 minutes once or twice weekly; let it drip dry before rehanging.
- Variations: Group three kokedama balls at staggered heights in a bright corner to create a cascading botanical mobile.
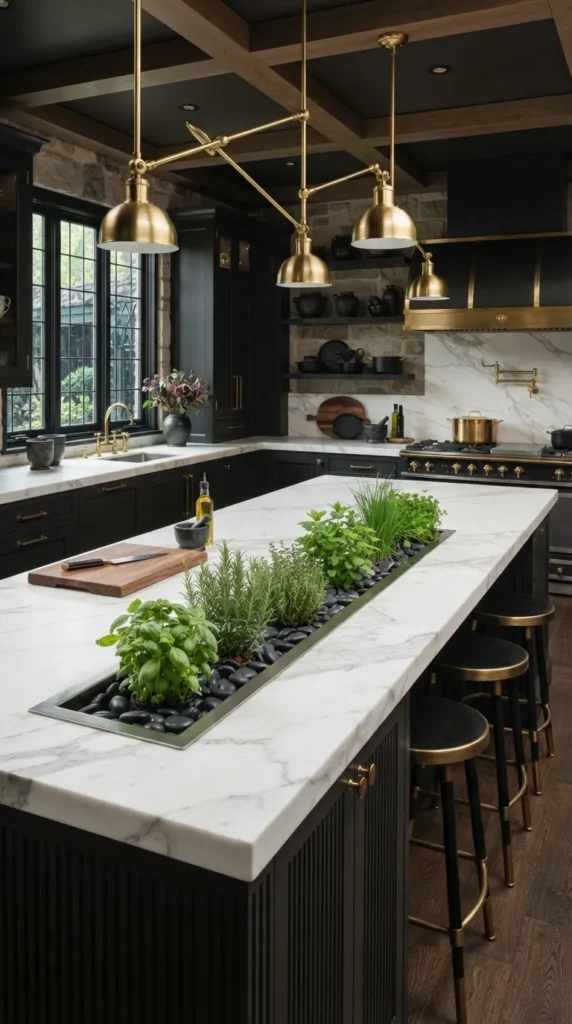
11. Built-in Kitchen Island Herb Trough
Introduction Integrating an herb garden directly into a kitchen prep island is the ultimate blend of high-end design and culinary utility. Fresh herbs remain within reach while chopping, sautéing, and plating meals.
What This Idea Means A recessed, sunken channel embedded into stone, quartz, or butcher block countertops specifically designed to house live culinary herbs at counter level.
How to Make It
- Coordinate with your countertop fabricator to cut a custom 6-inch-wide by 30-inch-long recessed trough directly into the island surface.
- Install a custom-welded 16-gauge stainless steel liner box inside the cut channel.
- Plumb the bottom of the stainless box with a small direct drain tube connected to under-sink greywater lines, or design it as a removable drop-in tray.
- Place individual, drop-in 4-inch square herb pots directly into the metal trough.
- Fill gaps between pots with smooth black river stones or horticultural clay pebbles for a polished finish.
- Install overhead directional high-CRI LED task lighting tuned to daylight spectrum (5000K) directly above the island.
Tips and Variations
- Maintenance Ease: Keeping herbs in individual modular drop-in cups allows you to swap out spent plants instantly without disturbing neighboring root systems.
- Variations: Install an integrated sliding butcher block cutting board over the channel that pulls closed when not in use.
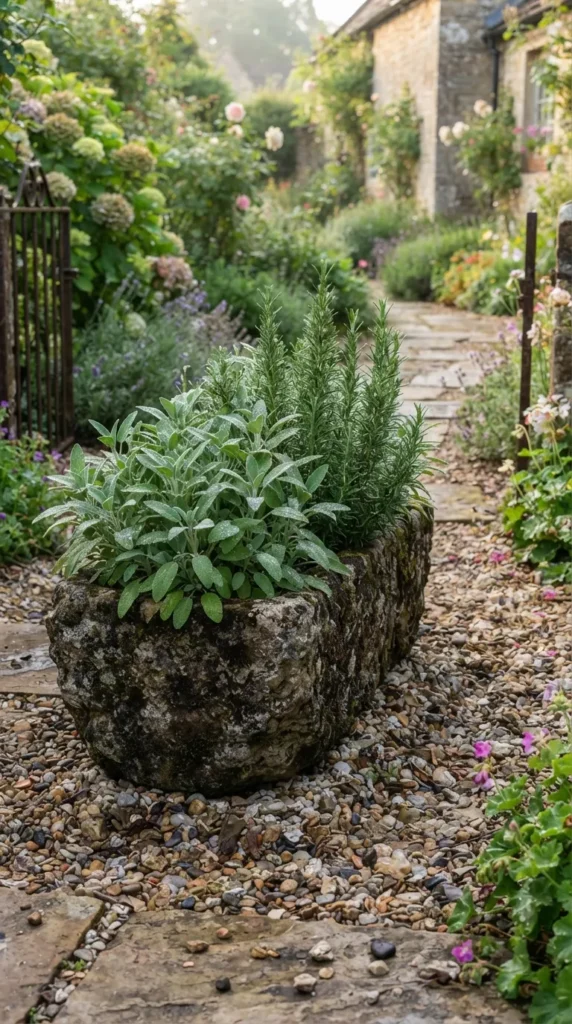
12. Vintage Stone Trough and Hypertufa Planter
Introduction Aged stone troughs provide a timeless, European cottage garden presence. Using authentic stone or lightweight handmade hypertufa, these planters create deep, well-insulated root zones for perennial herbs.
What This Idea Means This aesthetic relies on rugged, weathered, mineral textures that mimic old English livestock troughs, ideal for outdoor patio focal points or sunny garden borders.
How to Make It
- Craft a hypertufa trough by mixing equal parts Portland cement, sifted peat moss, and perlite with water.
- Pack the mixture 2 inches thick inside a rectangular cardboard form; let cure under plastic for 3 days before unmolding.
- Wire-brush the outer surface to expose stone-like aggregate, then cure for an additional 4 weeks.
- Drill two 3/4-inch drainage holes in the bottom base.
- Elevate the trough on small stone risers to facilitate free drainage.
- Fill with gritty, mineral-rich potting mix (60% potting soil, 20% crushed limestone gravel, 20% coarse perlite).
- Plant long-lived perennial Mediterranean herbs: winter savory, English lavender, and upright rosemary.
Tips and Variations
- Winter Hardiness: Deep stone and hypertufa troughs provide superior root insulation, protecting perennials during winter frost periods.
- Variations: Press dried fern fronds into wet concrete during forming to leave organic fossil impressions on the exterior walls.
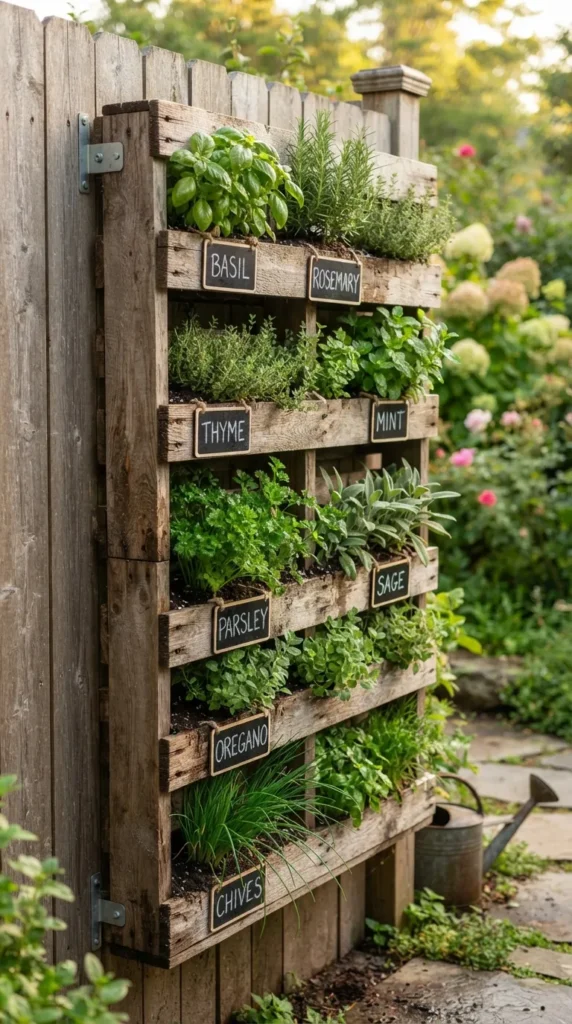
13. Reclaimed Wooden Pallet Herb Wall
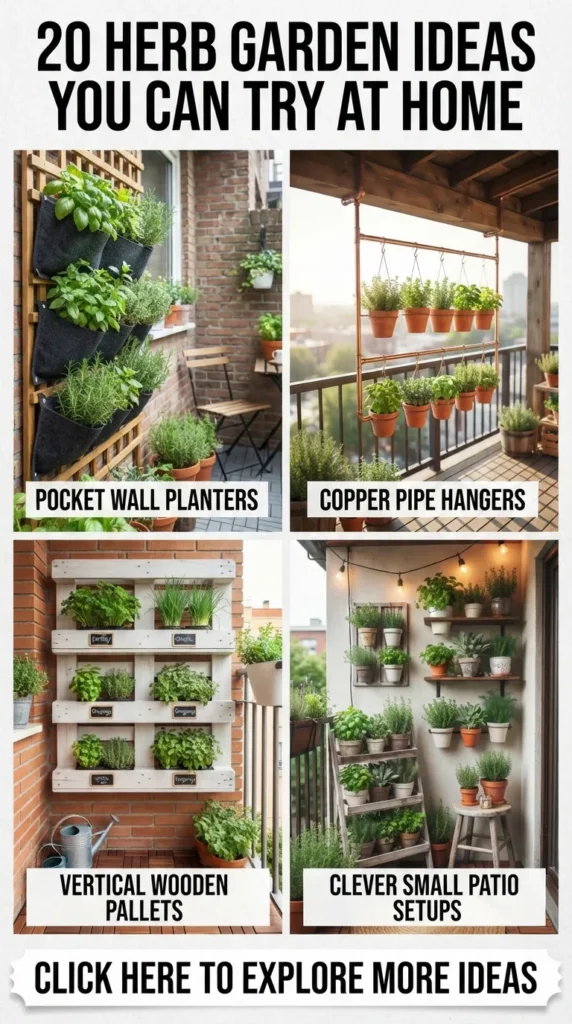
Introduction Upcycling a wooden shipping pallet into a vertical wall garden transforms industrial waste into a lush, multi-tiered herb garden suitable for balconies, backyards, or patio fences.
What This Idea Means A space-saving vertical planting system that utilizes internal pallet crossbars to create horizontal planting shelves, perfect for narrow outdoor spaces.
How to Make It
- Source a heat-treated (marked “HT”, never chemically treated) solid wood shipping pallet.
- Sand down rough faces to prevent splinters; brush on non-toxic, eco-friendly exterior wood stain.
- Cover the back, base, and sides of the pallet with heavy landscape weed barrier fabric, stapling every 2 inches.
- Create internal shelf bottoms by nailing salvaged wood slats beneath each horizontal crossbar.
- Fill each horizontal pocket with premium organic potting soil enriched with composted bark.
- Plant dense, trailing, and upright varieties in contrasting tiers: chives, cilantro, tarragon, and sweet basil.
- Mount the pallet securely to an exterior wall or fence using heavy-duty French cleat brackets.
Tips and Variations
- Chalkboard Labels: Paint the outer horizontal wooden slats with black outdoor chalkboard paint to label each herb row.
- Variations: Add small drip irrigation tubing along the back frame with individual micro-bubblers at each tier for automated watering.
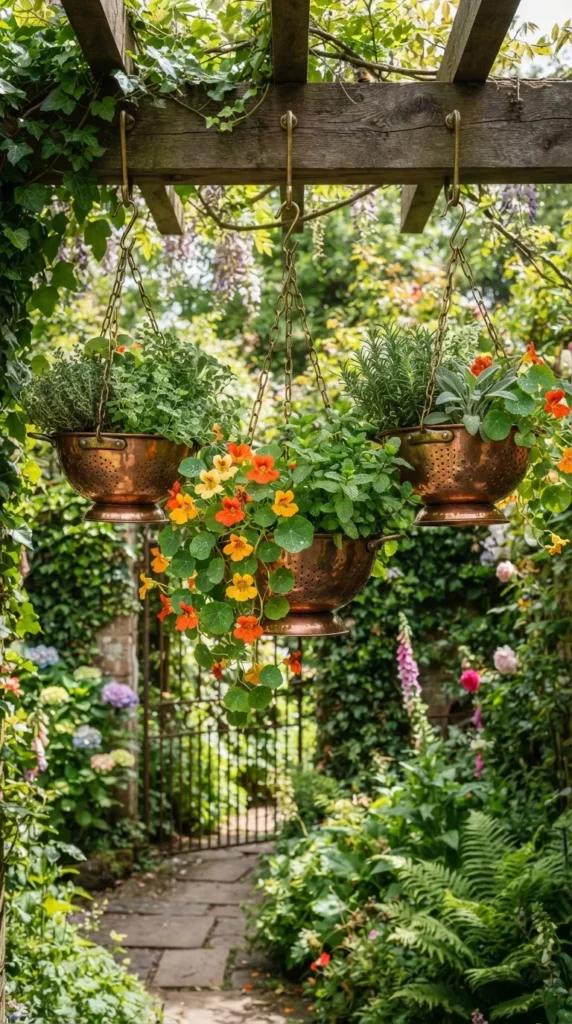
14. Hanging Copper Colander Herb Baskets
Introduction Transforming vintage copper kitchen colanders into suspended herb baskets blends culinary charm with functional gardening. The built-in drainage holes make colanders ideal planters for healthy root systems.
What This Idea Means A creative kitchen upcycling idea where perforated vintage cookware is repurposed into hanging planters that showcase vibrant herb foliage and rustic metallic patina.
How to Make It
- Procure antique copper or brass kitchen colanders (8- to 10-inch diameter) with sturdy side handles.
- Line the interior base of each colander with a round coconut coir liner sheet to prevent soil washout.
- Add a 1/2-inch layer of horticultural perlite for optimal drainage.
- Fill with a high-porosity potting mix composed of peat, perlite, and slow-release organic fertilizer.
- Attach three heavy brass chains to the colander’s rim or handles using split rings.
- Connect chains to a top S-hook and hang from a secure patio ceiling beam or pergola rafter.
- Plant trailing and spilling herbs: trailing nasturtium, creeping thyme, and sweet mint.
Tips and Variations
- Water Catchment: If hanging indoors, place a wide drip tray underneath or take the basket down to water over the sink.
- Variations: Use brightly colored enamelware colanders (vintage yellow, pastel mint, or bold cobalt) for a retro country kitchen vibe.
15. Minimalist Concrete Cube Herb Matrix
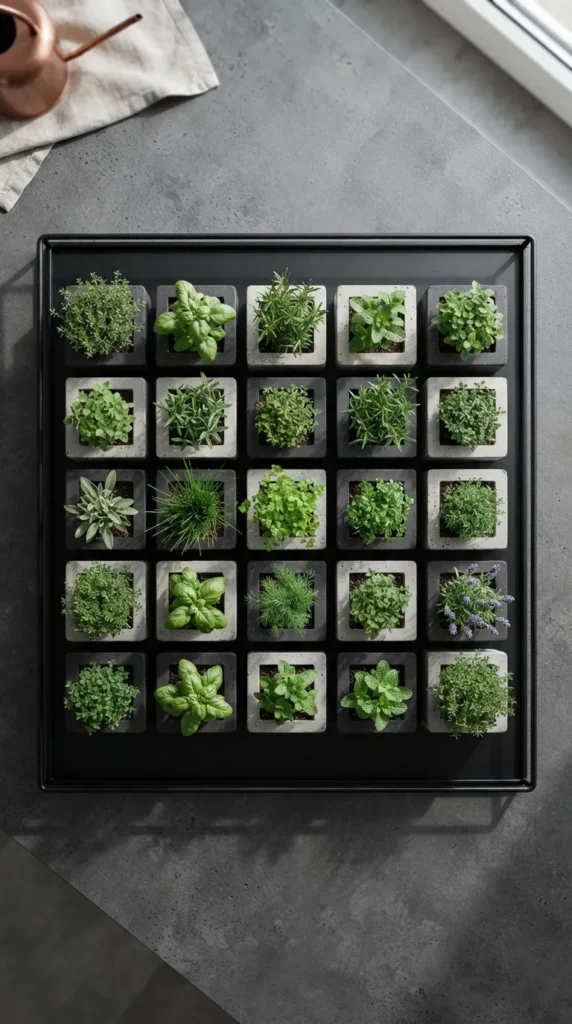
Introduction Crisp geometric forms and cool industrial tones highlight the organic textures of fresh herbs. A grid of modular concrete cubes creates a modern, architectural centerpiece for dining tables or sleek kitchen bars.
What This Idea Means This approach pairs architectural brutalism with soft living greenery, using a structured geometric layout to organize culinary herbs into individual stone vessels.
How to Make It
- Cast or purchase modular 4x4x4-inch poured concrete square planters with drainage holes.
- Sand sharp edges with 120-grit sandpaper for a smooth, refined finish.
- Seal the interior and exterior of each cube with non-toxic stone penetrating sealer to preserve the concrete.
- Arrange concrete cubes in a tight 3×3 or 1×6 grid over an elongated black iron or slate display tray.
- Fill each individual cube with a specialized potting blend tailored to the specific herb’s moisture preferences.
- Plant a single herb variety per cube: dwarf Greek basil, chives, curly parsley, oregano, winter savory, and rosemary.
Tips and Variations
- Surface Protection: Affix soft adhesive felt pads to the base of each concrete cube and tray to prevent scratching tabletop surfaces.
- Variations: Mix light grey and charcoal-pigmented concrete blocks to create a dynamic checkerboard color pattern across the tray.
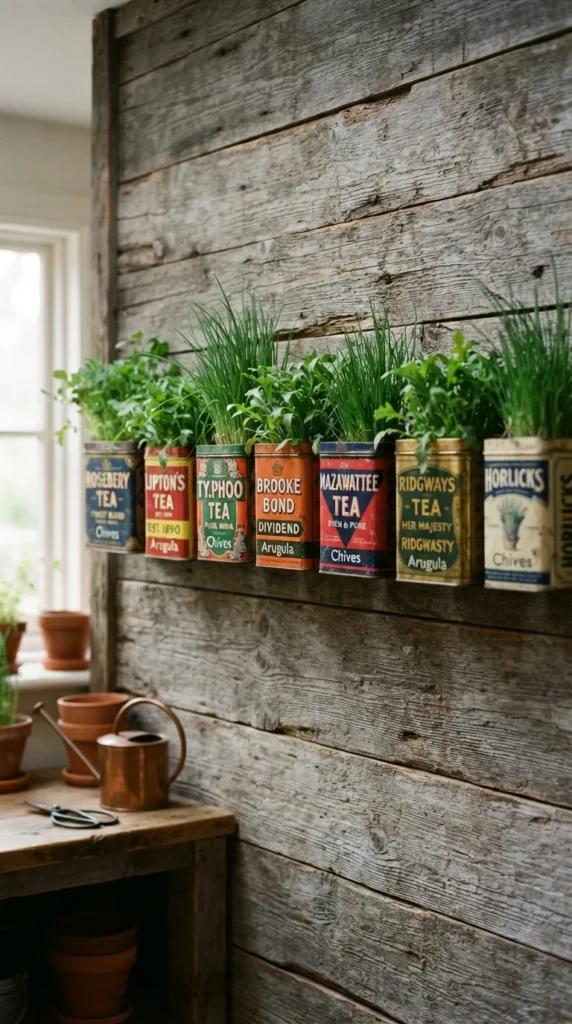
16. Wall-Mounted Vintage Tea Tin Collection
Introduction Antique tea tins, coffee canisters, and spice tins boast beautiful vintage typography and vibrant retro colors. Mounting them on a sunny kitchen wall turns forgotten tins into charming micro-planters.
What This Idea Means A colorful, upcycled wall display that celebrates vintage food packaging and graphic design while providing accessible single-serving herb pockets for daily cooking.
How to Make It
- Collect 6 to 10 vintage metal tea tins of similar height and proportions.
- Drill three small 1/8-inch drainage holes into the bottom of each tin using a standard metal drill bit.
- Coat interior seams with melted beeswax or food-grade silicone to prevent early seam corrosion.
- Drill two mounting holes in the upper back plate of each tin.
- Secure tins to a reclaimed wood backing board or directly into drywall using anchor screws.
- Add a 1-inch base layer of coarse volcanic gravel to assist drainage.
- Fill with light potting compost and plant shallow-rooted herbs: French chives, wild arugula, and sweet marjoram.
Tips and Variations
- Root Depth: Because tea tins offer limited root volume, stick strictly to shallow-rooting herbs and water lightly but frequently.
- Variations: Mount the tins on decorative magnetic strips using ultra-strong neodymium magnets glued to the back of each tin.
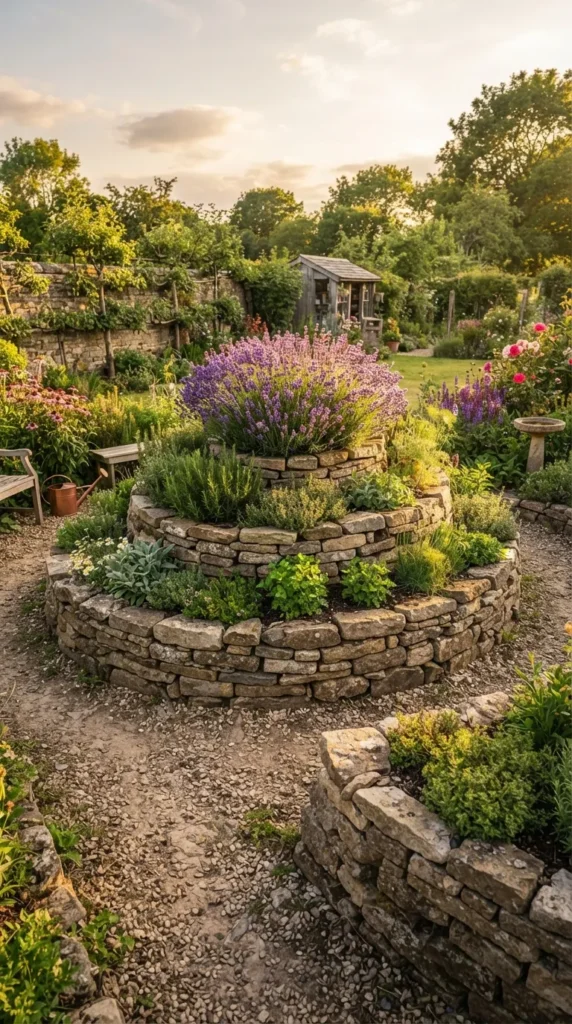
17. Outdoor Spiral Rock Herb Spiral (Permaculture Style)
Introduction The herb spiral is a classic permaculture design that stacks thermal stone mass into a vertical spiral. This creates distinct microclimates—hot and dry at the summit, cool and moist at the base—in a single compact garden feature.
What This Idea Means An eco-conscious outdoor stone structure that uses elevation and orientation to provide ideal growing conditions for vastly different herb species within a 5-foot circular footprint.
How to Make It
- Mark a 5-foot diameter circle in a sunny outdoor area; clear sod and level the native soil.
- Lay a base layer of fieldstones, river rock, or red clay bricks following a spiral inward path that resembles a snail shell.
- Build the stone walls progressively higher toward the center, reaching a peak height of 3 to 4 feet in the middle.
- Fill the interior spiral ramp with varying soil mixtures: sandy, well-draining soil at the dry top; rich, organic compost at the moist bottom.
- Plant Mediterranean, sun-loving varieties at the top peak: rosemary, lavender, and mountain sage.
- Plant moderate-moisture herbs in the mid-spiral: oregano, thyme, and tarragon.
- Plant water-loving plants at the low, shaded base outlet: mint, watercress, and parsley.
Tips and Variations
- Thermal Mass: The stones absorb solar heat during the daytime and release it slowly at night, protecting tender plants from evening chills.
- Variations: Add a tiny sunken micro-pond at the spiral’s bottom outlet to grow water chestnuts or marsh herbs.
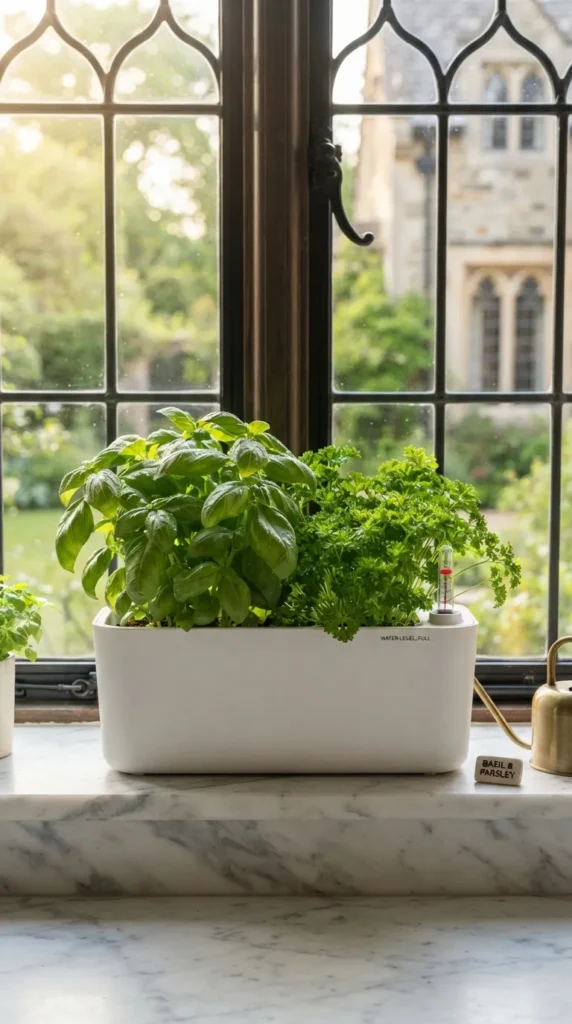
18. Self-Watering Sub-Irrigated Windowsill Box
Introduction A sleek, self-watering planter takes the guesswork out of daily hydration. Utilizing capillary wicking, herbs draw moisture upward on demand, keeping delicate culinary plants consistently hydrated with minimal upkeep.
What This Idea Means A modern sub-irrigation system that separates the water reservoir from the soil bed, providing steady moisture while eliminating top-watering mess on interior sills.
How to Make It
- Procure a modern, double-walled composite or acrylic windowsill planter box equipped with an internal water sub-reservoir.
- Install natural cotton or braided fiberglass wicking cords connecting the lower water tank to the upper root chamber.
- Fill the upper planting basket with a high-wicking soil mix (50% coco coir, 30% perlite, 20% vermiculite).
- Plant high-water-consumption kitchen herbs: sweet Genovese basil, broadleaf parsley, cilantro, and lemon mint.
- Fill the bottom reservoir via the outer water level indicator port.
- Refill the reservoir only when the visual float gauge indicates it has reached the bottom level.
Tips and Variations
- Preventing Stagnation: Let the reservoir empty for 24–48 hours between refills to allow oxygen to circulate down into the lower root zones.
- Variations: Build a DIY version using a vintage tin breadbox fitted with an internal perforated plastic tub and cotton rope wicks.
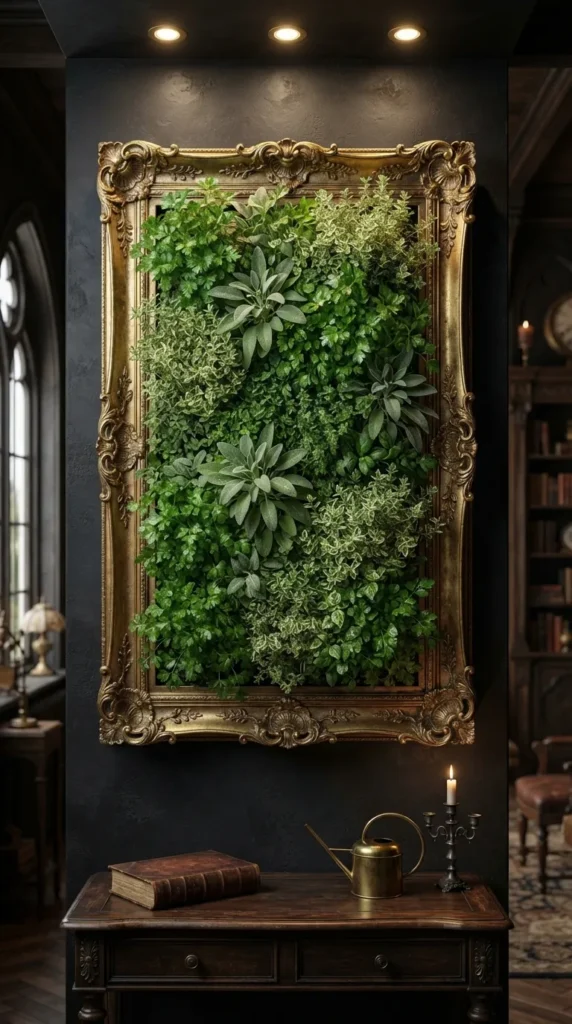
19. Framed Vertical Living Wall Herb Art
Introduction Treat your fresh herbs like fine museum artwork. Mounting a vertical hydroponic or felt-pocket herb garden inside a heavy, ornate picture frame produces a stunning, living culinary art piece.
What This Idea Means A vertical indoor herb planter bordered by a picture frame that integrates seamlessly with fine interior decor while growing fresh greenery vertically on your wall.
How to Make It
- Secure a deep shadowbox or construct an enclosed marine-grade plywood planter box (24×36 inches, 4 inches deep).
- Mount an ornate vintage wood or gilded gold frame around the front perimeter.
- Line the interior backing with a waterproof PVC backing panel to isolate moisture from the drywall.
- Install horizontal, multi-pocket breathable geotextile felt planting pockets inside the frame.
- Pack individual pocket cells with pre-moistened root-wrapped herb plugs in lightweight soil pods.
- Plant contrasting foliage textures: curly parsley, purple sage, variegated thyme, dill, and golden oregano.
- Mount the framed planter firmly into wall studs using heavy structural cleat hangers.
Tips and Variations
- Watering Strategy: Install an internal top drip irrigation manifold line hooked to a small discreet USB pump, or hand-mist the felt pockets using a pump pressure sprayer.
- Variations: Integrate low-voltage LED strip lights hidden behind the inner top lip of the picture frame for accent lighting.
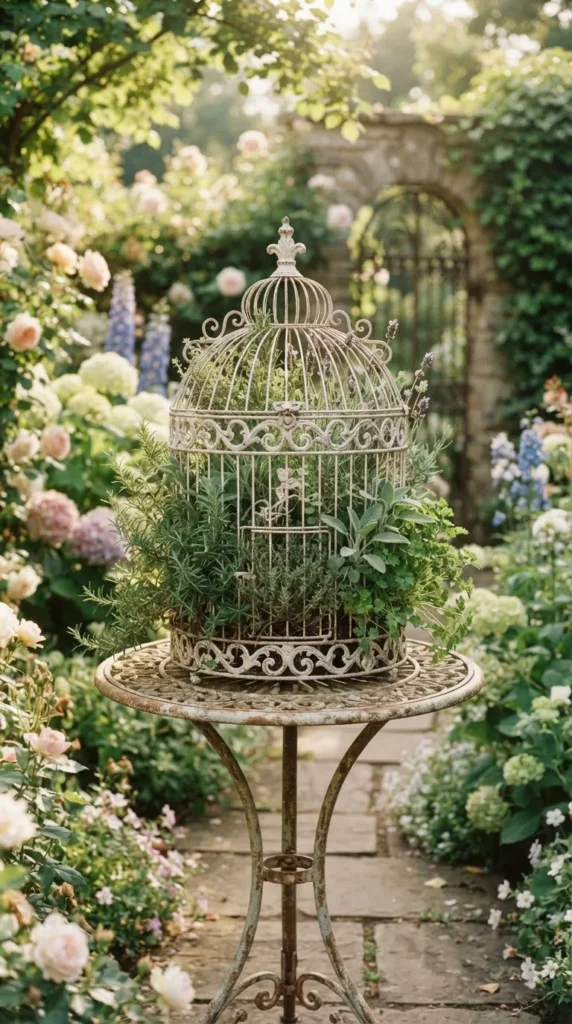
20. Gothic Iron Birdcage Herb Terrarium
Introduction Repurposing an antique Victorian-style wrought iron birdcage creates a romantic, vintage focal point. Suspended or displayed on a patio table, the wire frame offers structure and charm as herbs cascade through its bars.
What This Idea Means A whimsical, antique cottage-style garden idea that turns ornate architectural wire structures into a functional, protected herb display.
How to Make It
- Acquire an antique or reproduction wrought iron birdcage featuring a hinged, lift-up domed top.
- Thoroughly clean the iron; apply a rust-resistant satin enamel or distress with ivory chalk paint for an aged look.
- Line the bottom tray with heavy landscape fabric or a fitted round coir basket insert.
- Add a 1-inch drainage layer of expanded clay hydroton pebbles, followed by nutrient-rich organic potting soil.
- Plant bushy, trailing, and climbing herbs: English ivy-leaf thyme, creeping rosemary, sweet marjoram, and dwarf mint.
- Guide trailing stems between the iron wire bars to train them as they grow.
- Secure the top latch and hang the birdcage from an iron shepherd’s crook or porch ceiling hook.
Tips and Variations
- Air Circulation: The open wire bars provide excellent natural airflow, which deters fungal growth and powdery mildew on delicate herbs.
- Variations: Add tiny fairy lights woven through the dome bars to transform the birdcage into an ambient garden lantern at night.